Author: Anson

  • Copy Elements to Other Drawing in Tekla

    Copy Elements to Other Drawing in Tekla

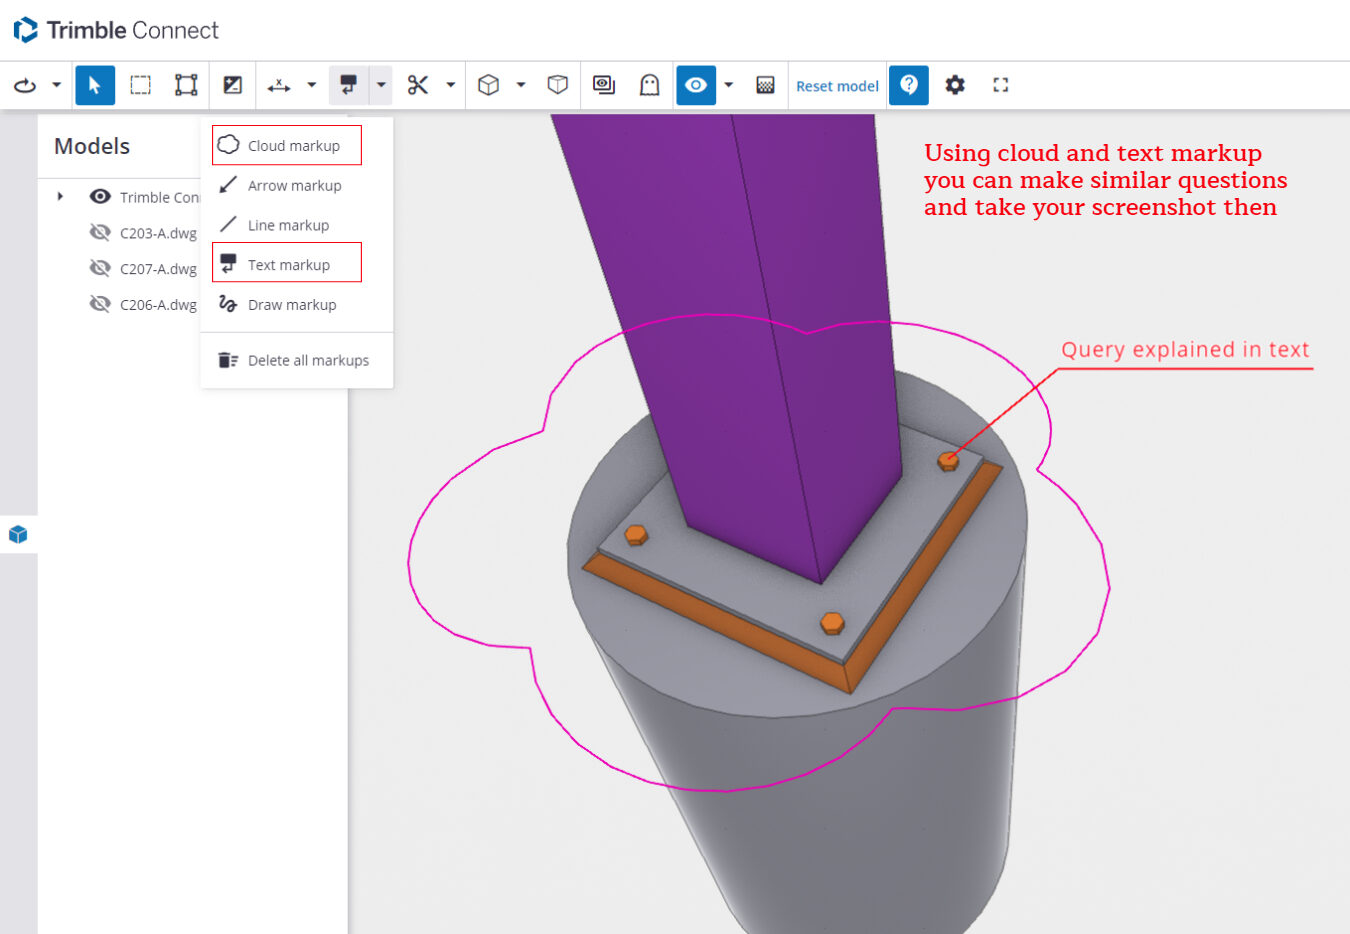
    For instance, when we intend to include this cloud and text markup in all drawings, our current process involves adding a cloud followed by a text box. However, this repetitive action for each drawing proves to be extremely time-consuming. So, I’m going to share a trick with you (which Tekla already has) as an alternative solution.

    What to do:

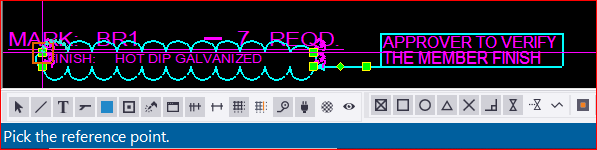
    *  First, you need to create a markup exactly how you want it.

    *  Next, select the elements that you want to be included in the markup. Be careful when selecting, as even a line that is selected will be included.

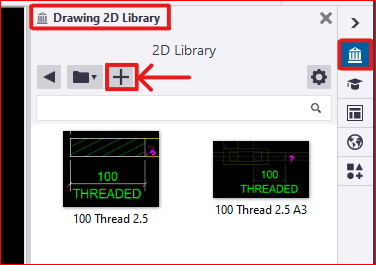
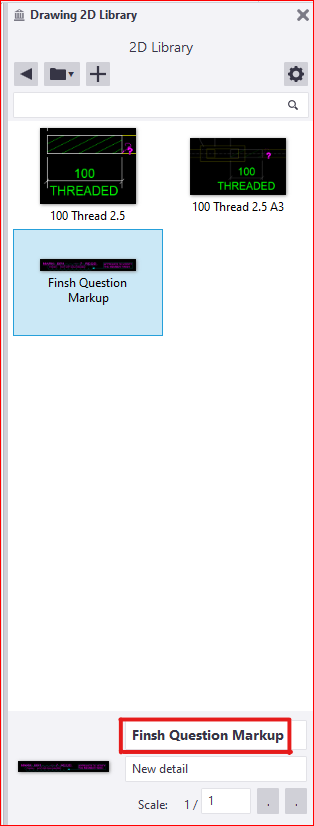
    *  In the Tekla drawing workspace, you’ll find the ‘2D Library’ option. Open it and to add a new detail, click the plus icon


    * Next, you need to select a reference point near the markup. This reference point will serve as the future insertion point for your detail in every drawing


    *  The next step is to select an area that will serve as your reference image, appearing like a thumbnail. after that the detail will be created and the the library looks like this

    * There are others options available to edit these existing details as well. Feel free to explore these options; you won’t need additional tips for that

    *  Finally, if you wish to insert this into another drawing, you just need to select and pick the insertion point in your drawing. The chosen detail insertion point will determine its placement. ( for example, I chose a location where I didn’t want the detail to appear.. 🙂 )

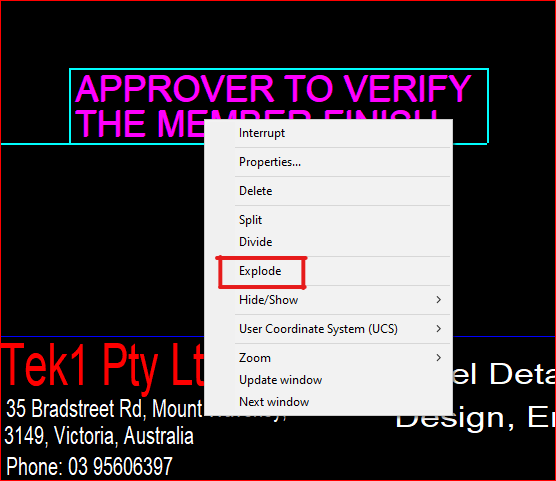
    * You can select and then right-click the mouse to choose the “explode” option, allowing you to select each individual element within the detail markup

    * We have additional blog posts that explain various tips and tricks in Tekla. Feel free to explore those resources as well

    *  If you have any doubts you can mail to koshy@tek1.co.au

    * Blog by – Anson.S

    ****************** linkedin/anson.suhesh ********************


  • How to View Tekla Model Status via Trimble Link

    How to View Tekla Model Status via Trimble Link

    Communication is crucial between clients and detailers, but there’s an issue with conveying the current project status to clients using text. Trimble offers an excellent solution by enabling the sharing of the IFC model with clients. This allows clients to visualize the actual model alongside reference models, erection drawings, assembly drawings, and single-part drawings

    HOW TO DO IT:

    –> You will receive a link from us indicating the status, or you can obtain the link from the status page of each project in quote app

    –> Retrieve the link and open it in a window. The model will gradually appear along with the attached .dwg files or 3D models, resulting in a page that resembles the following

    –> You can toggle the eye symbol to view the model. Some useful options available to workaround the model

    –> If you want to mark anything and report to us then it can be done easily using the markup tools available the work page

    –> Using these clients can easily get to know the current status of a project the 3D space and can give any queries

    If you have any doubts please mail to koshy@tek1.com.au

    Blog by,

    Anson.S


  • Exploring a New Approach to Copying Objects in Tekla


    copy to another Object in Tekla


    Normally in Tekla, if we want to copy objects or components from one object to another, we have to follow these steps :


    • Select the objects and components you want to copy.
    • Execute the “Copy to Another Object” command.
    • Choose the source object.
    • Select the destination object.
    • The objects will be copied by reference, aligning their coordination system with that of the source object to the destination object’s coordination system.


    Please note that the coordination system is used to ensure the accurate positioning of the copied objects in relation to the source and destination objects.


    Macro: Copy to another object multiple


    The command “Copy to Another Object” poses an issue when used in Tekla. It does not allow the selection of multiple destination objects at once; instead, we can only choose them one by one. This limitation can be time-consuming, particularly when working on large projects.


    Tekla offers a macro called “Copy to Another Object Multiple” that fulfills the requirement of selecting multiple destination objects. This macro functions similarly to the command mentioned earlier. First, we need to select the objects before running the macro. Once the macro is executed, it prompts us to select an object. Then, we select one source part, after which we can conveniently use drag selection to choose multiple destination objects. Finally, press the mouse middle button.


    the snapshot was taken on Tekla version 2022


    You can find this macro in the Applications & Components catalog of Tekla Structures.


    Introducing a New Approach: The Modified Implementation for Copying Objects in Tekla


    The ‘Copy to Another Object‘ command works by copying objects in relation to the source object and pasting them according to the destination objects


    • The coordination system plays a crucial role in defining the position and rotation of a part in Tekla
    • It is primarily based on the start handle of the part
    • Altering the coordination system of a part is not possible


    If the destination object’s lengths differ from the source object, a problem arises where the objects are positioned based on the start point


    After copying the small beam to other destination objects of varying lengths


    In many situations, we often find ourselves having to manually utilize the ‘Copy Linear’ or ‘Move Linear’ commands to perform copying tasks.


    We utilized the Tekla API to Create a new macro that helps to copy objects in relation to the end handle of the part. When executing this macro, it prompts the user to select the desired handling method for copying objects


    This is the dialog box that appears while running the modified “Copy Multiple Tek1” macro.


    When the “End Handle to End Handle Copy” option is selected, the operation produces an outcome that is similar to the image shown.

    members of the Tek1 organization can download the tsep installer file of the above macro by clicking the download button

    Here is the code of the macro. if anyone wants to have a look around and find out how things work, just go through the code:

    https://gist.github.com/ansonsuhesh/582062d65e83fad2a74540e2fddd795c

    Here is the video to explain the process of the newly created macro. Check this out:

    GitHub/ansonsuhesh

    LinkedIn/ansonsuhesh