Author: admin

  • Roof Modelling

    When you model the roof, pay attention to how the flashing will work.  In this video I am explaining, the roof flashing explaining the error in modelling.

    Few things to remember when modeling roof

    •  Roof need support everywhere.
    • Take care of roof slope and gutter requirements
    • Gutter will require 65 mm gap clear if the gutter support is to run under the gutter.
    • It is not necessary for the gutter support to run right through. Gutter support can stop at certain members and continue from the other side of members.
    • It should be possible to flash the roof to the design requirement. Do not model the roof in such a way that flashing is not possible

  • Associative functionality in the Autocad .net API

    Associative functionality in the Autocad .net API

    Question: What is the most exciting thing since sliced bread?

    The answer is AutoCad’s associative framework. It’s been two years since it’s been released, and it’s arguably one of the most powerful features of AutoCAD which has now been exposed to .net. You’d hardly know it exists because hardly anyone seems to talk about it in the forums. Anyways, I”m really excited about this new tool and I hope to be walking you all through it in the upcoming few weeks.

    There’s a tutorial out there:

    http://au.autodesk.com/au-online/classes-on-demand/class-catalog/2014/autocad/sd5217

    but I suspect it might be too hard-core for most of you so I really want to simplify it and walk you through the process. I hope you’ll derive as much pleasure from devouring it, as I will have producing it.

    What is the benefit?

    It’s just really really cool

    Ben

  • How to Copy Tekla Component Settings Between Two Models (Tekla Tips)

    There is more than one way to do this. But this could be the easiest:

    Other ways are setup your computer to read the favorite componets from a location, Set up the network such that all Tekla machines load their favorites from a location.

    You can download the custom files from the link given below

    Click to Down load the files


  • Selections: Pick and Drag Selections

    Pick Selection and Drag Selection:

    Here is the video:


    Welcome to Tekla training.

    In this video we are going to learn how to make selections.

    Pick Selection:

    Single objects can be selected by holding down the mouse key.

    Multiple objects can be picked by holding down the Ctrl or Shift key. if one object has to be deselected from the selected use Ctrl+ mouse key to deselect.

    Drag Selection:

    To select multiple object with a single drag of the mouse. Hold down the mouse key and drag

    Right to Left: Objects that are fully or partly inside the drag window will be selected.

    and

    Left to Right: Objects that are fully inside the drag window will only be selected.

  • How to insert a reference model into Tekla

    This post begins our inaugural series on Tekla detailing.

    We hope you enjoy it as much as we’ve had the joy in creating it. Here it is below.


  • A new blog series on how to use Tekla

    We’ve got some of the best Tekla technicians in our house, and given we’ve been so busy it’s been very hard to get a moment to educate the general public on Tekla.

    This blog series attempts to remedy that: we start from the very beginning and will post all manner of educational information to allow for a pure beginner to eventually master Tekla.

    And best of all: the information is free!

    I hope you gain something out of it. And let us know if you want to know anything in particular.


    – Tek1 Team

  • How to open a Tekla Model

    Open a Tekla model                       

    To open a tekla structure model multiple options are available as:

    1. File> Open

    2. Keyboard user input Ctrl+O. (Default tekla command)

    3.Using the open icon shown as a folder image

    How to open a Tekla model
    How to open a Tekla model

    Either of the methods can be used to open a tekla structure model , but before moving to the open dialogue display the existing model has to be “save’ or ‘don’t save’ dialogue will be displayed  to confirm the existing model  actions (Since only one model can be worked on in tekla). Once the selection is made we can move to the open model dialogue to proceed to the next model.

  • What does GroupBy do – Simple Explanation (Linq)

    What is GroupBy meant to do – Simple Explanation

    As always we will try to formulate a simple explanation of what is really going on.

    Airport

    Imagine you are at an airport and (as always) there is a queue and planes are delayed. See below. What you will immediately notice is that all of the passengers are grouped together promiscuously – standing around in slumps in no particular order. Every body is mixed up with each other.

    But, when you get into the plane, everybody is grouped into three distinct orders:

    1. First class
    2. Business class
    3. Third class. These classes are defined today by folks’ ability to pay. Unlike the olden days. Anyways, let’s move on.

    That’s basically what group by does. It takes a promiscuous group and separates them into distinct orders – in this case, three distinct groups of people: first, business and third class.

    So now you can say:

    • Get me all the names of all the people in first class.
    • Get me the names of all the people in the middle class who live in Europe.

    And it’s as simple as that! As for the technicalities: please refer to the MSDN documentation – hopefully reading it won’t cause too much discomfort.

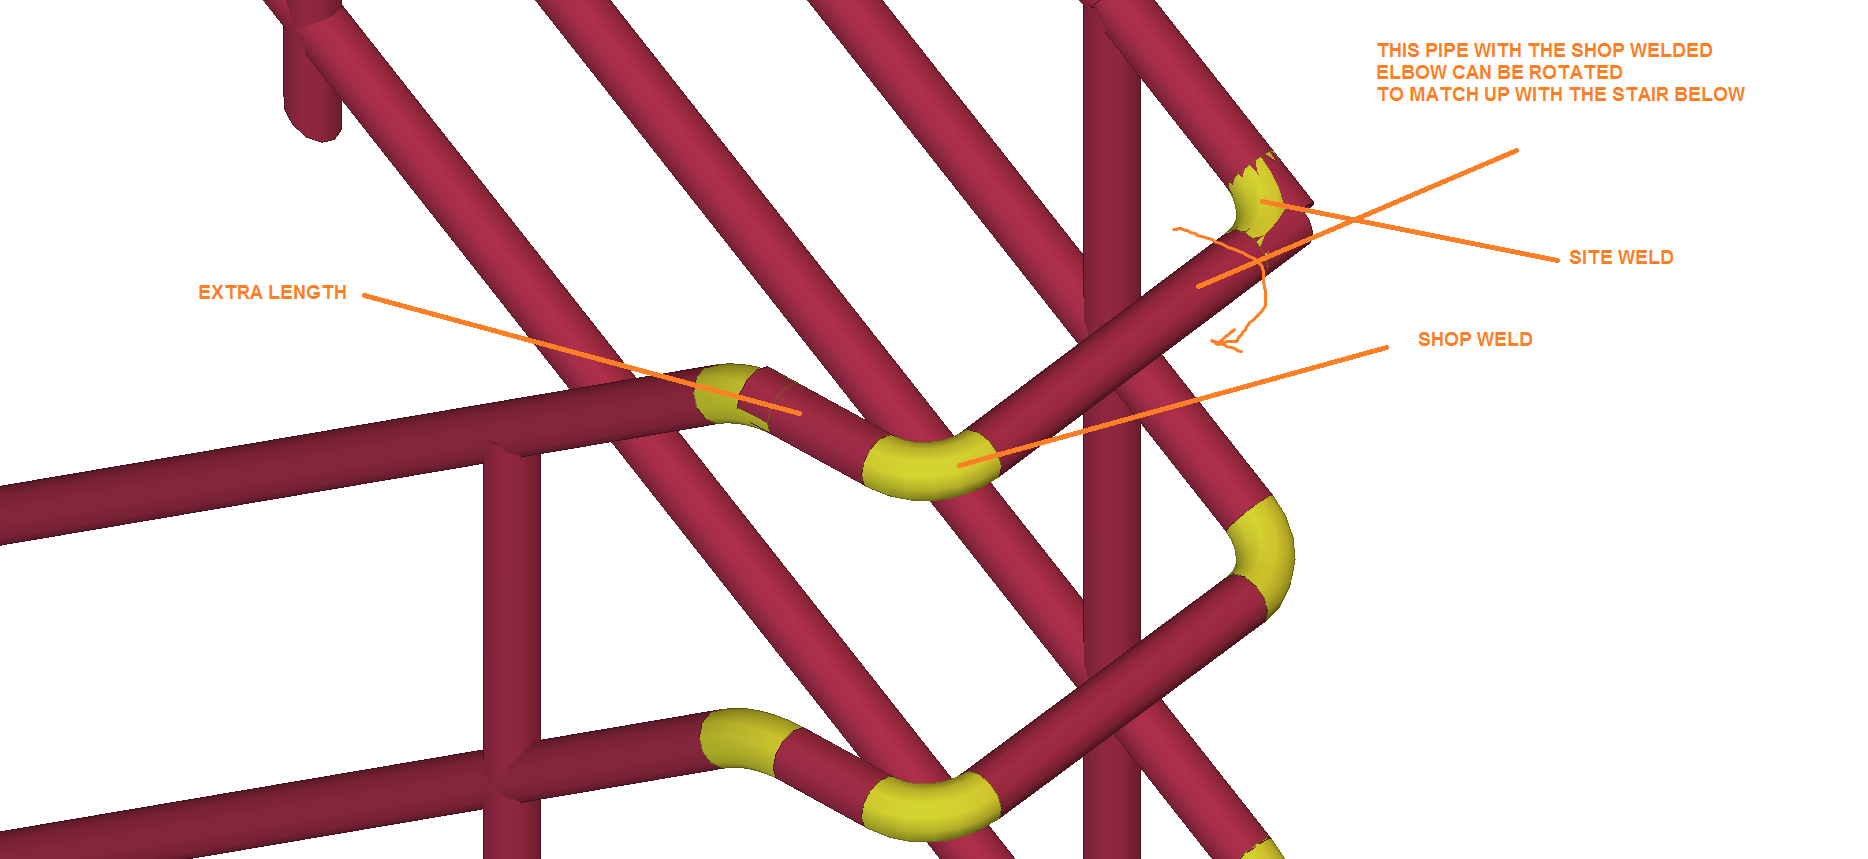
  • Rules for shop welding Elbows to Stair balustrades

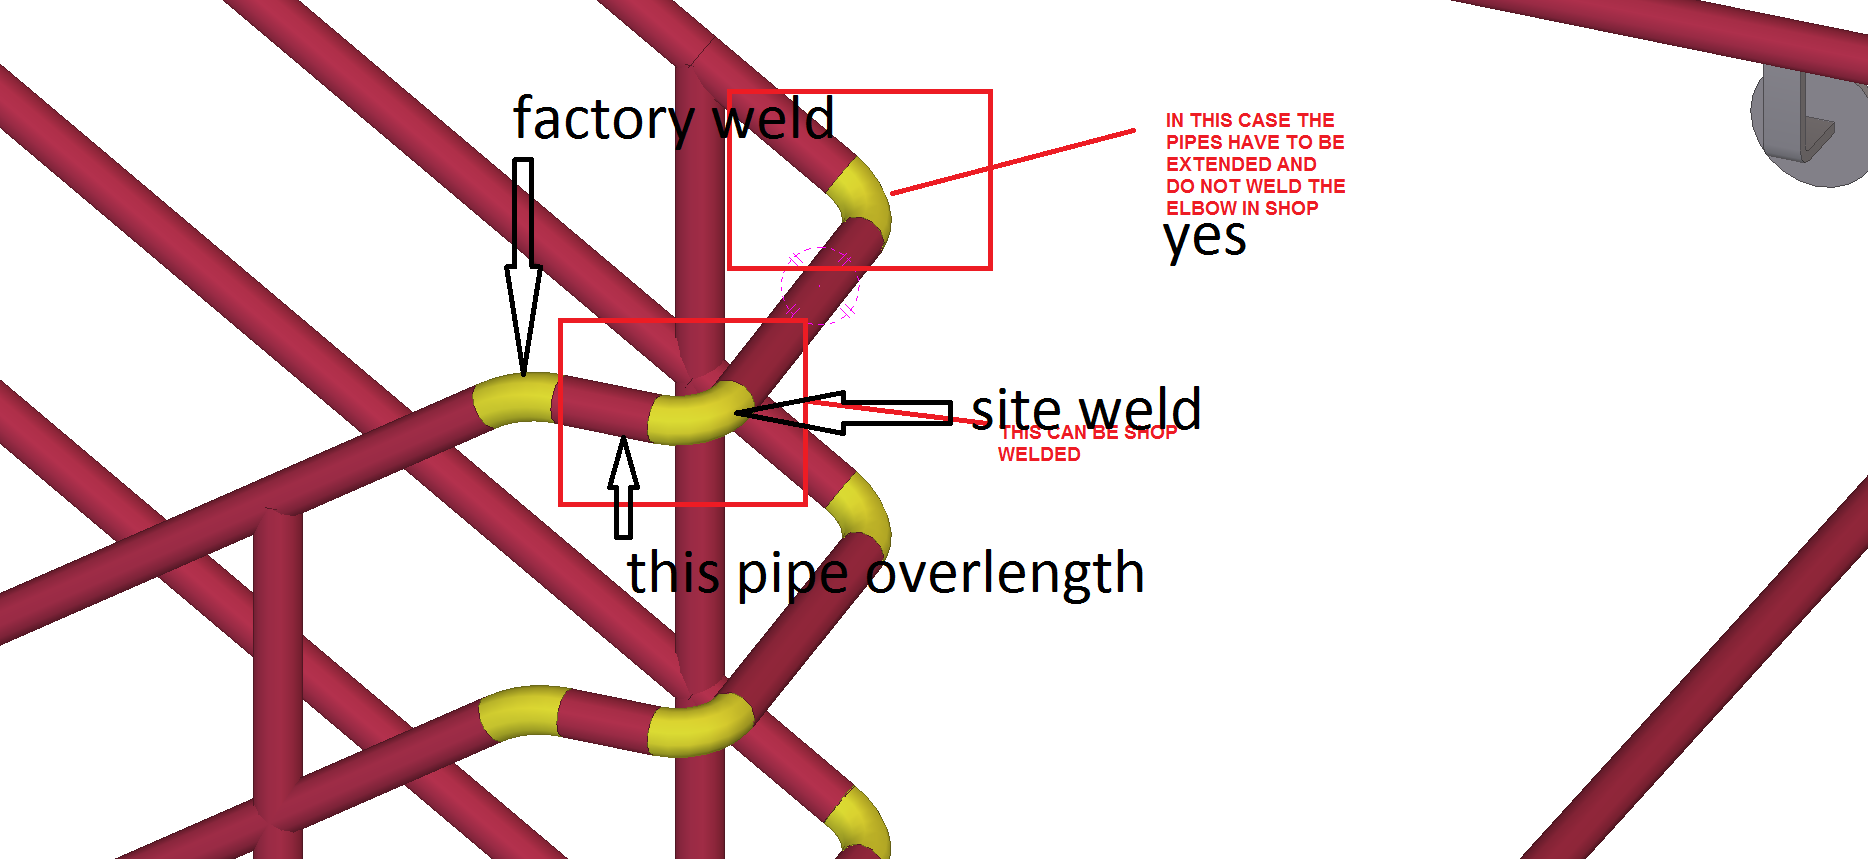
    Shop Welding Elbows.

    If the pipe is going up then do not weld the elbow to the pipe. Leave extra length on the pipe. Fabricator will cut at site and weld. (Make it slip joint)

    If the pipe is horizontal then you can weld at one end.

    See images


    RULES-FOR-SHOP-WELDING-ELBOW
    WELDING ELBOWS TO RAILINGS
    PIPES WITH EXTRA LENGTH AT ELBOW
    EXTENDING PIPES TO SUIT AT SITE

    RULES-FOR-SHOP-WELDING-ELBOW-2