Bega Tafe is a simple structure. One of the things we have to note down while constructing simple structure is some members can be more than 12 meter long. Standard transportation space available for frame is 12m x 2m x 2m. Any frame or member greater than 12m has to be reported to Project Manager in prior. We suggested to include a splice connection so that it could be transported within the limit 12m x 2m x 2m. Which saved the client thousands of dollars in transportation cost (Need Special transport facility). Sometimes due to aesthetic reasons client may bare the cost but it is always better to inform the client in prior making us a experienced firm in the field of fabrication and erection.
Tekla Model with ConcreteTekla Model with Main steel
Blog by Bharath – Tek1 Pvt Ltd. Visit www.tek1.com.au for further enquiries.
When an existing member is located near the new extension never forget to ask the site measurements from the Project manager. It could be of a simple mark-ups explaining things like below snip. Which could save thousands of dollars and a happy client.
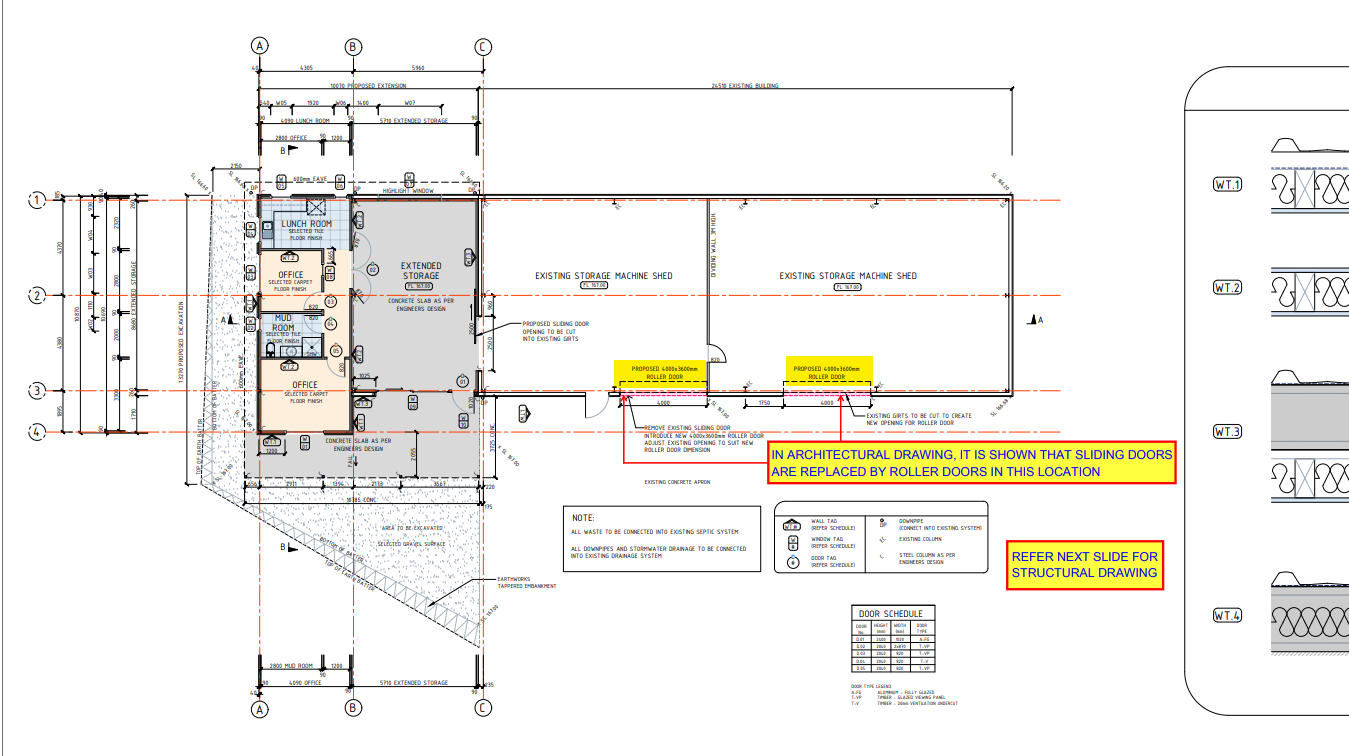
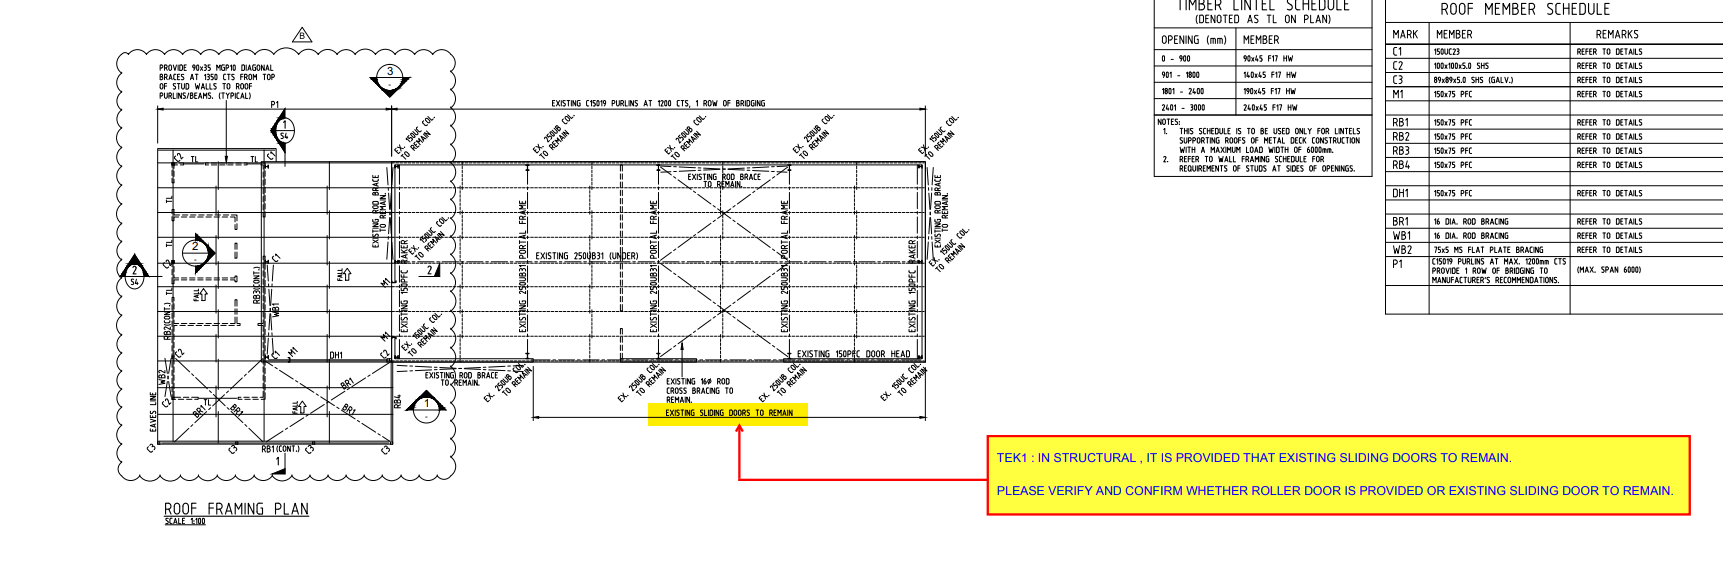
Sometimes there might be a conflict between the Architectural drawings and Structural drawings. Detailer or the modeler must inform prior to the Project Manger in-order to solve the conflict and guide us with the updated decision from clients. Refer below snip of conflicts in the sliding door.
Snip from Architectural Drawings – (Sliding door to be replaced by roller door)Snip from Structural Drawings – (Sliding door to remain)
Blog by Bharath – Tek1 Pvt Ltd. Visit www.tek1.com.au for further enquiries.
Warnambool is a city along the Great Ocean Road, in Victoria, Australia. Warnambool Footbridge is a million dollar project done quite efficiently. The cladding work surrounding the bridge made it to be a quite nightmare to the detailers. Several Mark-ups with 3D snips or 3D cad and BIM mark-ups were sent to the client to get a clear understanding of the conflicts and to make a perfect match for the cladding. So no rework is done on the site which in-turn could save a lot of money from client side making a happy client.
Any clash in the members were informed in prior saving lot of rework and money. Which reduced the cost of the project saving thousands of dollars.
3D Fly-OverSnip from ModelSnip from Model
Blog by Bharath – Tek1 Pvt Ltd. Visit www.tek1.com.au for further enquiries.
The Parramatta River is an intermediate tide-dominated, drowned valley estuary located in Sydney, New South Wales, Australia.
Tek1 has done a great job in detailing the bridge and delivering the drawings on time.
Also suggesting them with any issues that could possibly occur during erection on before hand saving thousands of dollars during detailing stage.
Try construct a new building is easier compared adding members to an existing members. We could face lot of issues on site. Tek1 has done it efficiently with skilled team members.
The existing site condition has made the Tek1 to propose lot of design changes which saved thousands of dollars during erection. Also one such thing, we provided them with a “drill template” so drilling on the members were done with ease and saved a lot of time, cost and man-hours.
Snip from TeklaSnip from Tekla
Blog by Bharath – Tek1 Pvt Ltd. Visit www.tek1.com.au for further enquiries.
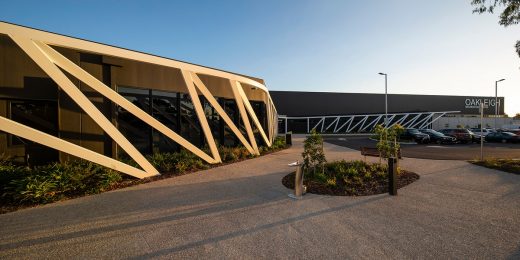
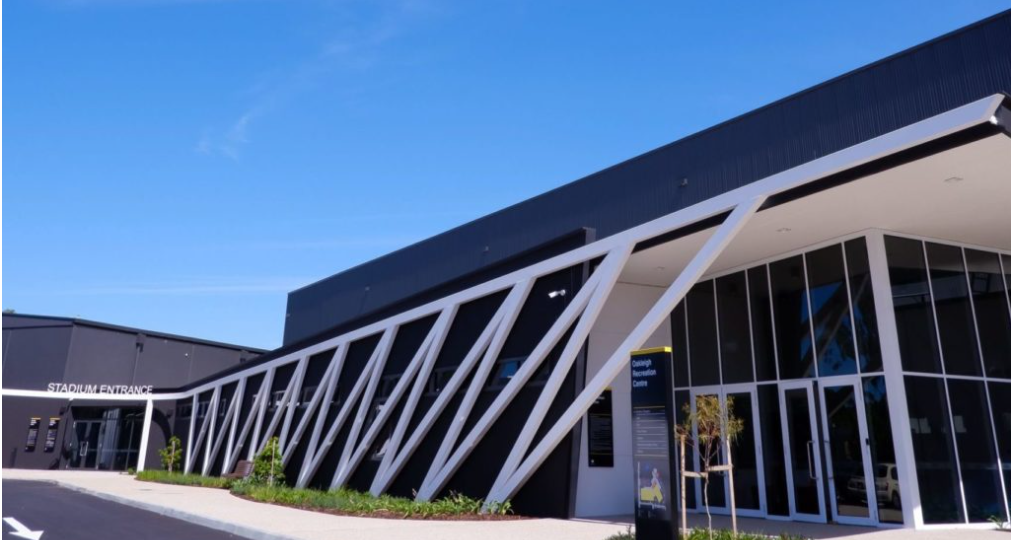
We are proud to be a part of the Steel detailing team in $25.4M worth project Oakleigh Recreation Centre. It is a joint collaboration between Monash Council and Federal Governments and the Waverley Gymnastics Centre.
Find below the YouTube video of the project.
3D Fly-over
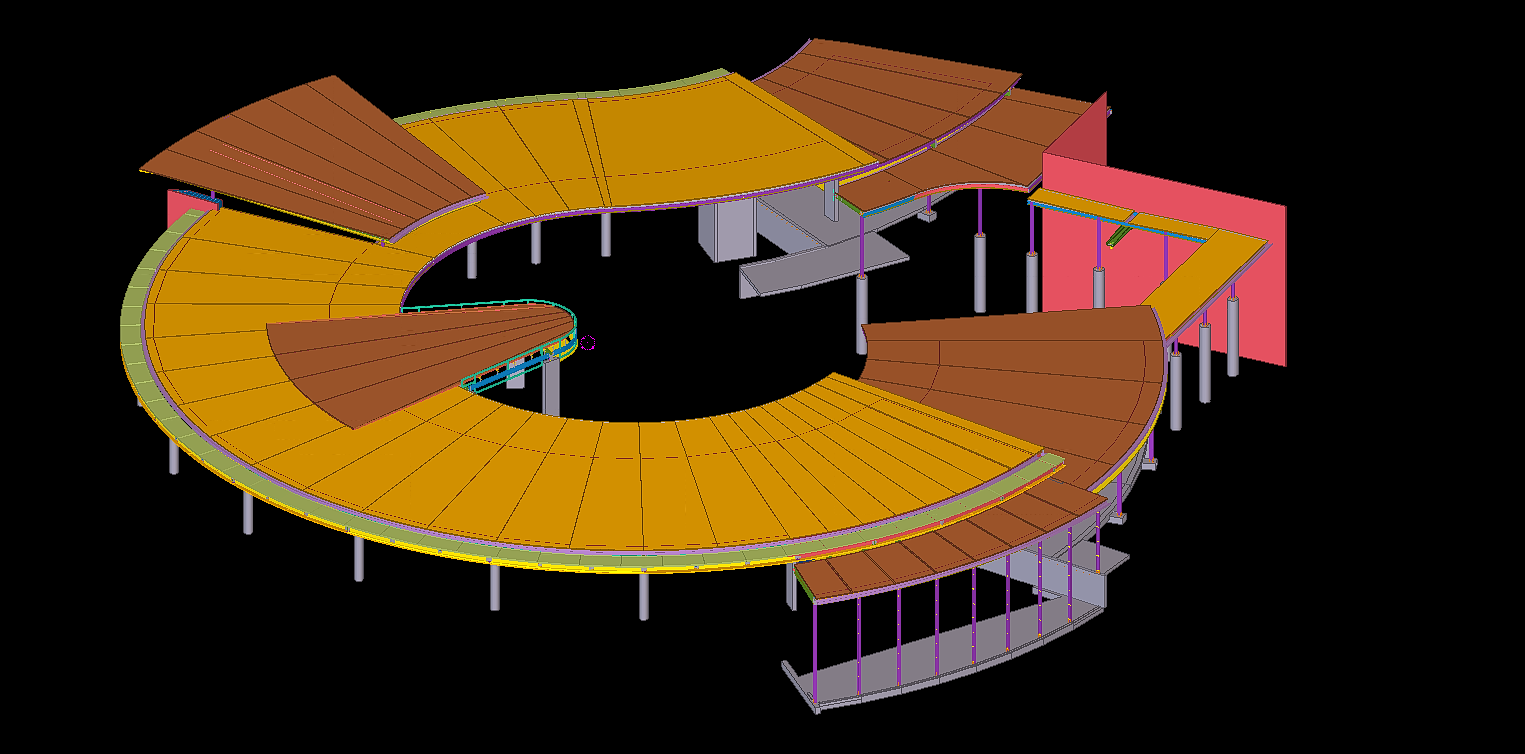
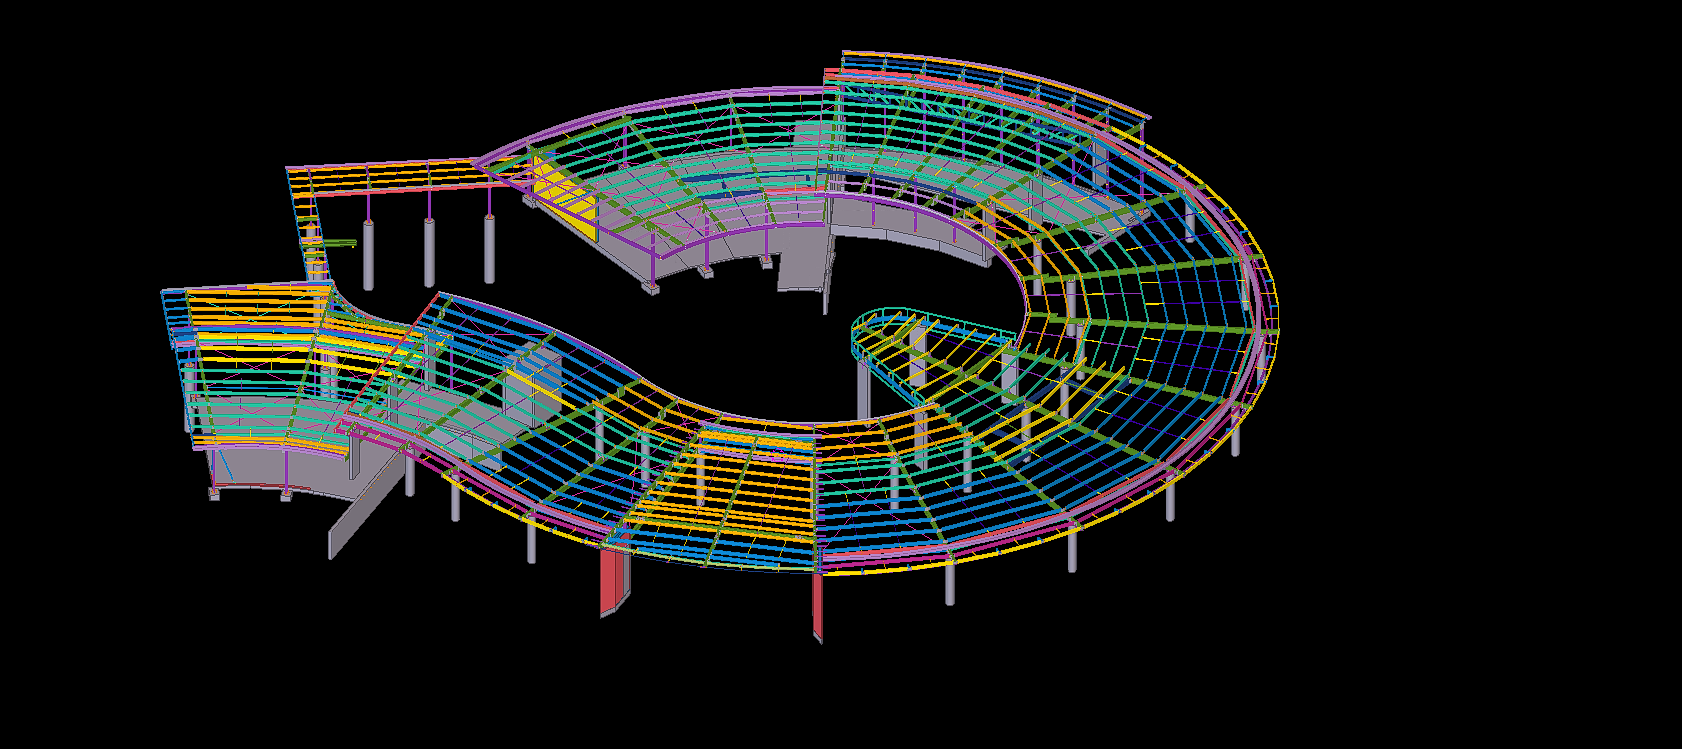
The curved and inclined steel members along with cladding is a nightmare to the steel detailers. Our highly skilled team members have done a great job in executing this project with customer satisfaction.
Snip from site
Snip from site
Snip from Tekla
Blog by Bharath – Tek1 Pvt Ltd. Visit www.tek1.com.au for further enquiries.
We are proud to be a part of the team in Macarthur Anglican School project. The tapered roofing, windows and cladding makes the steel work complex. Yet we are proud to say that we have done the job efficiently with client satisfaction.
3D – Flyover of MacArthur Anglican SchoolSnip From TeklaSnip From Tekla – Main SteelSnip taken On-Site
Blog by Bharath – Tek1 Pvt Ltd. Visit www.tek1.com.au for further enquiries.
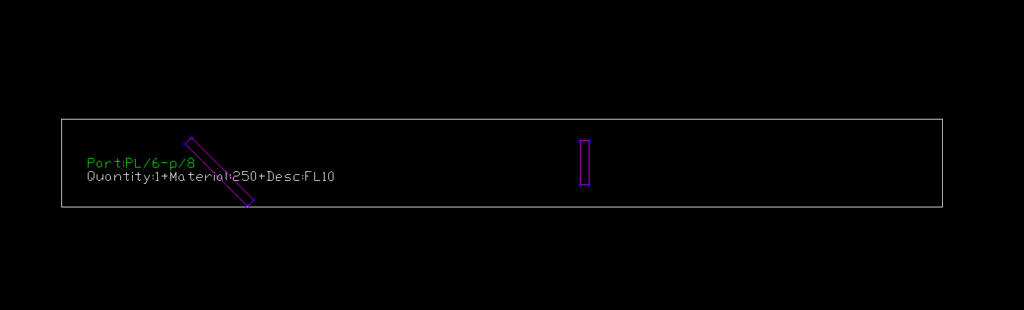
Contour Marking: It is an information written in an NC file that passes information to the NC machine on the layout and the parts that are welded together.
Requested from client
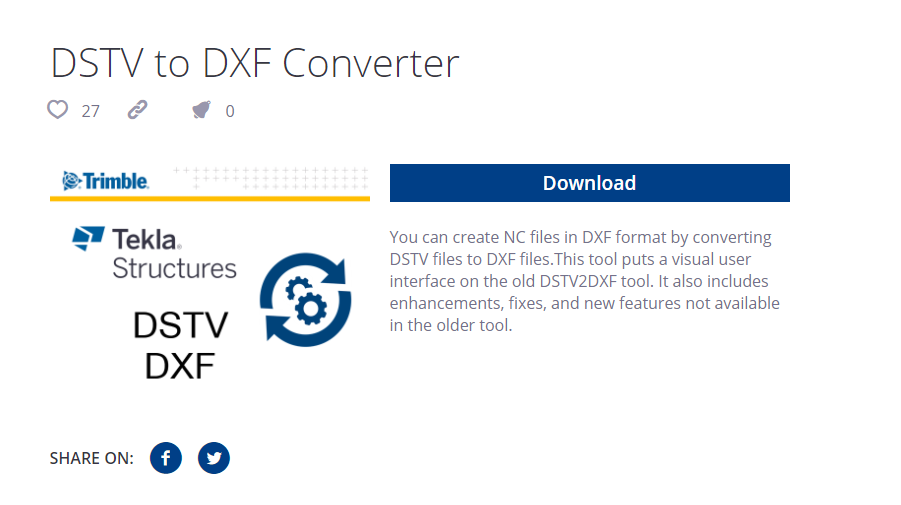
Tek1 do care about every client so we thought of seeking the help of Trimble Connect warehouse and found an plugin suiting the criteria.
Convertor plugin found on Warehouse
How the Convertor Works
The convertor converts all the NC files to DXF. By default it converts the members in Front View. To obtain the contour marks that are available at the back face few changes had to be done on the convertor setting for efficient changes.
DXF converted output of members with front face weldedDXF converted output of members with back face welded
SETTINGS TO CHANGE FOR EFFICIENT EXPORT
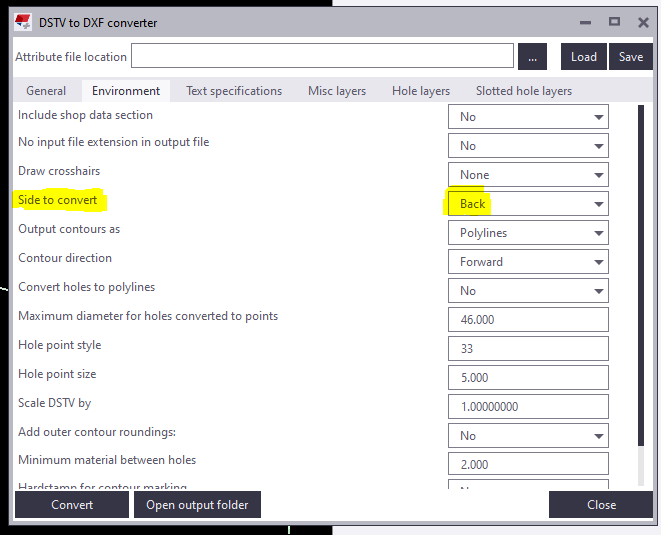
Change “side to convert” under Environment tab as Back in the convertor to create DXF with contour marks at Back view.
Snip from the convertor
For plates if Back option is chosen you get DXF Files converted like below images. So few advanced settings has to be done.
Snip of Plate profile with Back option chosen
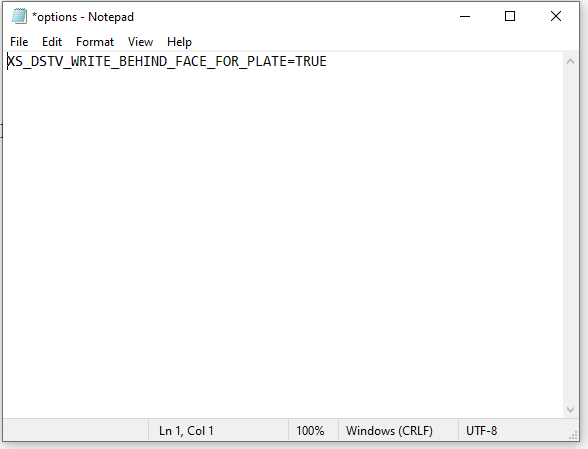
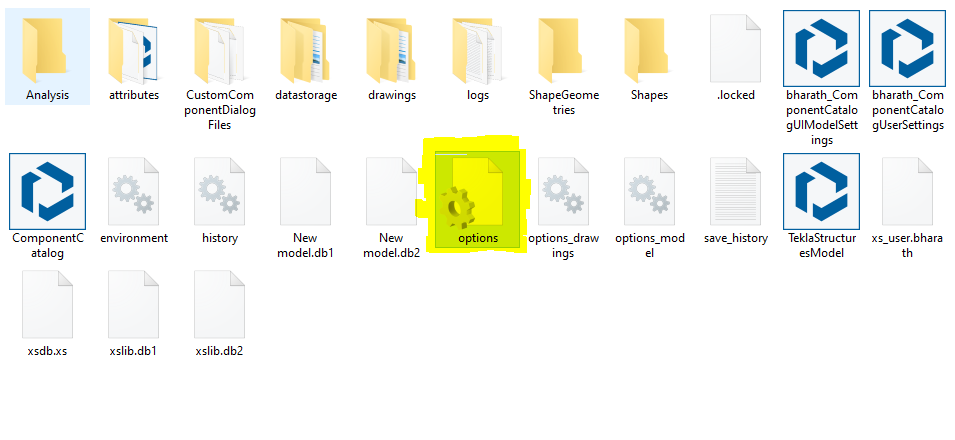
For plates members follow the below steps: 1) Open the model folder 2) Create a new text document 3) Type “XS_DSTV_WRITE_BEHIND_FACE_FOR_PLATE=TRUE“ 4) Save the document as “options.ini“ Refer below snip for Clarity
Snip of NotepadSnip of the File in model folder
Now repeat the conversion the convertor works efficiently providing a quality output.
Improve your english: If you’re English skills are weak, then you need to improve it. Don’t “practice your mistakes”. The easiest way to improve is by shadowing. Spend 1 hours a day for a few months – your career will massively benefit as a result of this. Why should I bother learning English? (1) To avoid miscommunication, (2) Clients HATE bad grammar, (3) you will be rewarded financially in your career (clients will prefer you).
This blog is about the efficient use of using custom macro in Tekla Structures. Tedious or repetitive commands in a model could be time consuming. These repetitive commands can be automated by use of custom macro
Understanding the bolt parts:
In Tekla Structure the bolts can be created as single or in a group. Bolts are created with two parts joined together. We could consider as Primary Part (Part to bolt to) and Secondary Part (Part to be bolted).
In Tekla Structures the bolts are released along with secondary parts
ie. When Bolt Summary is taken, the bolt connected to secondary parts are extracted and displayed on the list.
Recording the macro to extract the bolt summary:
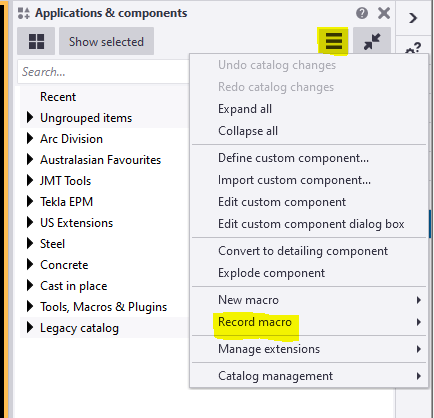
To record the macro. Click on the Application button.
Then click on the access advance feature button and click record macro.
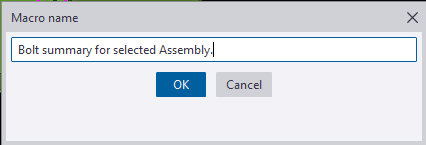
You could choose either global or local to save the macros and define a name to the macro. Here we have named as Bolt summary for selected Assembly.
Now the macro will start recoding.
Follow the below steps to create the macro.
Step 1: Press Ctrl+B for Reports List to appear.
Step 2: Click on the required reports to be generated for the selected Assemblies.
Step 3: Click Create from selected button.
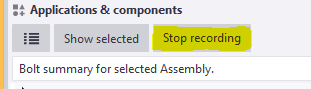
Step 4: Finally Stop the recording.
Now Checking the custom macro created:
1: Select an assembly for which bolt reports has to be taken.
2: Double click on the custom macro to perform the task.
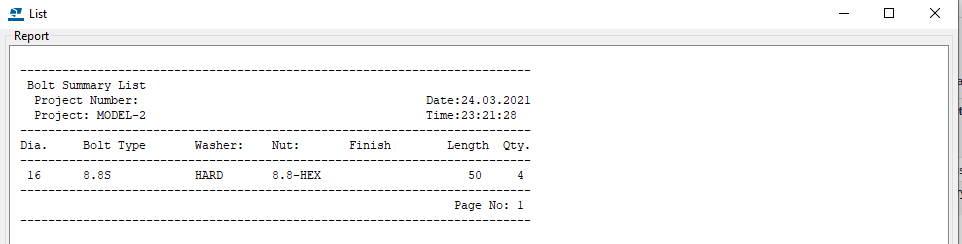
The bolt summary for the Assembly is generated.
Using the custom Macro we could define all the tedious and repetitive works in a custom macro and use to save time and man-work involved.
Note: Incase the macro has been recorded with error. You could delete the custom macro created by right clicking the created macro and choose delete option.
For creating API on “How to programmatically create bolt list reports from selected model objects”