Category: LIGHT GAUGE STEEL BUILDINGS

  • Granny Flat Excellence – Smart LGS Framing in a Compact Space

    Granny Flat Excellence – Smart LGS Framing in a Compact Space

    Project Insight: Granny Flat – Elgin Avenue

    Smart design doesn’t always require large space—and this granny flat project at Lot 23, Elgin Avenue St is a perfect example of maximizing structural performance in a compact build. With just 52 sq.m of total area and a single-storey footprint, this unit stands firm with a well-designed Light Gauge Steel (LGS) roof framing system.

    📌 Project Snapshot:

    • Client: Ausgreen Steel Frames
    • Location: Lot 23 Elgin Avenue St
    • Total Area: 52 sq.m
    • No. of Levels: 1
    • Total LGS Tonnage: 1.1T
    • Roof Type: Gable
    • Scope: LGS roof trusses

    The use of 1.1 tonnes of LGS ensured strength, straightness, and durability, despite the limited footprint. The gable roof design allowed for simple but efficient truss implementation, speeding up construction while keeping quality at the forefront.

  • Precision Framing at Sturdee Street LGS for Strength and Stability

    Precision Framing at Sturdee Street LGS for Strength and Stability

    Project Insight: LGS Framing at 57 Sturdee Street, Towragi

    Attention to detail and structural accuracy were at the heart of this Light Gauge Steel (LGS) framing project located at 57 Sturdee Street, Towragi OT 44 DP 8085. Designed as a robust two-storey structure, the building spans 269 square meters and incorporates a complete LGS system consisting of roof trusses and floor joists.

    📌 Project Snapshot:

    Client: Contractors United

    Location: 57 Sturdee Street, Towragi OT 44 DP 8085

    Total Area: 269 sq.m

    No. of Levels: 2

    Total LGS Tonnage: 11.5T

    Roof Type: Gable

    Scope: LGS roof trusses and floor joists

    With 11.5 tonnes of Light Gauge Steel used, this project reflects how LGS systems deliver not only strength but also faster and cleaner construction. The gable roof design allowed for a streamlined truss layout, supporting long-term performance and ease of assembly.

  • LGS Roof Trusses for Duplex & Subdivision – Strength and Simplicity in Denham Court

    LGS Roof Trusses for Duplex & Subdivision – Strength and Simplicity in Denham Court

    Project Spotlight: Proposed Duplex & Subdivision, Denham Court – LGS Framing Excellence

    A recent project in Denham Court, NSW showcases how Light Gauge Steel (LGS) can effectively support duplex and subdivision developments with strength, efficiency, and structural clarity. Located at Lot 5326, Gerraghty Street, this two -storey structure was designed with a gable roof and a complete LGS roof truss system, tailored for precision and durability.

    📌 Project Summary:

    • Client: Ausgreen Steel Frames
    • Location: Gerraghty Street, Denham Court, NSW
    • Total Area: 300 sq.m
    • Number of Levels: 2
    • Total LGS Tonnage: 11.2T
    • Roof Type: Gable
    • Scope of Work: Complete LGS roof trusses

    With a substantial 11.2 tonnes of steel, the project demonstrates how LGS framing solutions are ideal for high-demand residential applications. The LGS roof trusses were meticulously modeled to ensure seamless fabrication and on-site assembly. The gable roof design further enhances structural simplicity while maintaining architectural appeal.

  • Efficient Framing for SDA Multi-Unit Development in Redcliffe

    Efficient Framing for SDA Multi-Unit Development in Redcliffe

    Project Highlight: SDA-Compliant Multi-Unit Development, Redcliffe, QLD

    I’m excited to share my involvement in a Specialist Disability Accommodation (SDA) compliant multi-unit residential development at 113 Dover Rd, Redcliffe. This large-scale, two-storey project brought together the challenges of SDA compliance and multi-unit coordination—making it a great opportunity to showcase the efficiency of Light Gauge Steel (LGS) framing.

    Project Overview:

    • Client: Brisbane Steel Frames
    • Location: Redcliffe, QLD
    • Total Area: 433 sq.m
    • Levels: 2
    • LGS Tonnage: 6.7T
    • Roof Type: Gable
    • Scope: LGS roof trusses only

    My scope involved detailing the LGS roof trusses across the entire building. The challenge was to ensure clean spans, consistent alignments across multiple units, and smooth coordination with other trades—while meeting SDA standards. The total tonnage came in at 6.7T, and every truss was placed with fabrication and installation efficiency in mind.

  • Stylish & Sturdy: Hillsea Court LGS Framing with a Hip Roof

    Stylish & Sturdy: Hillsea Court LGS Framing with a Hip Roof

    Project Highlight: Hillsea Court Residence, Arundel, QLD

    I’m pleased to share another successfully completed Light Gauge Steel (LGS) project: a secure and stylish two-storey residence situated at Lot 38 (No. 25), Hillsea Court, Arundel Drive, Arundel. I had the opportunity to provide the complete LGS detailing for this structure, working closely with Brisbane Steel Frames to deliver precise results.

    Project Overview:

    Client: Brisbane Steel Frames

    Location: Arundel, QLD

    Total Area: 154 sq.m

    Levels: 2

    LGS Tonnage: 3.3T

    Roof Type: Hip

    Scope: Full LGS structure – roof trusses + floor joists

    Though compact in size, the project demanded complete attention to detail due to the hip roof design and full-frame coverage. I was responsible for modeling and detailing the floor system and roof trusses, ensuring clean transitions, proper load paths, and fabrication-ready output.

    With just 3.3T of steel used, efficiency and accuracy were key in meeting the client’s expectations without compromising design intent. Every member was positioned with clarity to help streamline assembly on site.

  • Precision in Every Truss: LGS Detailing for Maple Court Residence, Arundel

    Precision in Every Truss: LGS Detailing for Maple Court Residence, Arundel

    Project Highlight: Maple Court Residence, Arundel, QLD

    I’m happy to share another successful Light Gauge Steel (LGS) detailing project that I recently completed: a well-planned two-storey residence located at Lot 6 (No. 5), Maple Court, Arundel Drive, Arundel. This project was in collaboration with Brisbane Steel Frames, who trusted me with the detailing for key structural components.

    Project Overview:

    • Client: Brisbane Steel Frames
    • Location: Arundel, QLD
    • Total Area: 206 sq.m
    • Levels: 2
    • LGS Tonnage: 4.6T
    • Roof Type: Gable
    • Scope: Roof trusses and floor joists

    For this home, my responsibility was to detail the LGS roof trusses and floor joists to ensure structural integrity and alignment with the architectural layout. I used precision tools and methodologies to ensure that the detailing met fabrication accuracy, while minimizing material wastage.

    Although the tonnage was relatively low at 4.6T, the design required close coordination and clean framing lines to support the residence’s functional and aesthetic goals. Projects like these highlight the efficiency of light gauge steel in low-to-mid-rise residential construction.

  • Berrigan Street Residence: Strength and Stability in Every Detail

    Berrigan Street Residence: Strength and Stability in Every Detail

    Smart & Strong: LGS Framing for a Compact Two-Storey Residence in Southport, QLD

    Project Highlight: Berrigan Street Residence, Southport QLD

    I’m excited to share one of my recent Light Gauge Steel (LGS) detailing projects: a modern two-level residence located at Lot 124 (No. 11), Berrigan Street, Southport, QLD. This project was executed for Brisbane Steel Frames, who entrusted me with the complete LGS framework.

    Project Overview:

    • Client: Brisbane Steel Frames
    • Location: Southport, QLD
    • Total Area: 135 sq.m
    • Levels: Ground + First
    • LGS Tonnage: 7.1T
    • Roof Type: Gable
    • Scope: Full LGS package including floor joists and roof trusses

  • Smart Framing Decisions in LGS: My Experience at Mickleham Child Care

    Smart Framing Decisions in LGS: My Experience at Mickleham Child Care

    I recently worked on a Light Gauge Steel (LGS) detailing project for a single-story building. Mickleham Child Care. The project involved a 6° sloped metal roof, supported by 2-inch top-hat trusses.

    Refer the below image:

    The building also had a roof overhang on both the top and bottom eaves, which needed proper support framing.

    Refer the below image:

    To cover the overhangs efficiently, I proposed a hybrid roof concept, combining roof trusses with a roof frame. The client reviewed and approved this concept, and I prepared the framing layout accordingly.

    Challenges Faced During Detailing

    As a designer and detailer, I always try to provide practical solutions based on the information available, keeping in mind both structural logic and constructability. However, as I’m not a licensed structural engineer, I work within the limits of what’s acceptable from a detailing standpoint.

    After submitting the overhang frame design, we had a Teams meeting with the client and their team. They shared a few valuable suggestions to improve stability:

    • Use double noggings for better bracing:
      The initial design had single noggings, but the client pointed out that double noggings improve lateral stability, especially in wind-prone regions or when the overhang is long. Doubling up helps reduce flex and provides better load distribution.

    Refer the below image:

    • Use triple studs at key points:
      At certain locations, studs were positioned directly above supporting members or points bearing higher loads. The client recommended triple studs to prevent buckling and improve vertical load transfer in those critical areas.

    Refer the below image:

    • Re-orient the overhang frame layout:
      Initially, I had vertical members as studs and horizontal members as noggings. The client suggested a reversal — horizontal members as studs and vertical members as noggings — so that the framing better supported the roof sheeting direction and provided more consistent strength along the overhang.

    These insights from the client were genuinely helpful and added value to the final outcome.

    Practical Constraints and Adaptation

    Initially, I had created the frame using the Scottsdale software, which by default builds vertical studs and horizontal noggings. To meet the client’s updated request, I had to manually revise the layout in the Scot simulator, which took some additional time and effort. I explained this to the client, and they understood that software limitations sometimes require a manual approach.

    While making these changes, I also adjusted the truss height to match the roof RL ensuring that the roof frame sitting above the truss aligned perfectly with the original design elevation. The final result was a stable, clean solution that maintained the intended levels and supported the overhang well.

    Reflecting on a Similar Experience

    After this session, I revisited an earlier job I worked on – Lot 202 Mount Keira Rd, Mount Keira – where I had used a similar overhang framing concept. That job was successfully completed on site without any issues, and the detailing approach was almost the same as my original proposal in this current project.

    This comparison helped me realize that different clients can have different expectations, even for similar framing problems. It’s not always about what’s right or wrong – it’s about understanding the specific needs of each project and adapting to them.

    What I Learned

    This experience was a strong reminder of a few key things:

    • Client feedback is essential — it helps enhance and refine design decisions.
    • Software is just a tool — manual adjustments are sometimes necessary to suit real-world conditions.
    • Every project is a learning opportunity, even when the problems feel familiar.

    I’m glad this task helped me explore more about overhang framing logic, client coordination, and working beyond default software configurations. I’m sharing this in the hope that it helps someone working on similar LGS roof detailing situations.

  • 🚧 Lessons Learned from the Site: Smarter LGS Detailing for Better Builds!

    🚧 Lessons Learned from the Site: Smarter LGS Detailing for Better Builds!

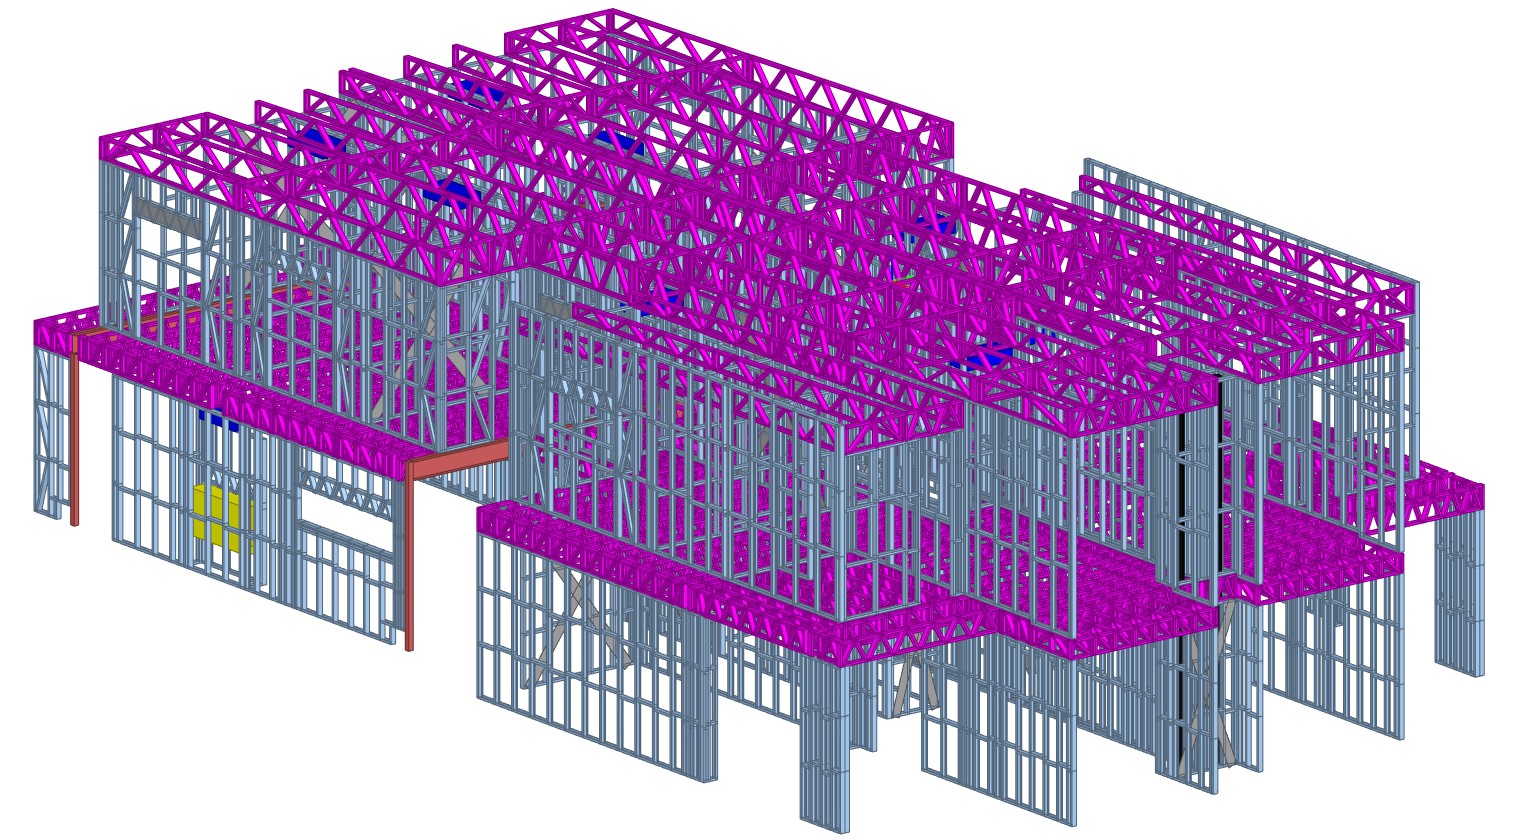
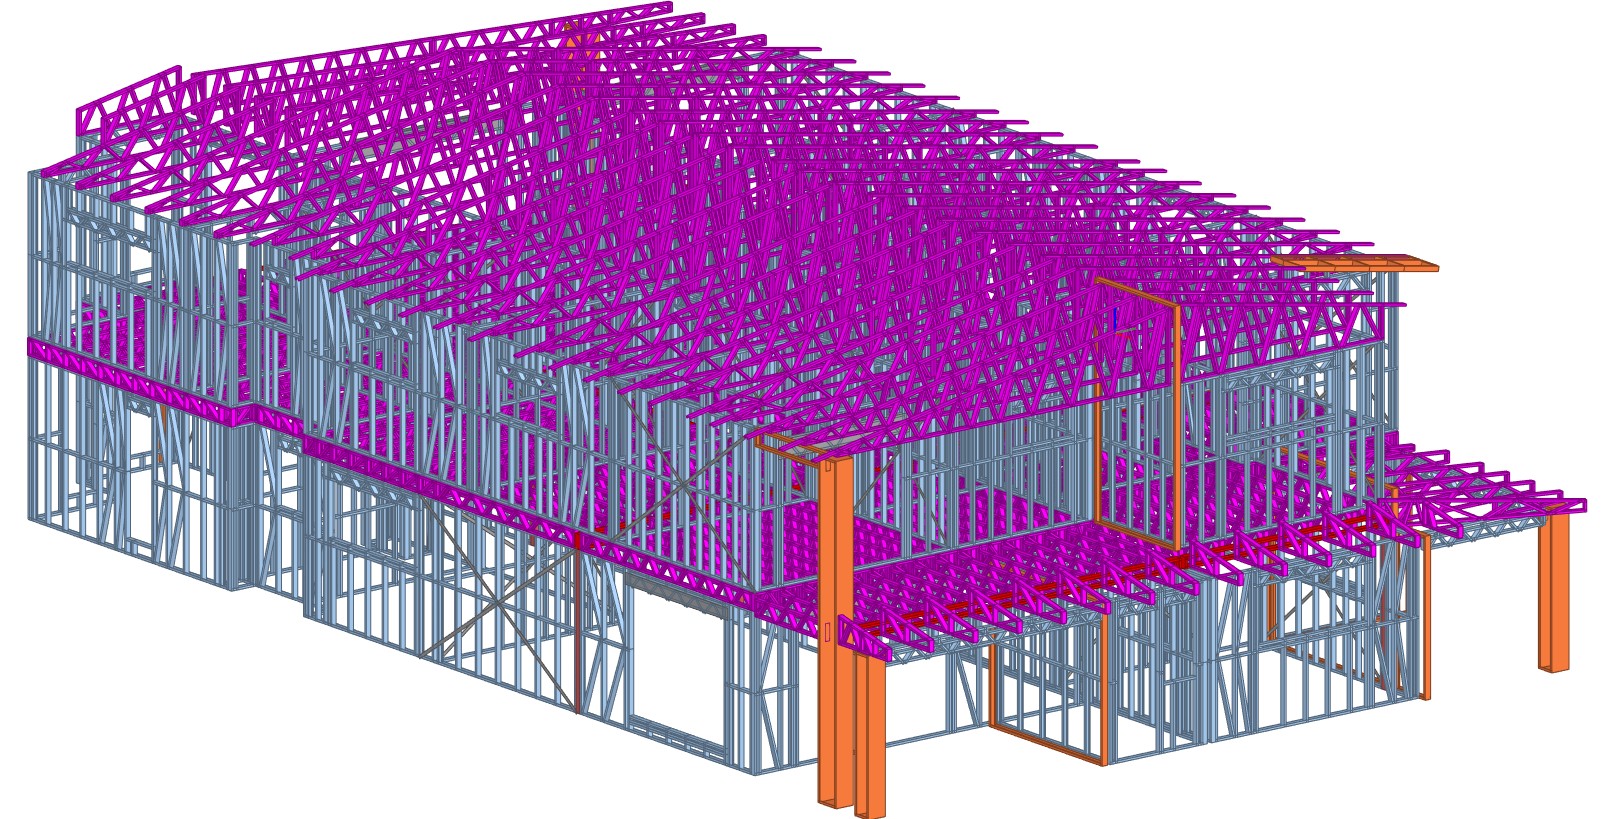
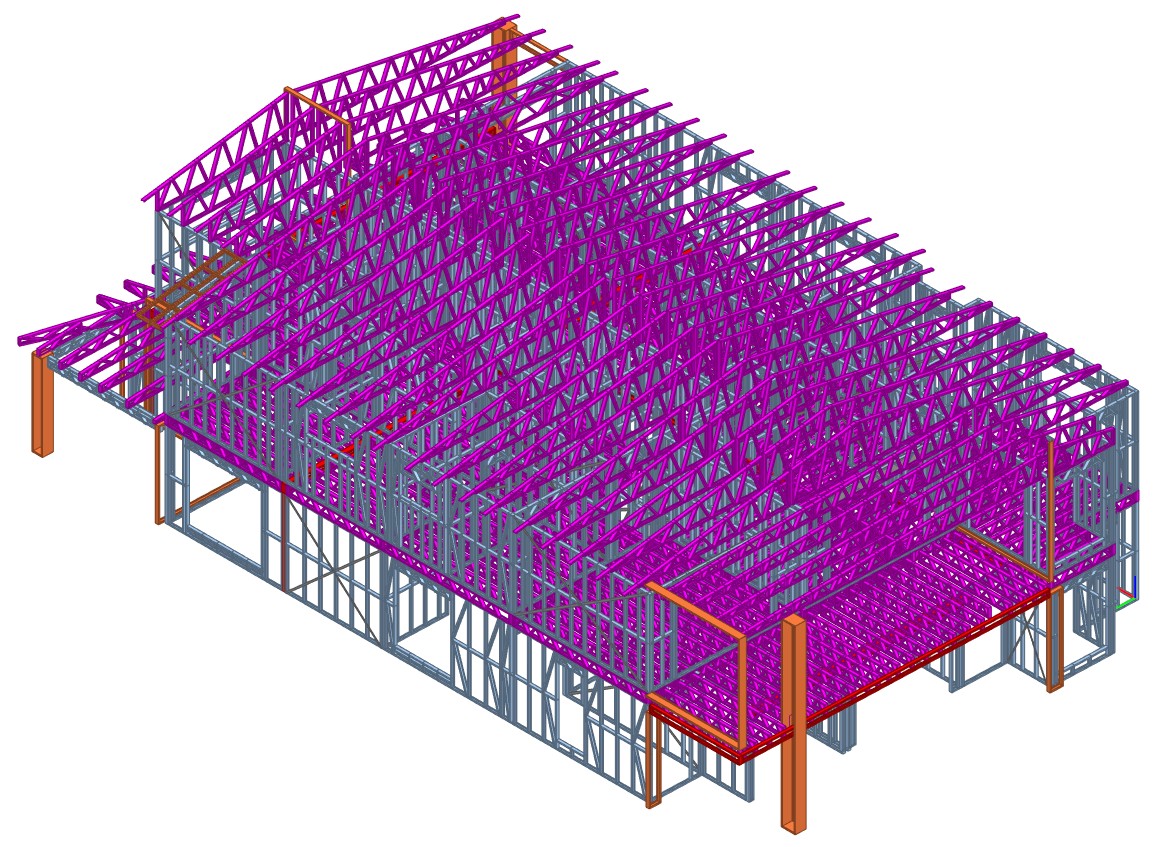
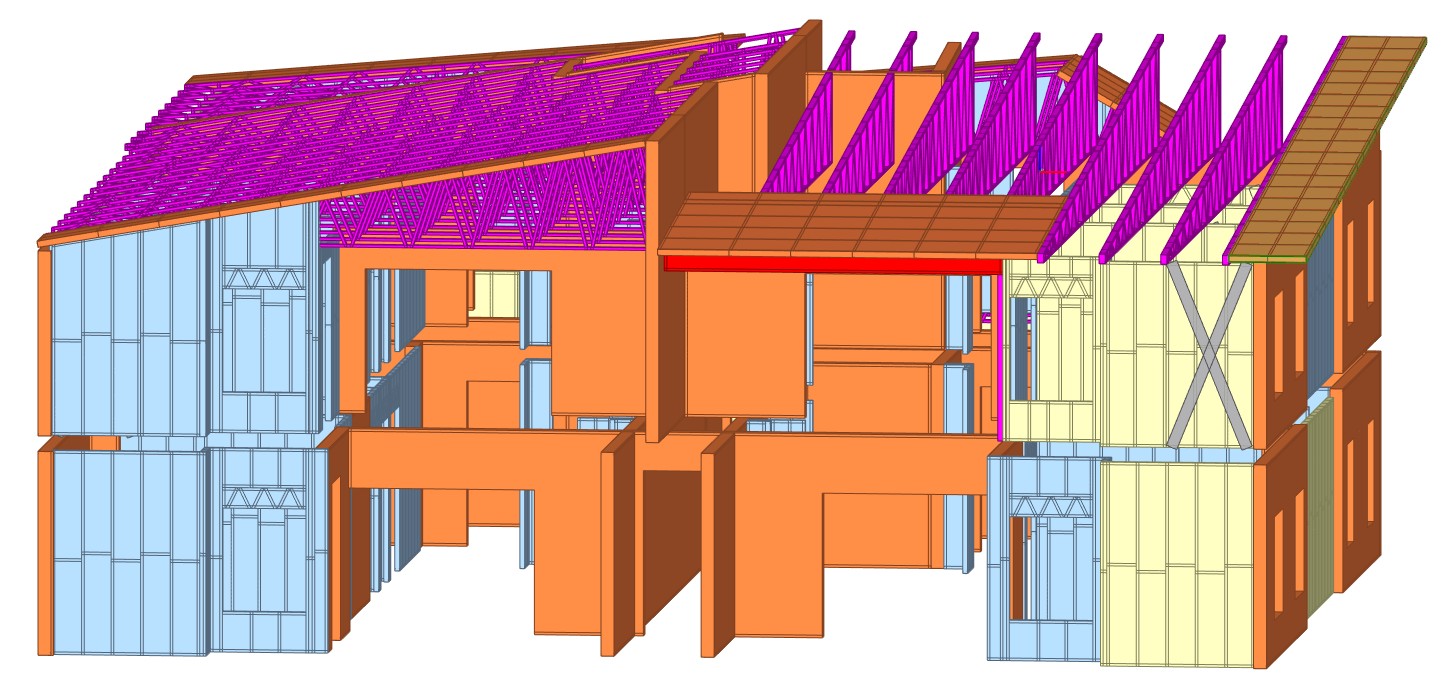
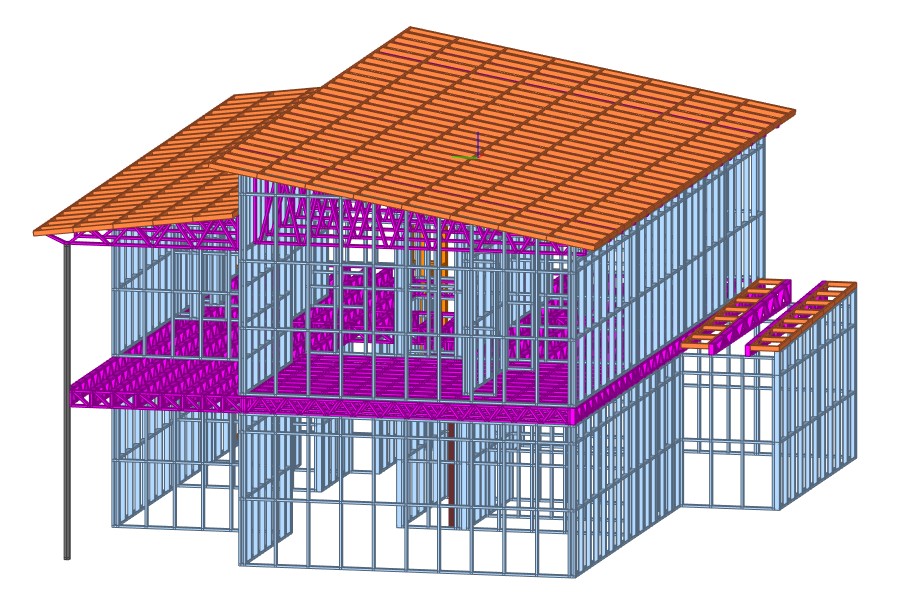
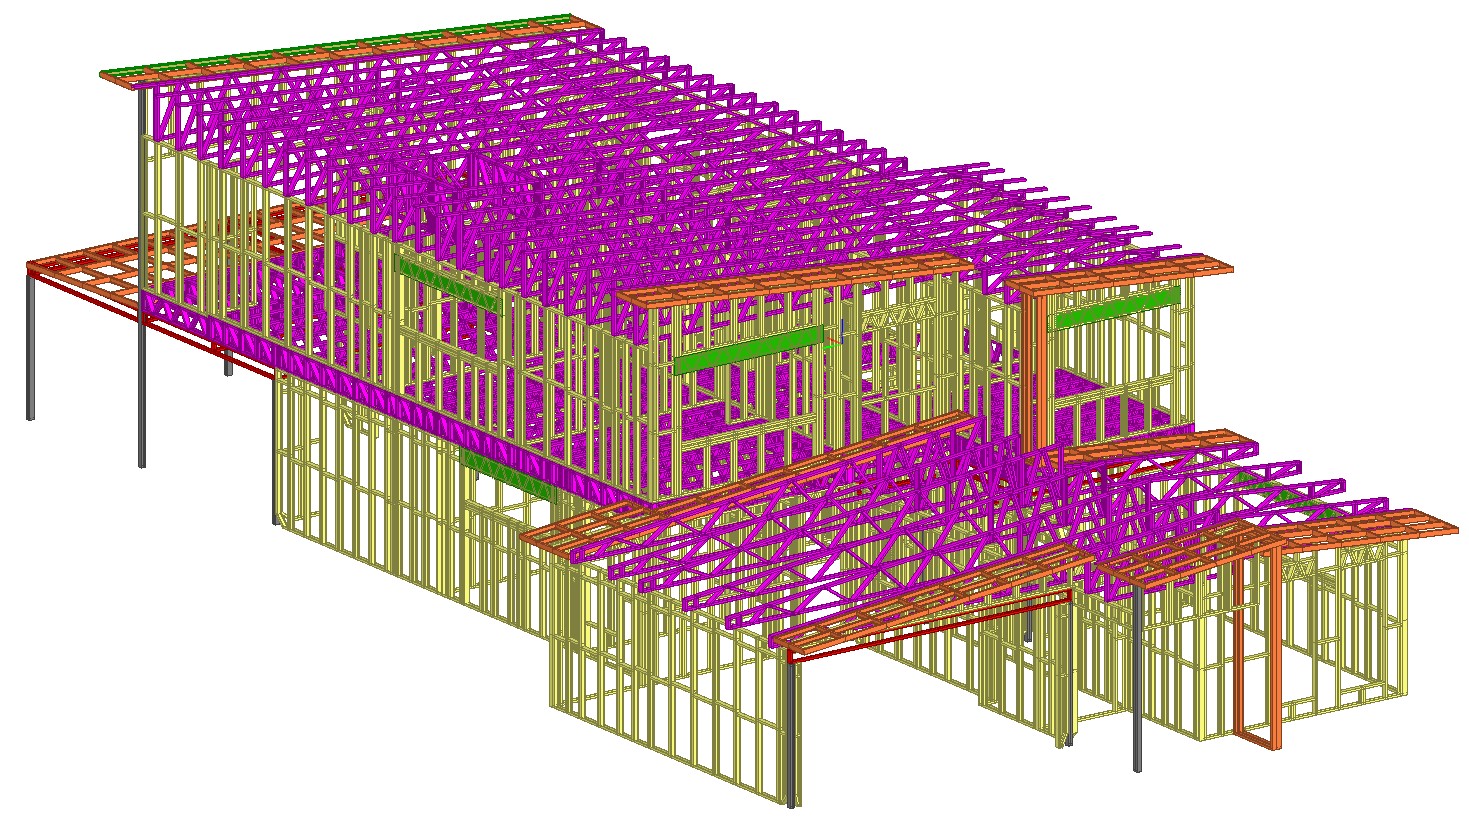
    🧠 1. Frame Size Matters – Don’t Overlook Transport Constraints 

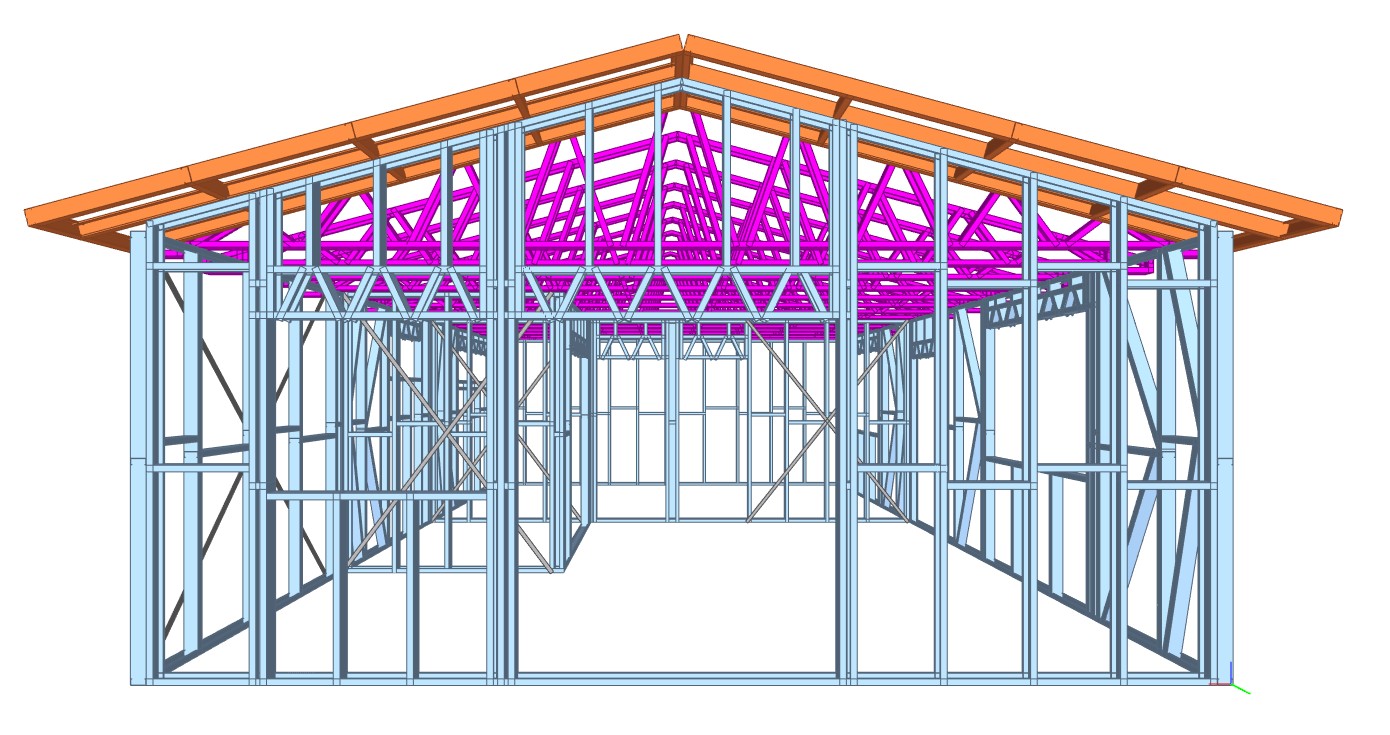
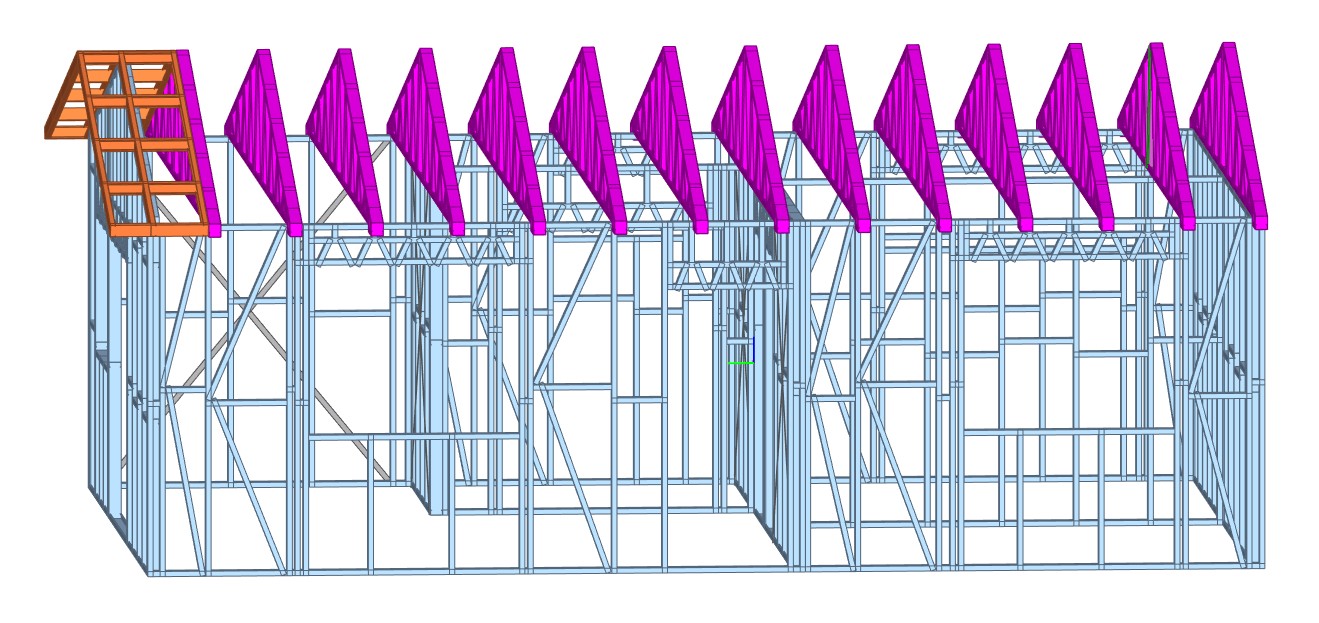
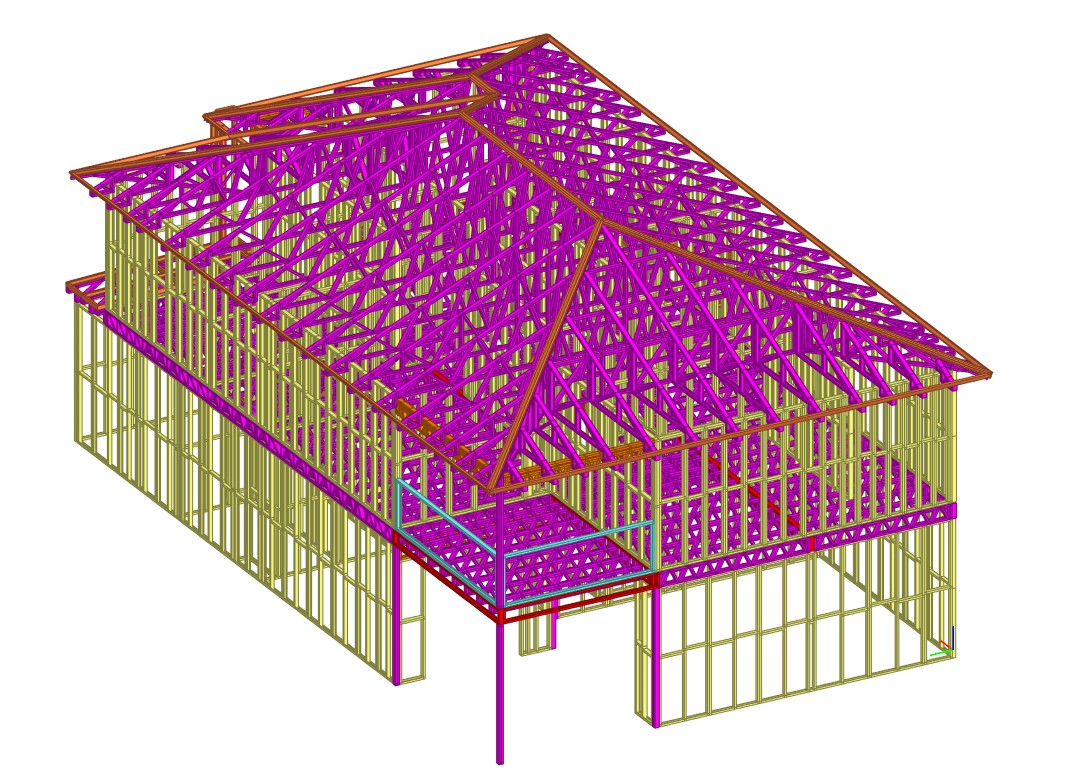
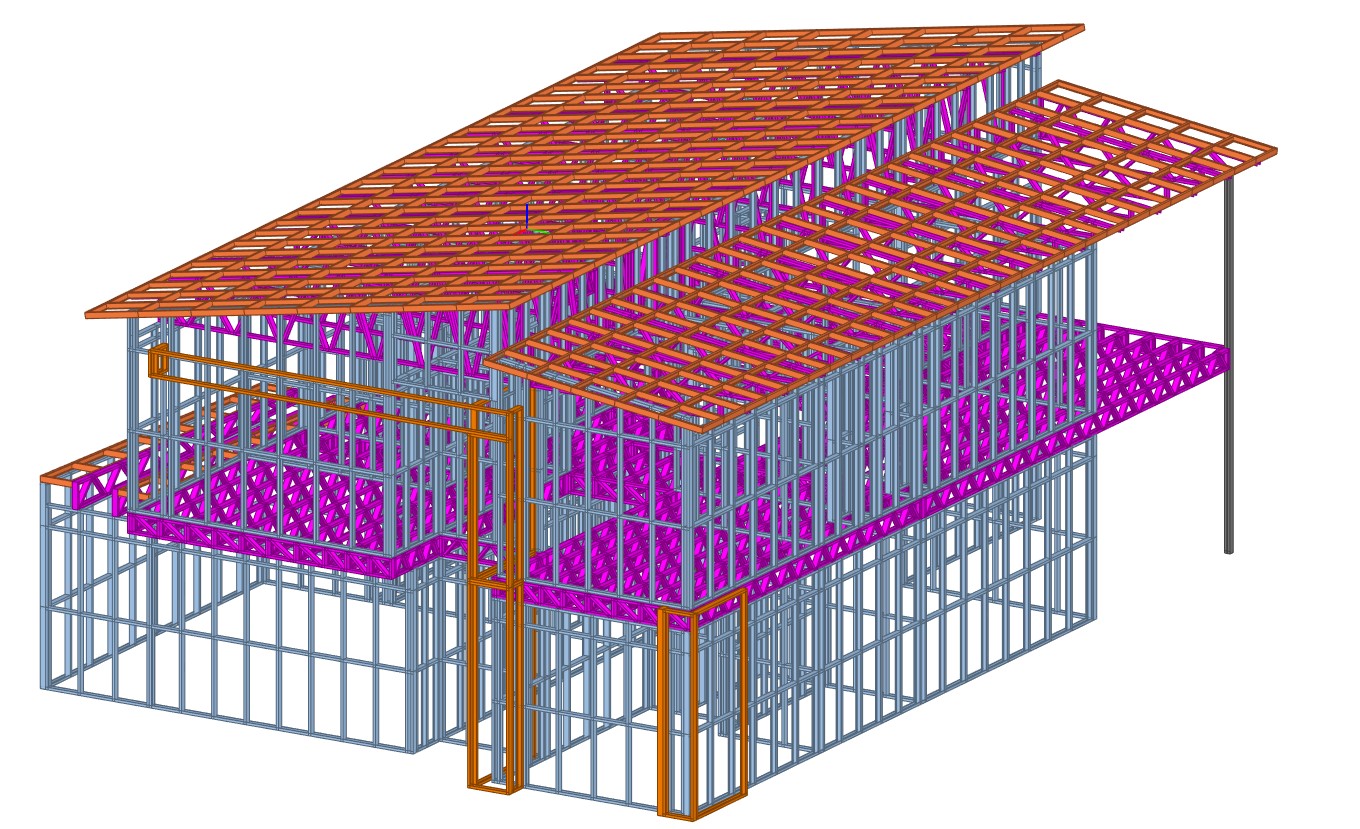
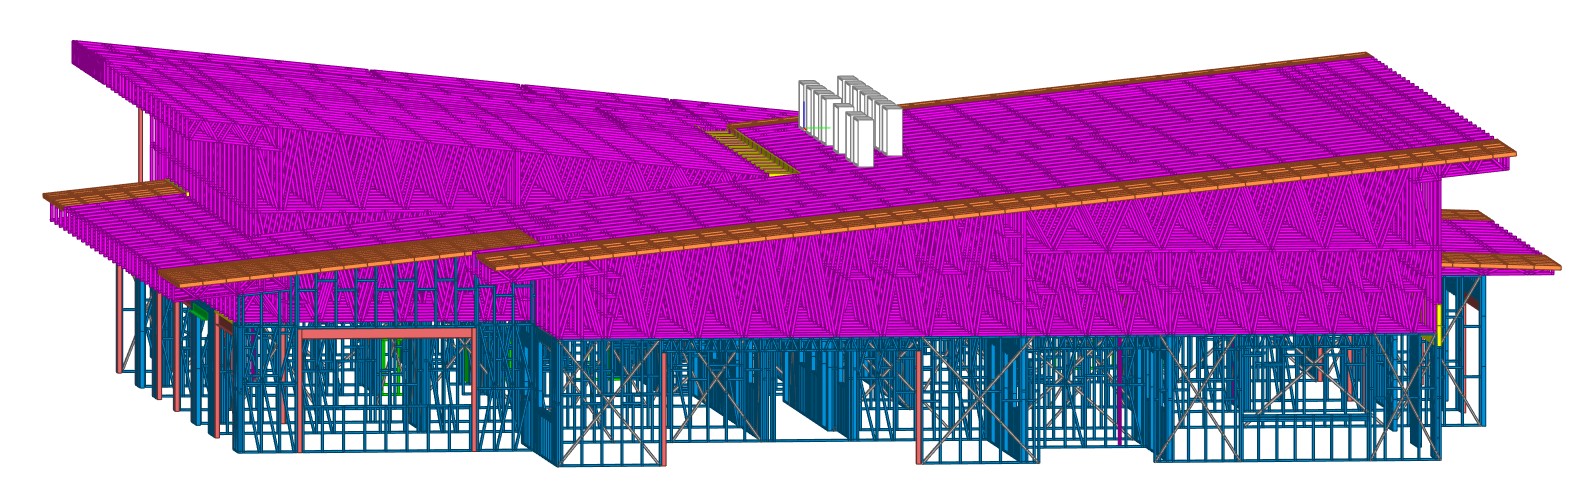
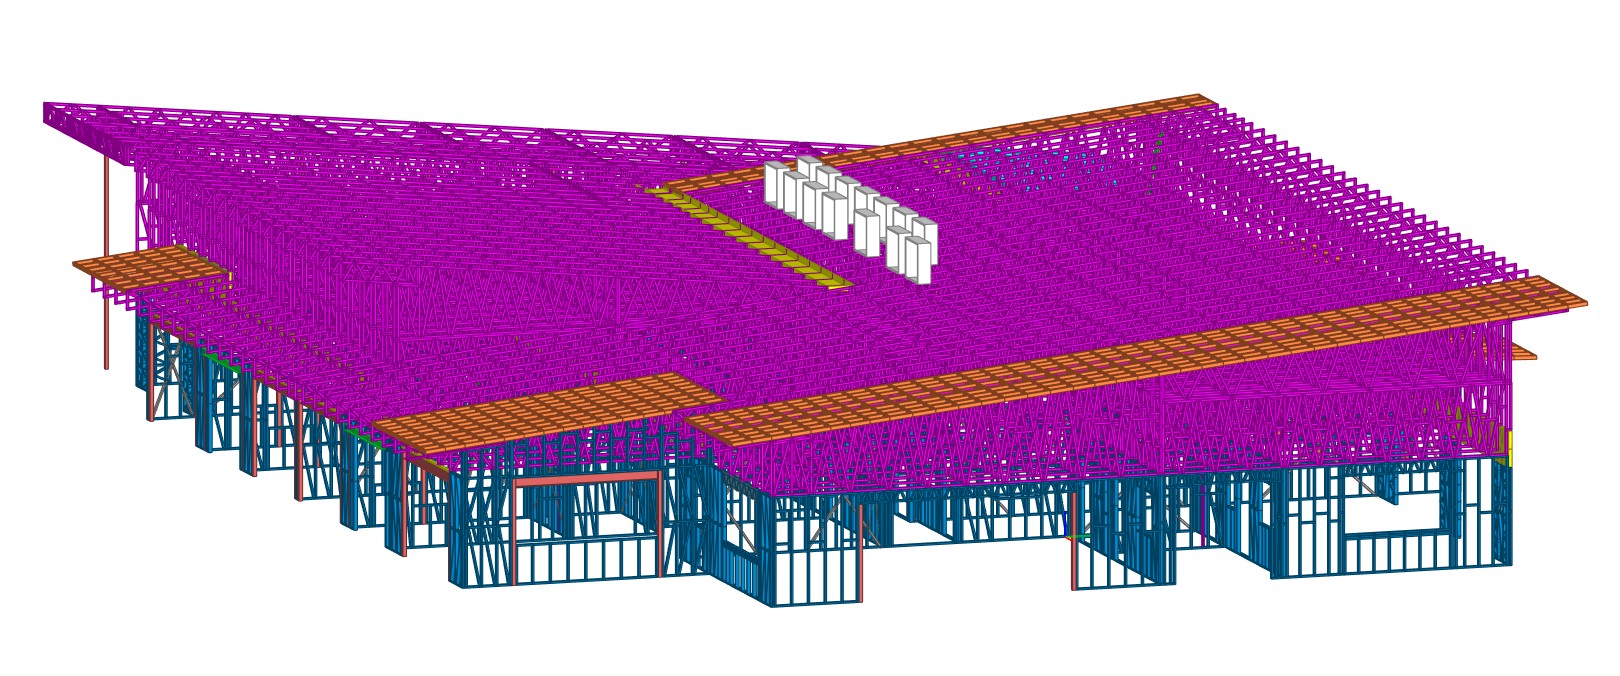
    • Truss heights hit up to 3m and lengths extended to 10m – something that could change based on client and transport feasibility. 
    • Wall frames also touched 3m in height and 5m in length – be sure to check if it fits the truck before detailing. 
    • Roof overhangs? Review them early to ensure they’re compatible with transport or you’ll risk on-site chaos. 

    ✅ Tip: Always check transport feasibility during quoting and in RFI#1

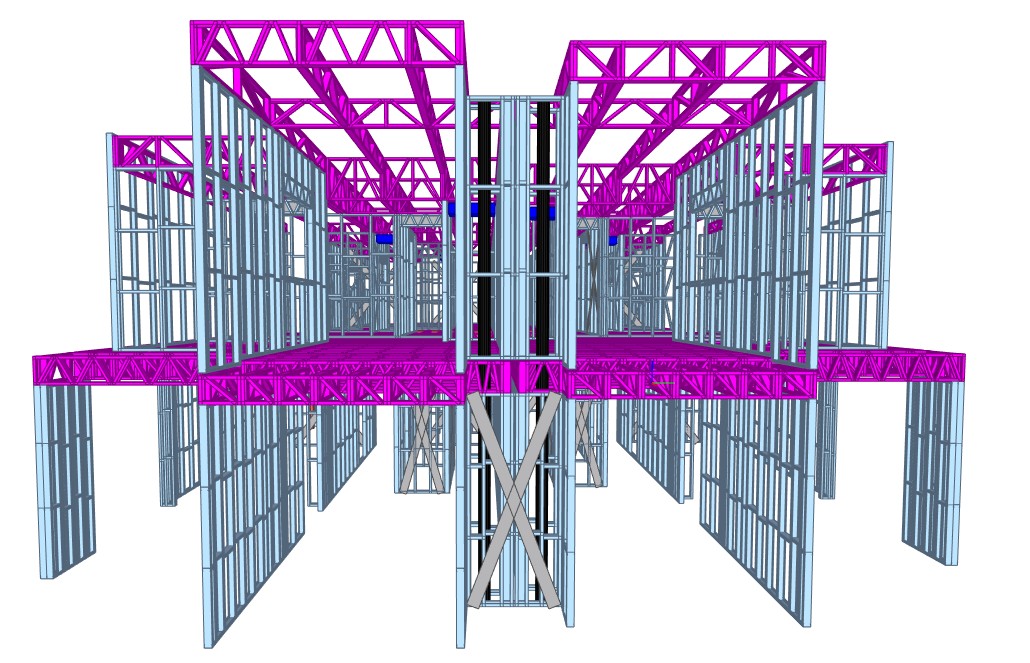
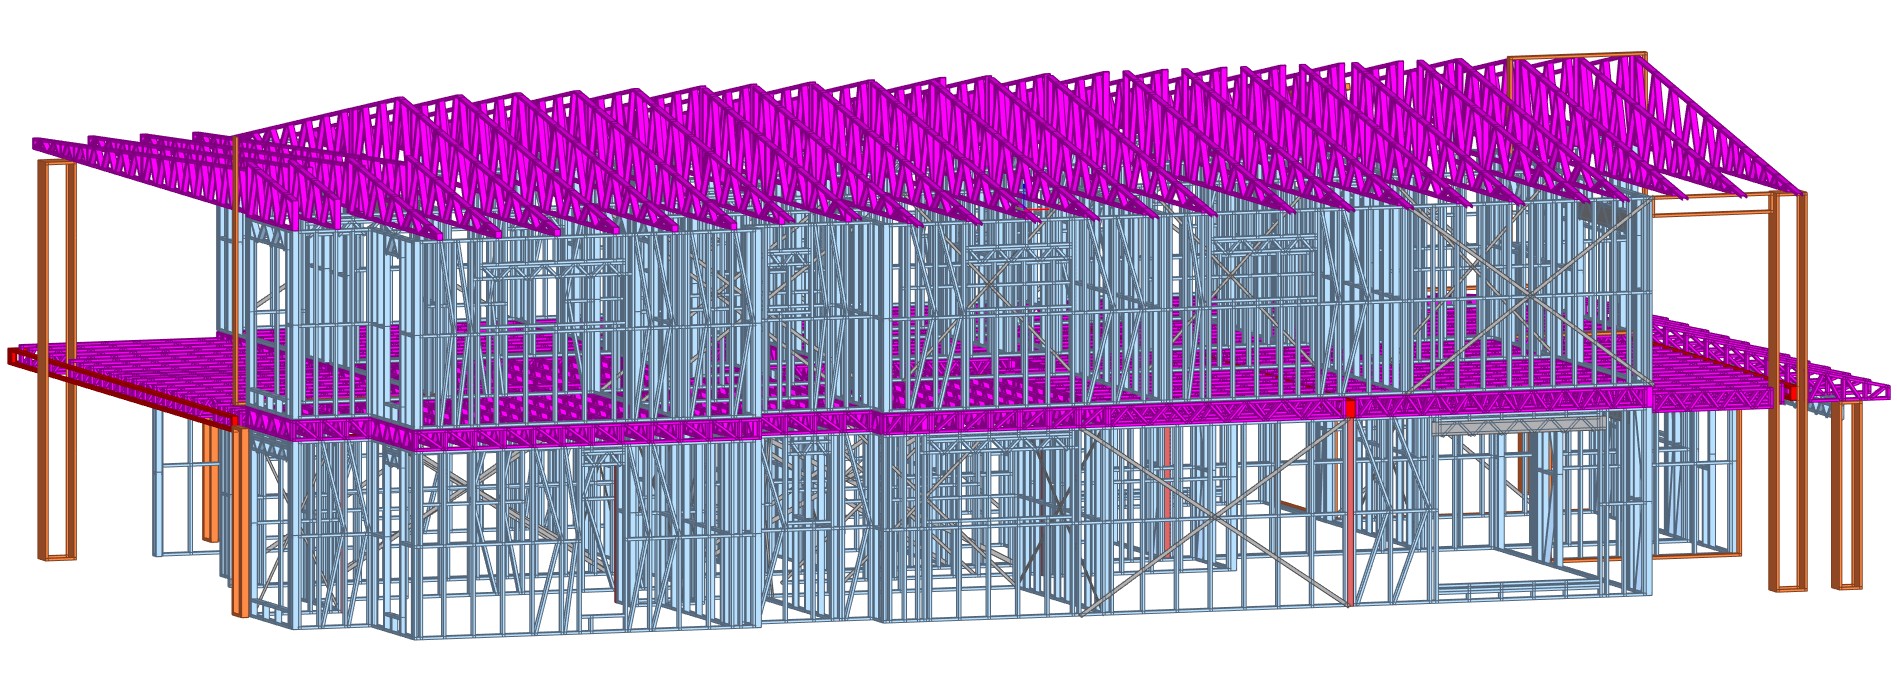
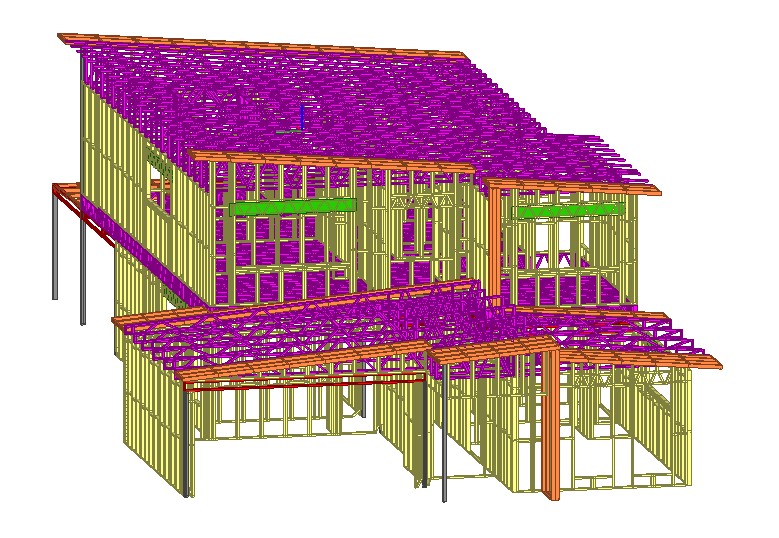
    ✂️ 2. Splitting Tall Walls – Think Before You Frame

    • External walls taller than 3m should be split during design. 
    • Confirm site handling options – are cranes available, or will it be lifted manually?

    ⚠️ Don’t assume! Discuss early to avoid rework and surprises on-site. 

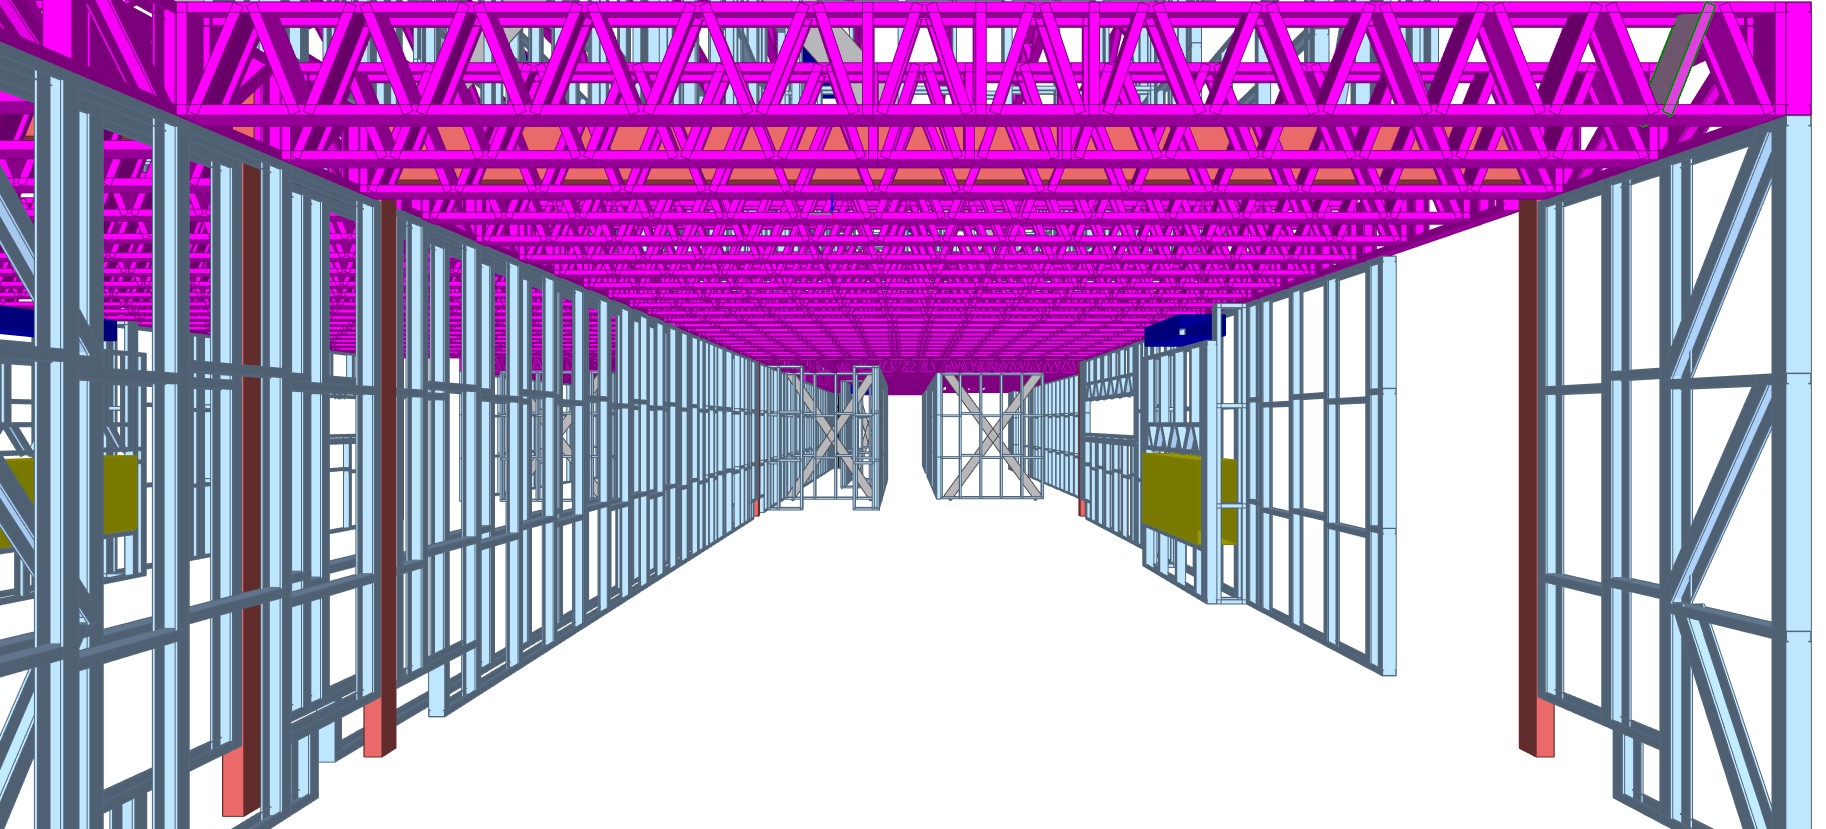
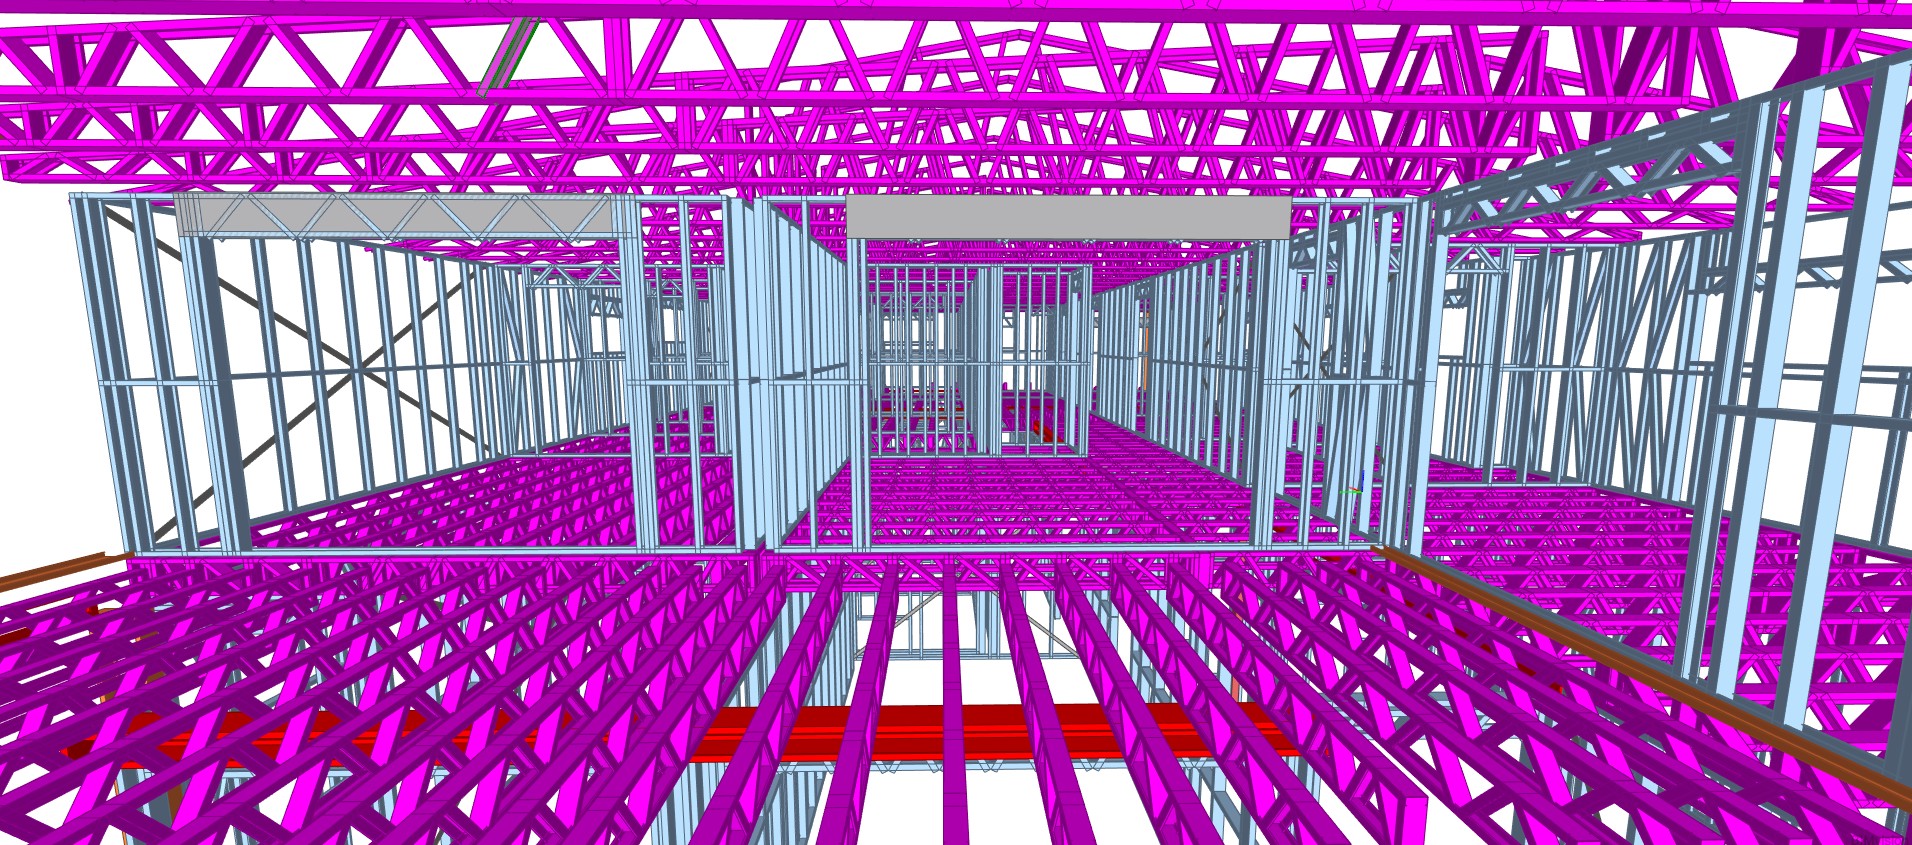
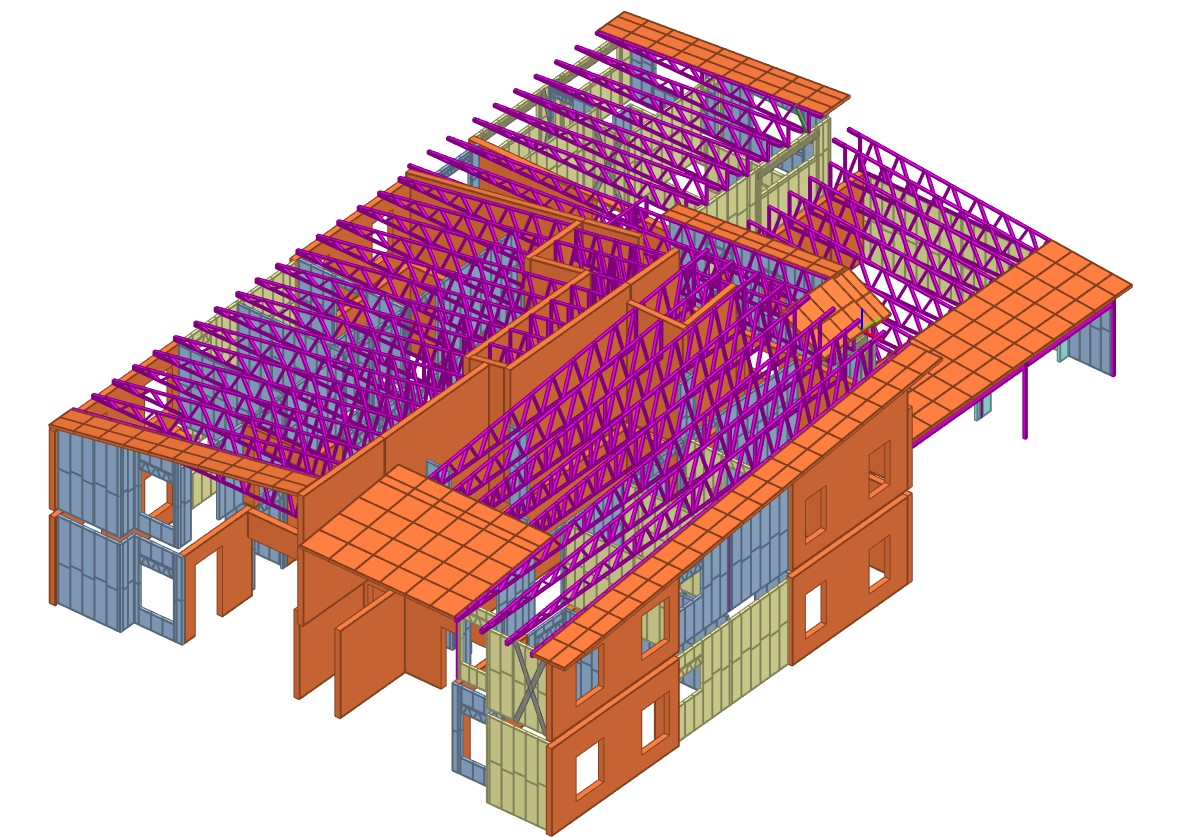
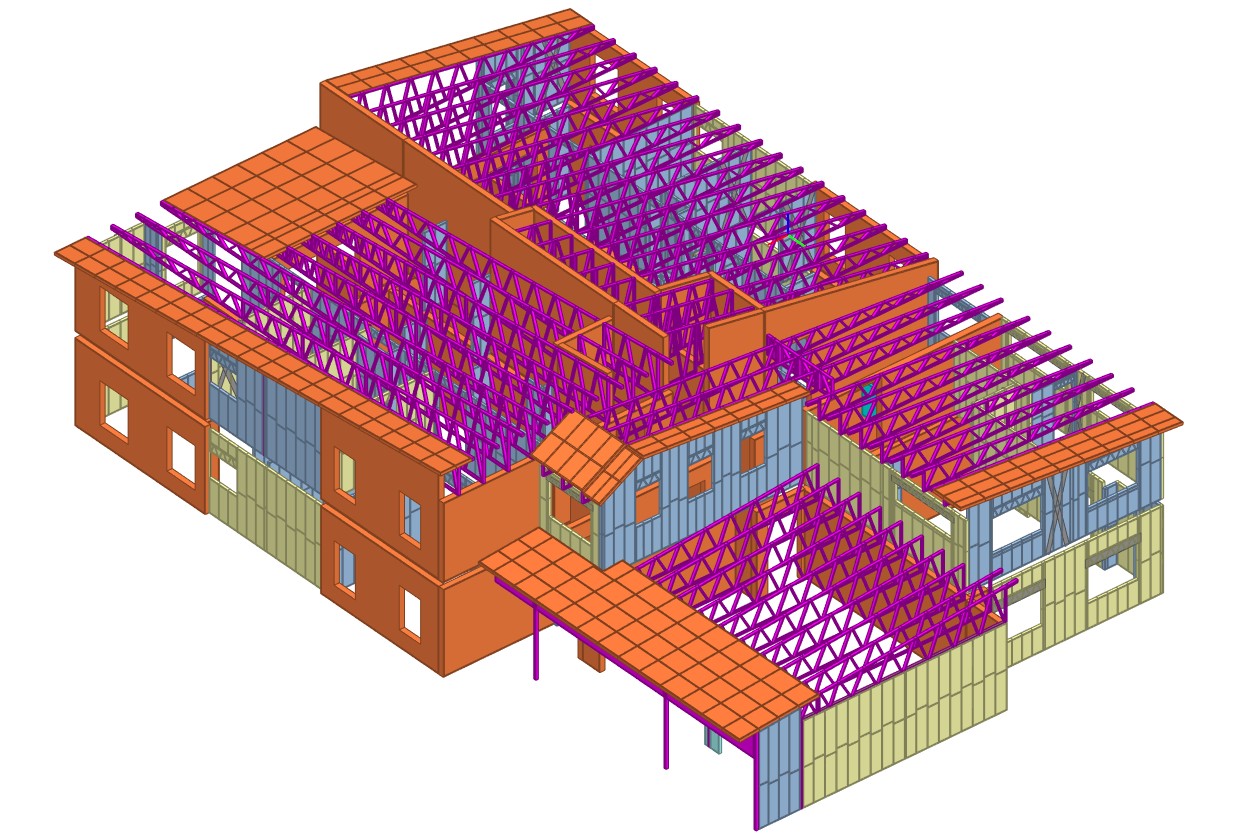
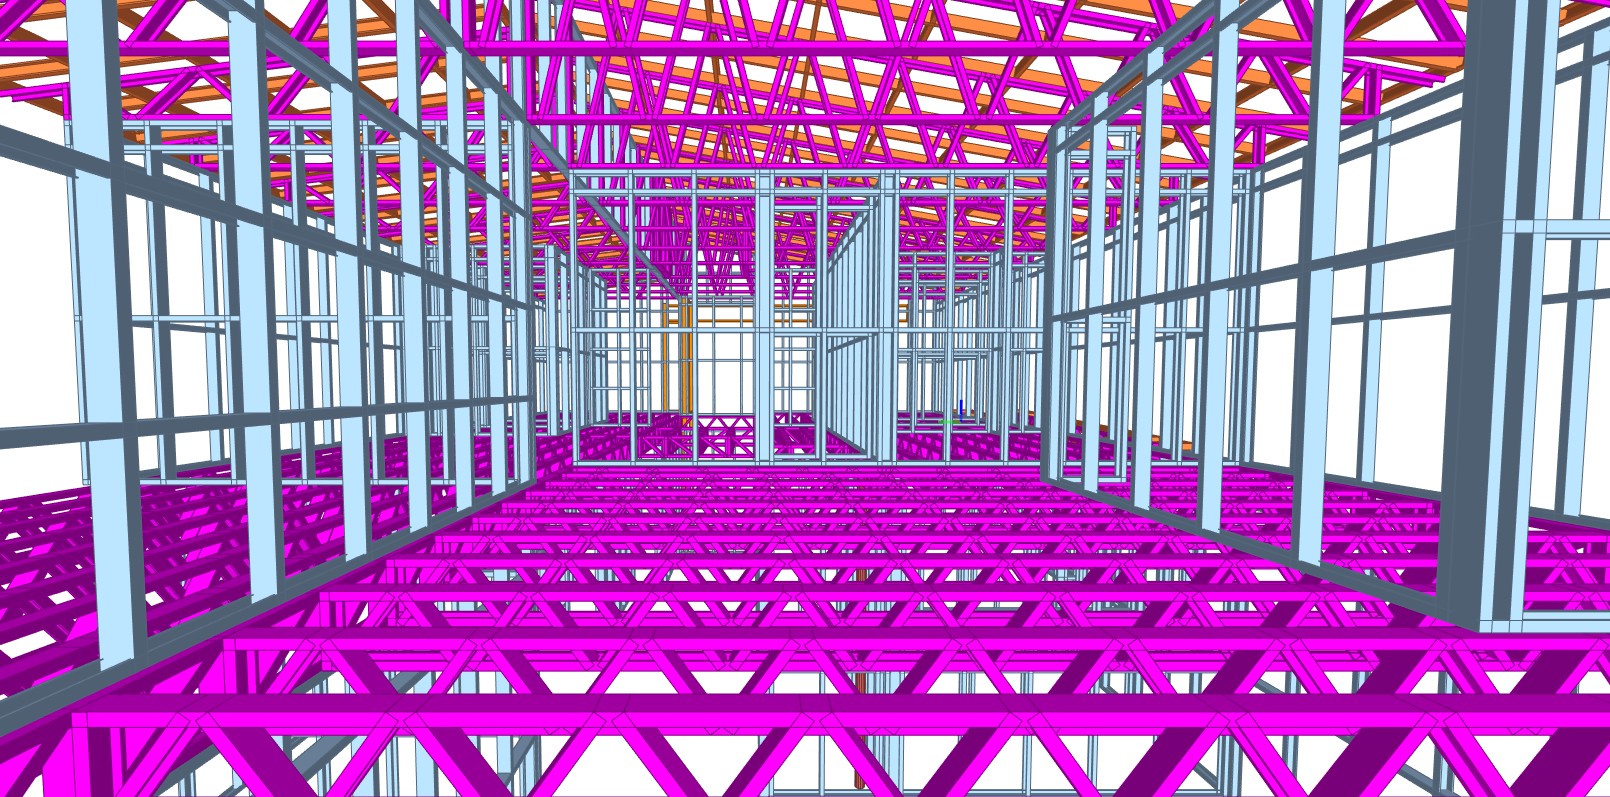
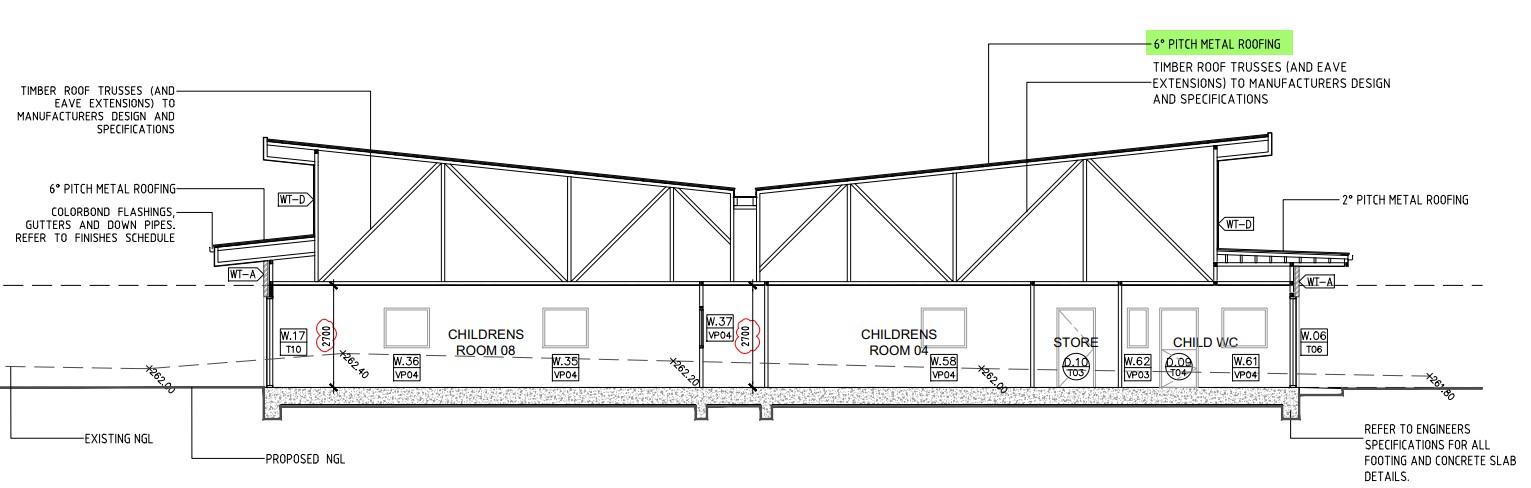
    🧩 3. Design Features for Roof Panels & Coordination with MEP for Wall Cutouts 🛁

    • Before locking in the wall layout, always confirm plumbing cutouts and vent pipe locations with the client, especially in WET areas.
    • If these aren’t aligned early, it can cause major trouble onsite — including last-minute frame cutting.

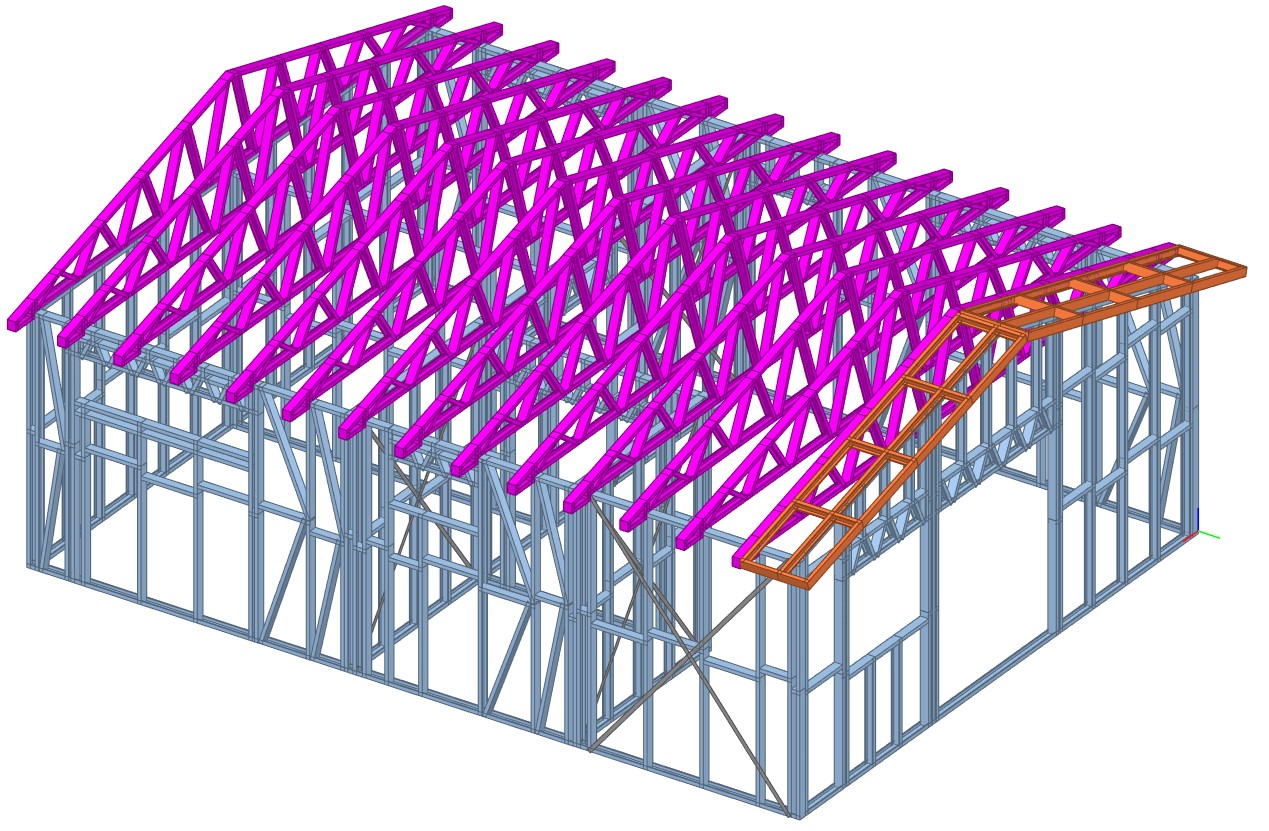
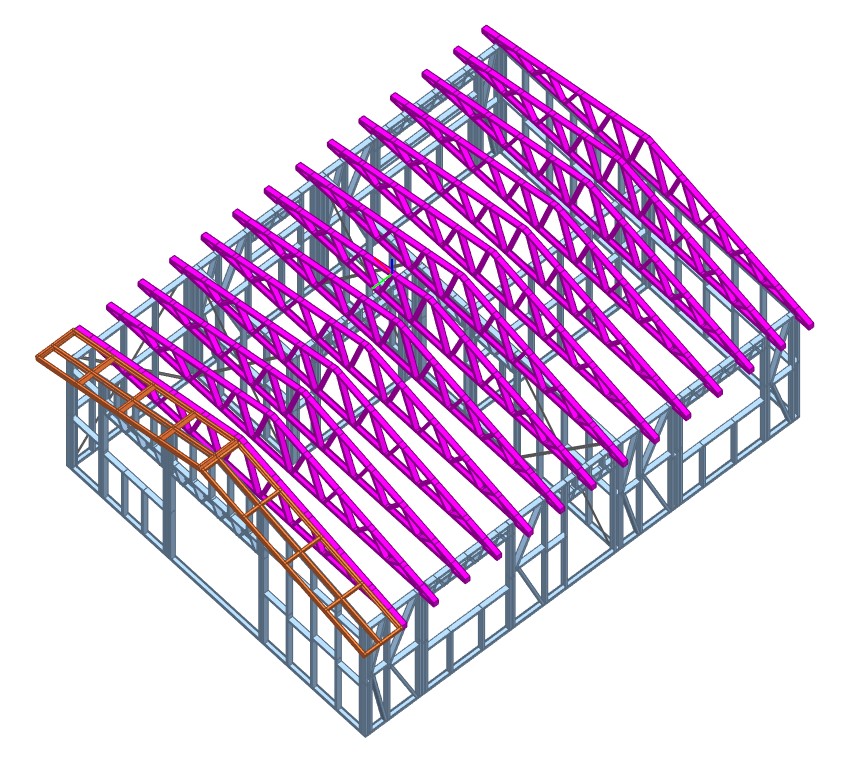
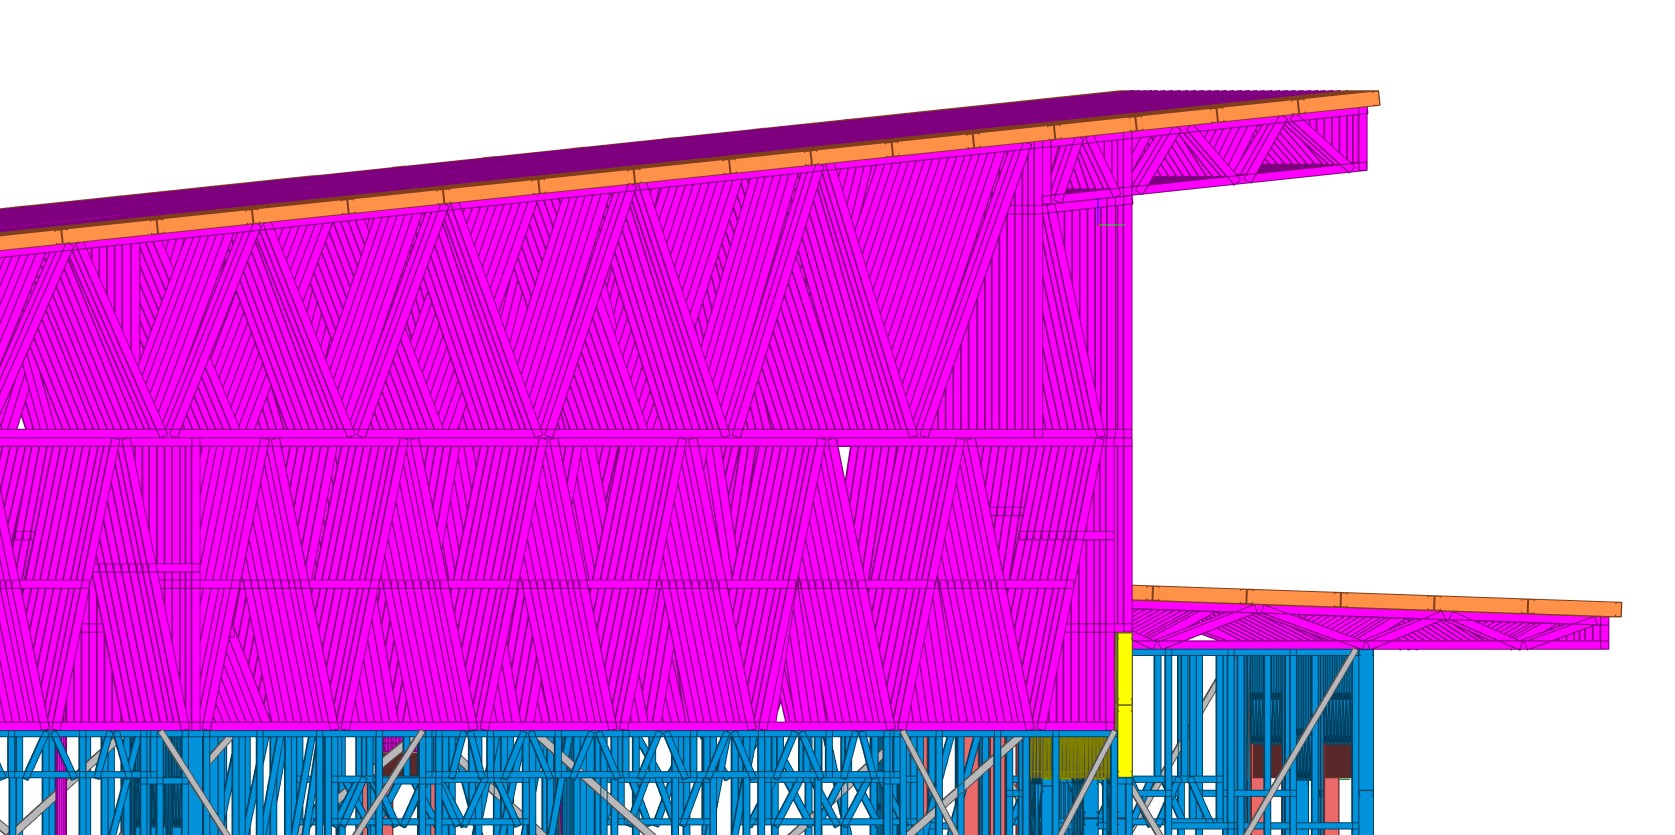
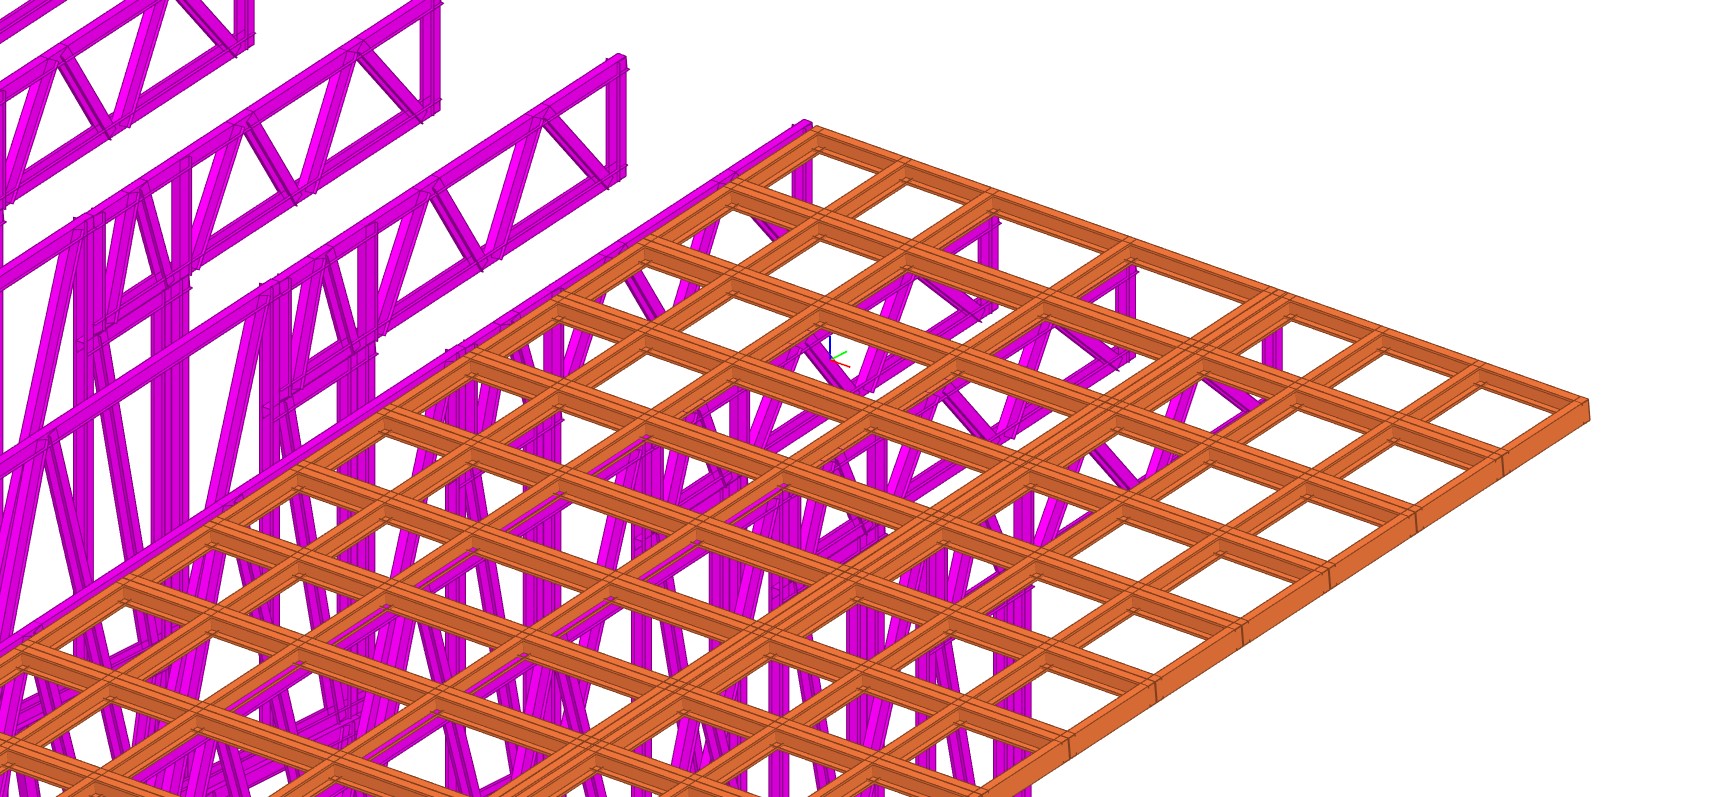
    For Roof Frame like overhangs:

    • Rafters should be designed as doublers (to add strength).
    • Rafters must be perpendicular to the wall.
    • Noggings should run parallel to maintain overhang stability and simplify installation.

    🔍 These small details make a big difference for smooth execution.

    🚛 4. Confirm Transport & Lifting Method Early

    • Every frame size should be checked for transport in RFI#1.
    • Clarify lifting access – Is there a crane or only manpower?

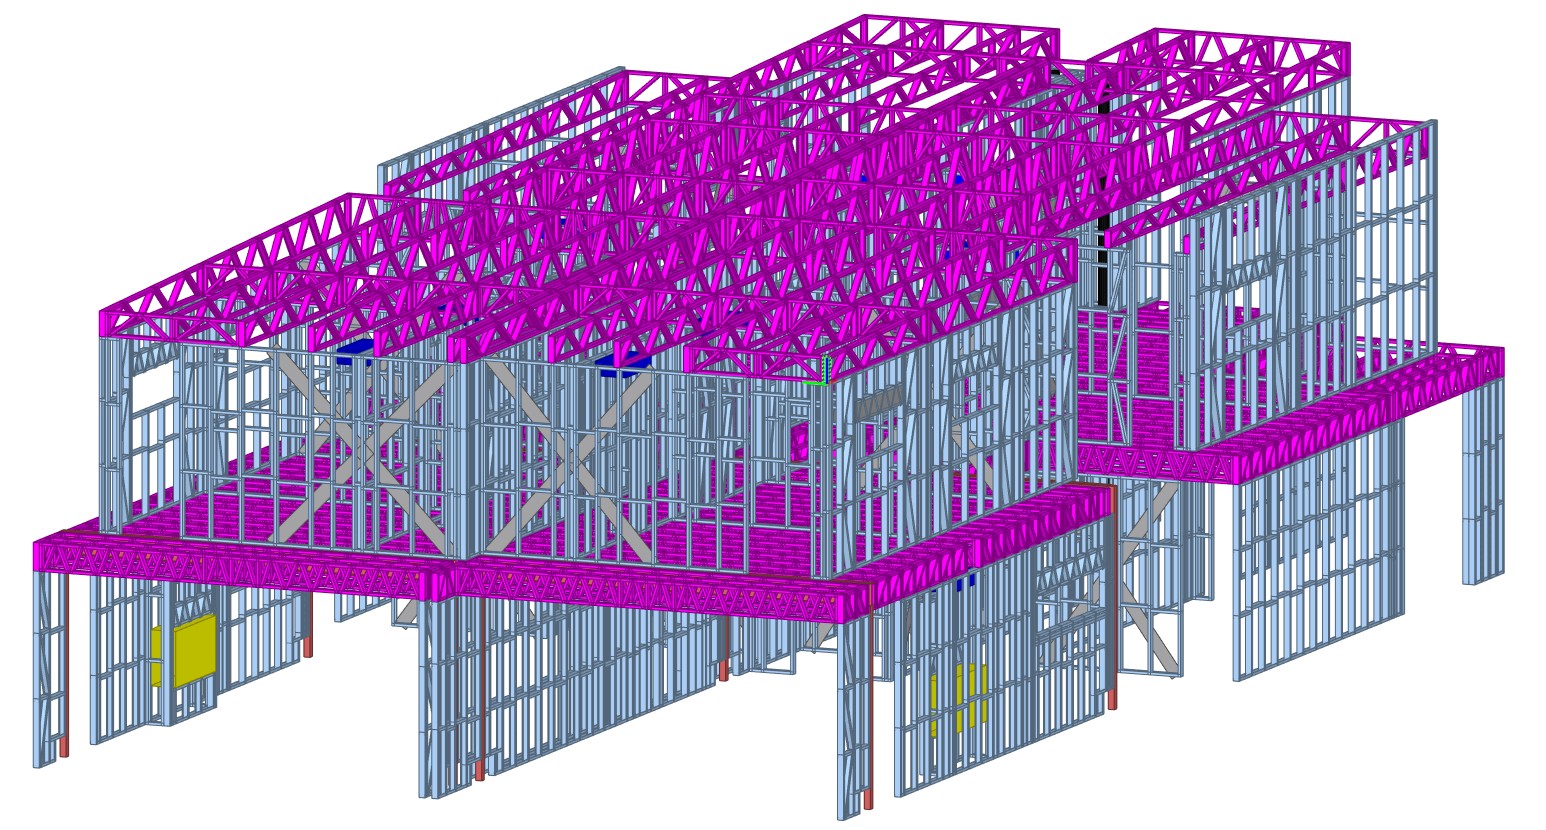
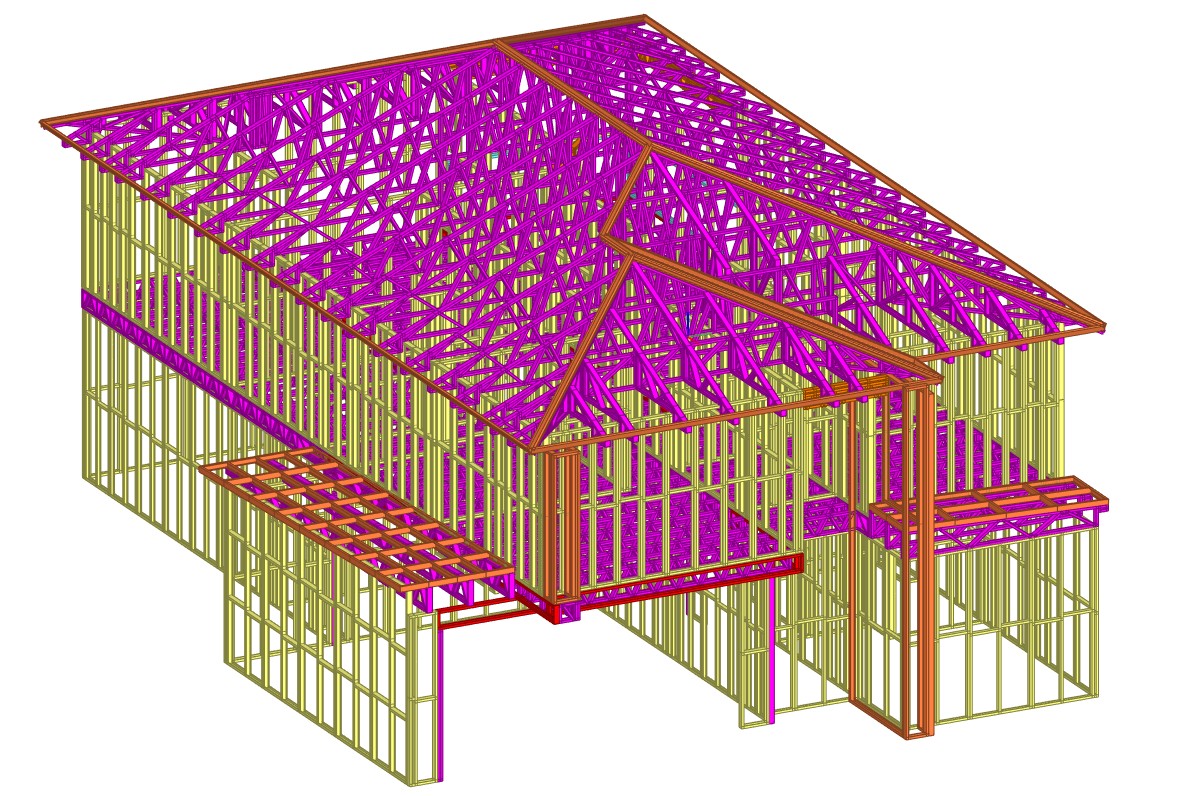
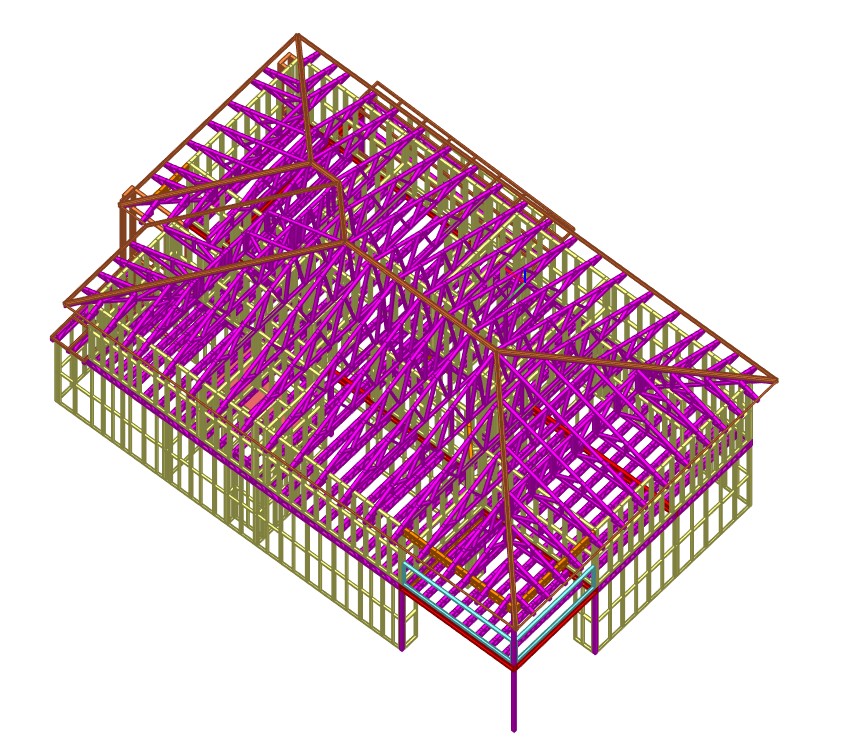
    🏗️ 5. Large Trusses – Assess or Be Stressed 

    For long trusses that might need splitting: 

    • Evaluate engineering requirements early – if a truss fails, it’s not on us, it’s an engineering issue.
    • Consider onsite assembly time, weight, and transport limitations in your quote.
    • Flag “suspect trusses” during quoting with buffer for iterations.

    🧠 Smart Detailing = Fewer Site Surprises

    📄 6. Quote Smart – Define Scope Clearly

    • Don’t quote blind. Wait for all necessary drawings and details.
    • Add buffer for unknowns and clarifications.
    • Clearly state we follow the provided architectural and structural drawings. If things change later — that’s a variation.

    🔄 7. Variation Handling – Get it in Writing

    • Raise a variation immediately for any change that occurs after quoting.
    • Pause all work on the affected section until written client approval is received (or the variation is rejected).
    • If there’s a delay — pick up the phone and speak directly with the client. Clear communication is key to minimizing disruptions.
    • To alert the client that a change has happened, and that there is a delay in the program.

    💡 8. Our Design Suggestions – Add Value and Help Your Client Cut Costs

    If we propose design improvements (e.g., optimizing the LGS frame layout), they should be quoted as added value.

    When working off client-supplied drawings, and we identify missing details or unclear sections:

    • We can submit proposals for improvement.
    • If this was clarified in the quote, it is already within our scope — no need to raise it as a variation.

    Smart detailing isn’t just about execution — it’s also about helping our clients save time and money.

    🧱 9. Client-Driven Design Changes – That’s a Variation Too 

    Any change the client makes for ease of installation or cost saving must be quoted as a variation

    📋 LGS Project Checklist (for Detailers & PMs)  

    ✔️ Confirm frame size limits (wall/truss) with client 
    ✔️ Review transport feasibility and crane availability 
    ✔️ Request complete architectural, structural, and MEP drawings 
    ✔️ Identify special features (cutouts, splits, overhangs) early 
    ✔️ Define scope clearly – design vs. detailing only 
    ✔️ Include buffer time for potential RFI clarifications 
    ✔️ Document all design and client-driven changes 
    ✔️ Conduct internal reviews before client submission 
    ✔️ Flag and assess suspect trusses during quoting

    💬 Final Thoughts 

    Whether you’re a detailer, project manager, or fabricator, I hope this blog helps you:

    • Spot issues early
    • Avoid costly site changes
    • Deliver smoother, smarter LGS solutions

    📢 More Coming Soon 

    We’ll continue sharing more real-world LGS insights, including: 

    • 🧠 “Can You Spot the Problem?” detailer challenges 
    • 🛠️ Cost-saving ideas we’ve implemented 

    Stay tuned — and let us know if there’s a specific LGS topic you’d like us to cover!