

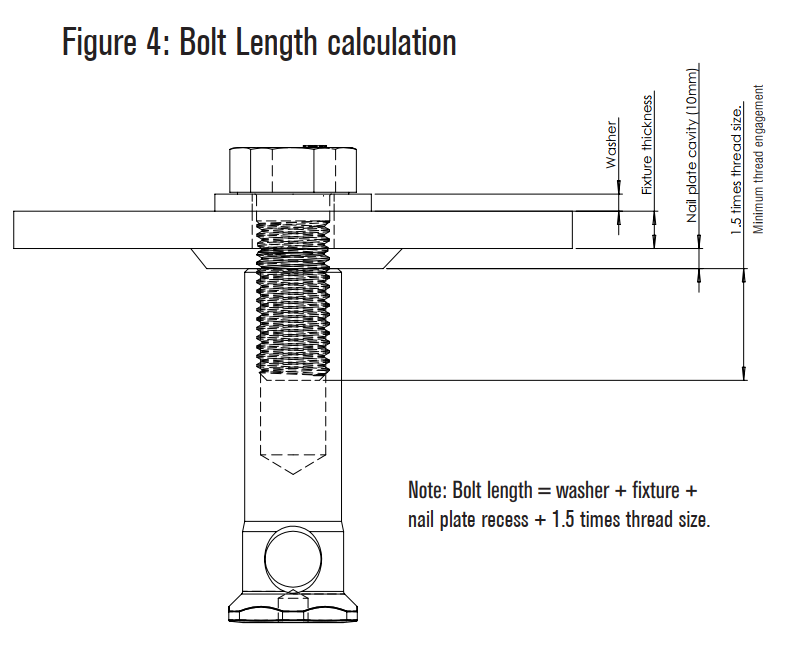
Main issue here is the entire length of bolt is decided by the Cut length the modeler provides.
If proper care is not taken, then there will be a site issue
Author: Pon Dhileepan
While working in a project called Bateman Bay, TEK1 came across a situation where PFC members are provided to support glazing. PFCs are laid flat, a 50mm U channel is run along the PFC which supports the glass. The below image is the cross section across the glazing and it elucidate the set up.

These PFCs are connected to columns by 10mm end plate & 16dia 8.8s bolts. The problem arose here as the bolt head of 8.8s bolt would clash with the glass. Refer below image for clarity.

Hence, TEK1 raised a query as to whether they can cut the glass where ever bolts clash or use CSK bolts. The structural engineer changed the 8.8s bolts to CSK bolts.
Another problem came as the PFC web is just 4mm whereas the CSK head is 8mm. The bolt head will still clashes with glass.

Then we proposed to weld an 8mm plate under the PFC and CSK drill is to be made together. The proposal is accepted. The below images show that the glazing runs without any hinderance.


TEK1 detected the issue earlier which saved cost in cutting the glass at site. Structural engineer often do not consider these kind of clashes and it is the duty of the modeler to find this out and make this to structural engineer’s knowledge.
Thanks for reading.
Does a detailer care about supporting the elements which are not available in the structural design, but it could affect the structure? You should care!
See the below incident for an example.

This structural plan has sections 1 & 2. Refer below snip for section views.

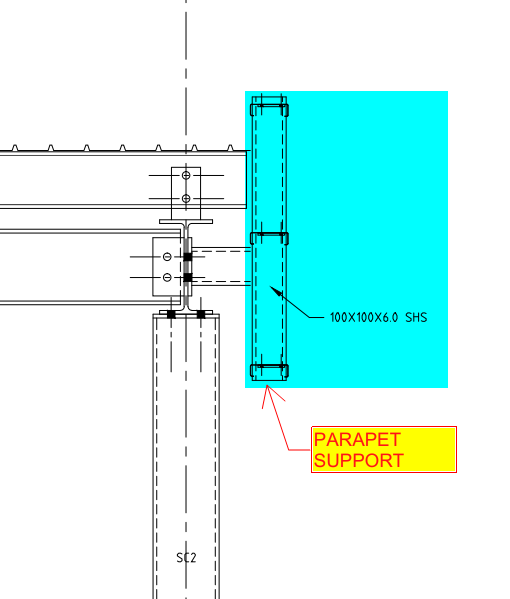
If you see the above snap, Section 2 has detail-A, which shows parapet wall support. But section-1 does not have it.
Is that means there is no support required?
Actually, there is also support required.
Refer below architect plan.
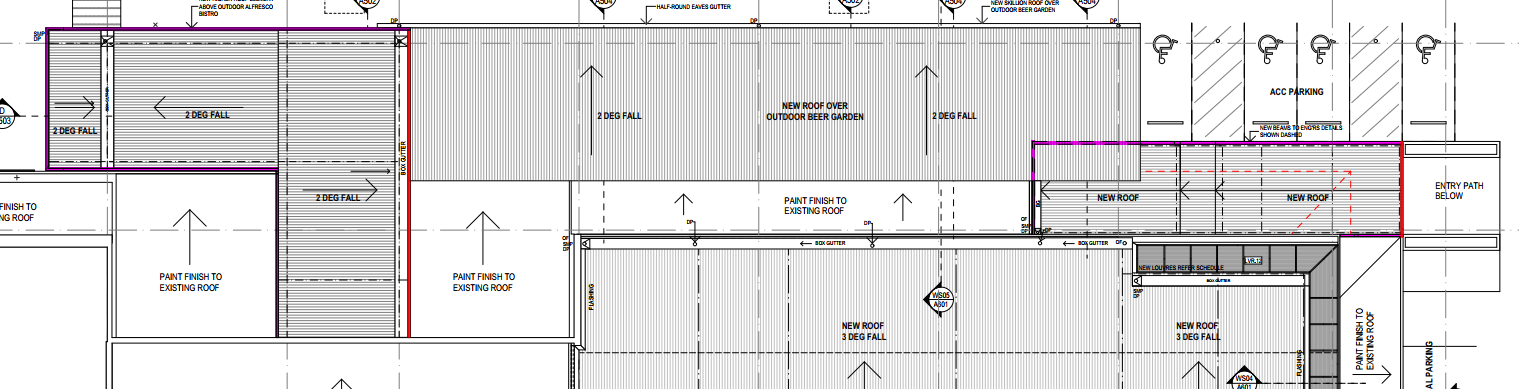
We have noticed that the parapet coming all around the roof (Highlighted in Pink Colour). So we raise RFI regarding this issue for taking it to their attention. Refer below snip.

The client realises the situation and approves providing parapet support members all around the roof. Refer below snip for the client’s response.
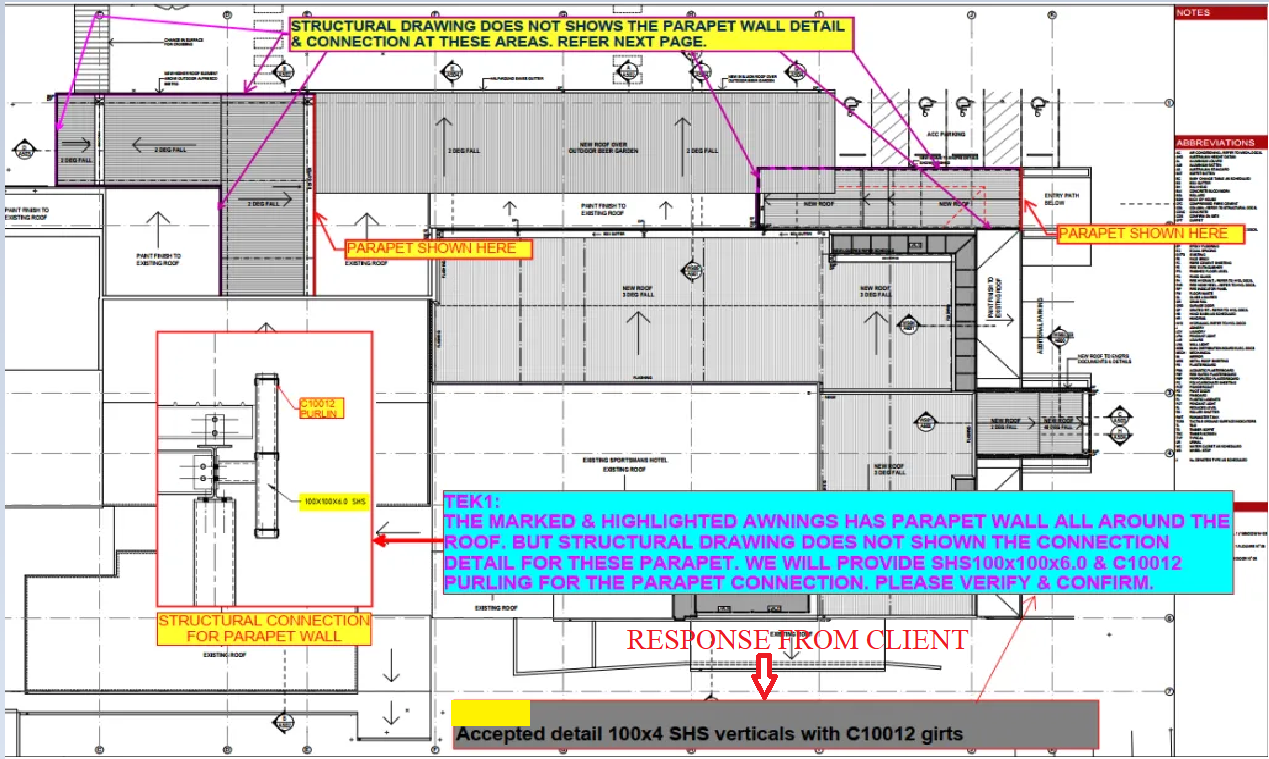
We always keep our client’s out of trouble from these types of issues.
This tutorial is about creating beams. The main take away here is
1. Manage UCS.
2.Manage Layers
3.Manage View Cube and Work Area
4.Manage Rotation and insertion point of Beam Section so that later on Advance copy can be used effectively
5. Us Construction Lines.
Create work area in Advance Steel
visit https://www.tek1.com.au for full list of Advance Steel and Tekla Tutorials
Points to note
Work area can be used to reduce clutter in the model
Visibility of elements outside the work area can be set to desire level by controlling the level of details
Only one work area is active at any time.
Create work area on the XY plane after setting the UCS to the desired value.
Advance steel Quick View Tool bar tools to show and hide elements. Also, deals with 2d snap which is very much like Tekla Workplane Viewplane switch.
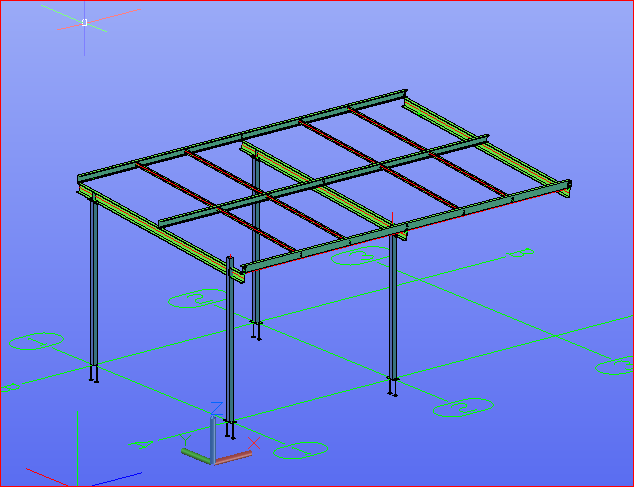
Advance Steel Tutorials for Tekla Users
In this video we are going to look at trim/extend tool. I could not make the extend tool work. Could not find any documentation
I have to suspect that advance steel is starting to gain traction in the market. Job posts in Job Portals show the following data
An year before Advance steel jobs were much lower.
There could be couple of reasons why Advance Steel is gaining traction. At this point of time Tekla is still a better software for detailing steel
Another important thing especially with countries like India where piracy is rampant could be that it could be increasingly difficult to pirate with later versions of Tekla software forcing detailers to switch to cheaper alternatives.