Let us now continue to refactor according to good design principles.
Let us now continue to refactor according to good design principles.

We will attempt to do something which is seldom done or discussed in Tekla code samples: and that is the very important issue of refactoring code.
The first thing you need is a good suite of tests. That way you will know whether something has gone wrong or not. It might be tricky doing this since we are developing within the Tekla environment, but I do suppose it’s possible.

WARNING: The code is very dirty. There’s a lot of repetition here. And I’ve gone up some cul de sacs incorrectly. But that’s ok. It’s code which works. We can worry about refactoring for another day – in fact, that will make for a very good exercise. Here is a link to where I document the refactoring process.
I’ll walk you through the code:
Here is the full code unencumbered by commentary:

In the last part we left off having obtained all the bolt distance and placing them in a domain object. In this instalment we will try to export all that data into an Excel Spreadsheet. Please note that the following code is untested – unfortunately there was a lightening storm in Melbourne which short circuited my flux capacitor which means I cannot connect to the TeklaServer – so rather than wait, I thought to get this code out to you.
There are many libraries out there: XLS compatible and not:
The consensus is that the worst of the above is still better than using Microsoft’s office interop dll. If you use that approach, you will need to ensure that MS Office is installed in your deployment machine, and secondly, be sure to dispose of all relevant objects. If you forget, then you’ll be leaking memory. This is a very important point.
* A significant change has been made – we are now filtering the SinglePartDrawings based on: (i) whether they are beams or not and (ii) whether they have the relevant profile – a reader wrote an email asking for this version of the code. I have left the previous version out there as well.
* I’m not an expert with ClosedXML – I just wanted to get the code out there. So it’s a very hackish and non-elegant solution, but I hope it serves to illustrate the point.
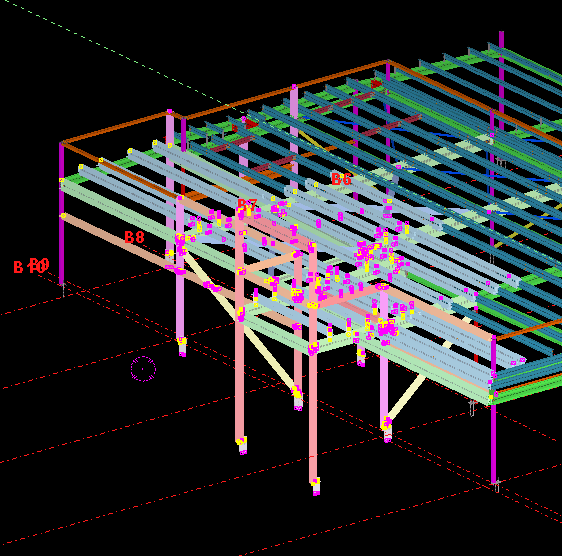
We have programmatically identified some model objects that we want to select in the model – to attract attention to the user and to allow her to easily identify all such objects. In this particular case we will be creating some beams. And then, we will select those beams in the model. Here is a code snippet to get you started:
Wouldn’t it be handy if we could programmatically insert reference models into Tekla? Well you can now do so quite easily.
Here is the code which does the hard work. (You will of course add the appropriate references and directives):
And if you want to see a video demonstration, here it is:
Inserting XRefs into Tekla as Reference Models from Tek1 on Vimeo.

The object of a Tekla Application is to ensure that things go smoothly on the construction site. You can see the organised chaos that is here. Avoid the real chaos. Plan ahead.
For the newbie this post shows how to set up a Tekla Project.
Let us assume that you are creating a WPF desktop Application. You could also just as easily create a console application – I often do this if I simply want a quick and dirty way to test code.
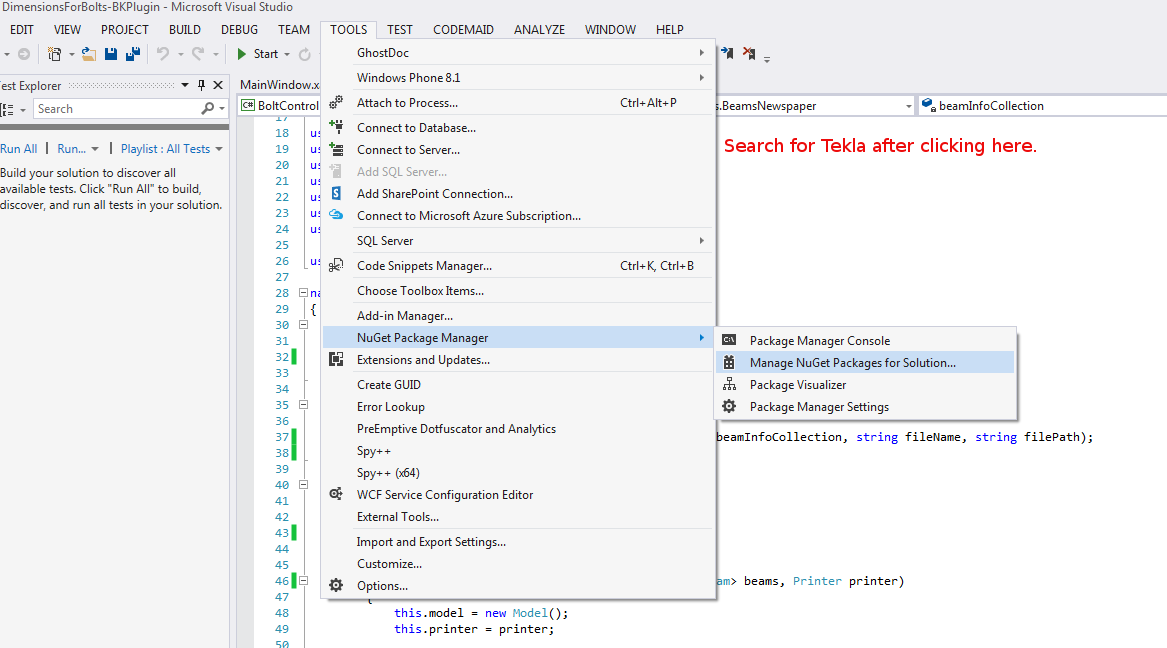
Follow this gif:

Follow this Gif:
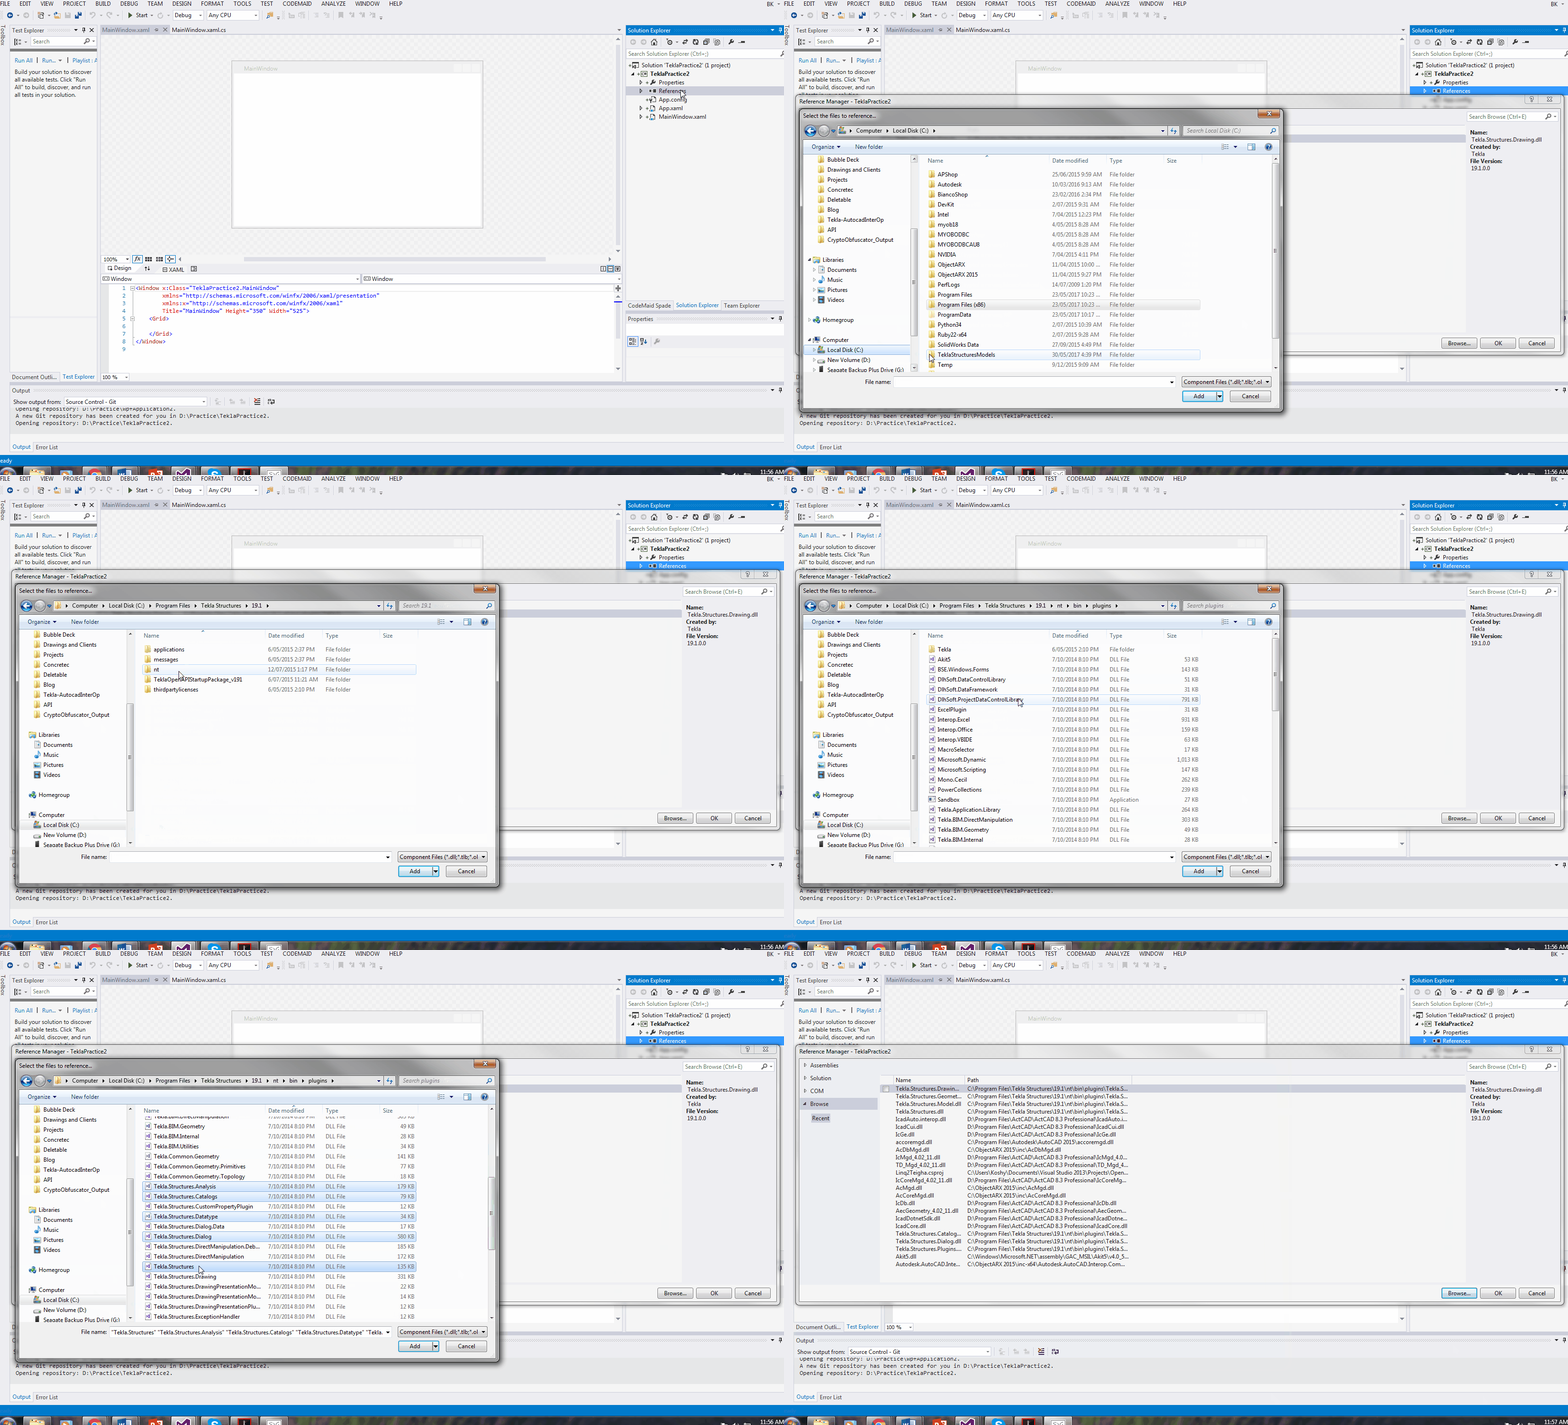
Shows how to add references to a Tekla API WPF Project.
Some common directives and aliases that I use:
I hope this post helps you!
We are revisiting a post I made earlier.
Here’s the problem. You are viewing a Tekla drawing. But you have no idea what you are looking at, or where it is. This macro will take you to that very assembly in the model. It’s actually quite handy. And here is the previous post where I made allusion to the facility (you’ll find a video demonstrating its use):
http://www.tek1.com.au/tekla-plug-in-2-viewing-an-assembly-in-the-model-from-an-assembly-drawing/
This post marks the release of the code which does the job! Enjoy!
When you first get into .net API programming – for AutoCAD plugins, you learn this cardinal rule: make sure the three AutoCAD dlls you refer to have copy local set to false.
Why exactly is this the case? I couldn’t find a better answer than the one offered by Fenton Webb. Here it is in full:
Take a second to look at the AcMgd.dll and AcDbMgd.dll in this folder…. Do you notice that they are much smaller than the ones in the AutoCAD installation folder? There is a big reason for this which is that since the 2010 release of the ObjectARX SDK, we have “liposuctioned” the managed reference DLL’s. I say “liposuctioned” because we literally sucked out the body of the code from each function in the assembly DLL. What we did to create these DLL’s was to actually ILDASM (MSIL disassemble) the original DLL’s, strip all the body code from them and then reassembled them using ILASM (MSIL assembler). OK, now why on earth would we do that, right? Let me explain: the WPF UI designer (and indeed the WinForms designer) in Visual Studio is pretty cool in that it does a great job of showing the design of the UI on screen obviously. The problem is that the designer does like a half-hearted parse of the code behind that controls the UI in order to work out things like how it’s displayed for instance, which when we reference the external AutoCAD managed DLL’s can cause unresolved dependency errors and thus stop the VS Designer from working properly. These dependency errors are caused by the fact that the ac*mgd.dll’s depend on acad.exe which of course the VS Designer finds impossible to load in order to resolve the dependencies. By using the “liposuctioned” assemblies in your project, all of the object definitions are in place to resolve designer parsing issues. You’ll be glad to hear that it still compiles, and loads too! Just as long as you keep the Reference property “Copy Local” set to false for each DLL.
(Taken from Fenton’s WPF AutoDesk University course notes).
#Tekla API #Autocad API #DOT NET