This page show cases some of the Steel Detailing projectgs completed in Melbourne, Sydney, WA, Brisbane Tek1 has completed
Caladenia Court in Australia.
Tek1 has successfully completed a commercial project for a Caladenia Court in Australia.
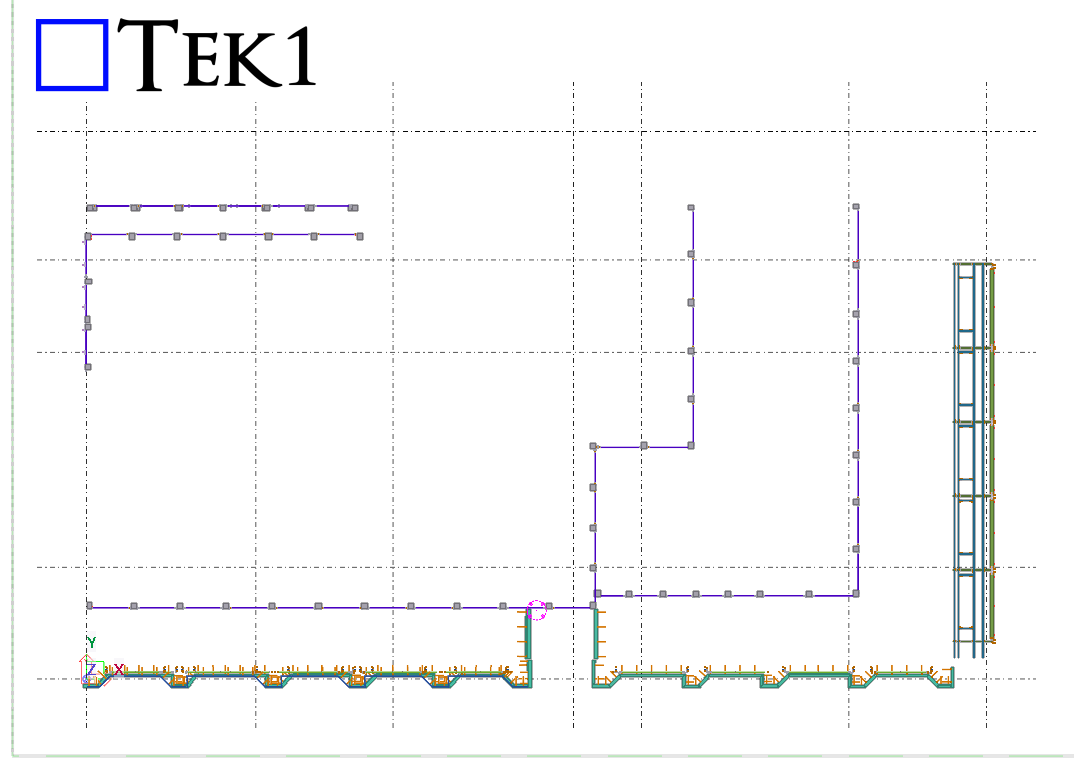
The scope of work involves providing the Stair & the Awning steels. we completed this job in a day without any hitch.
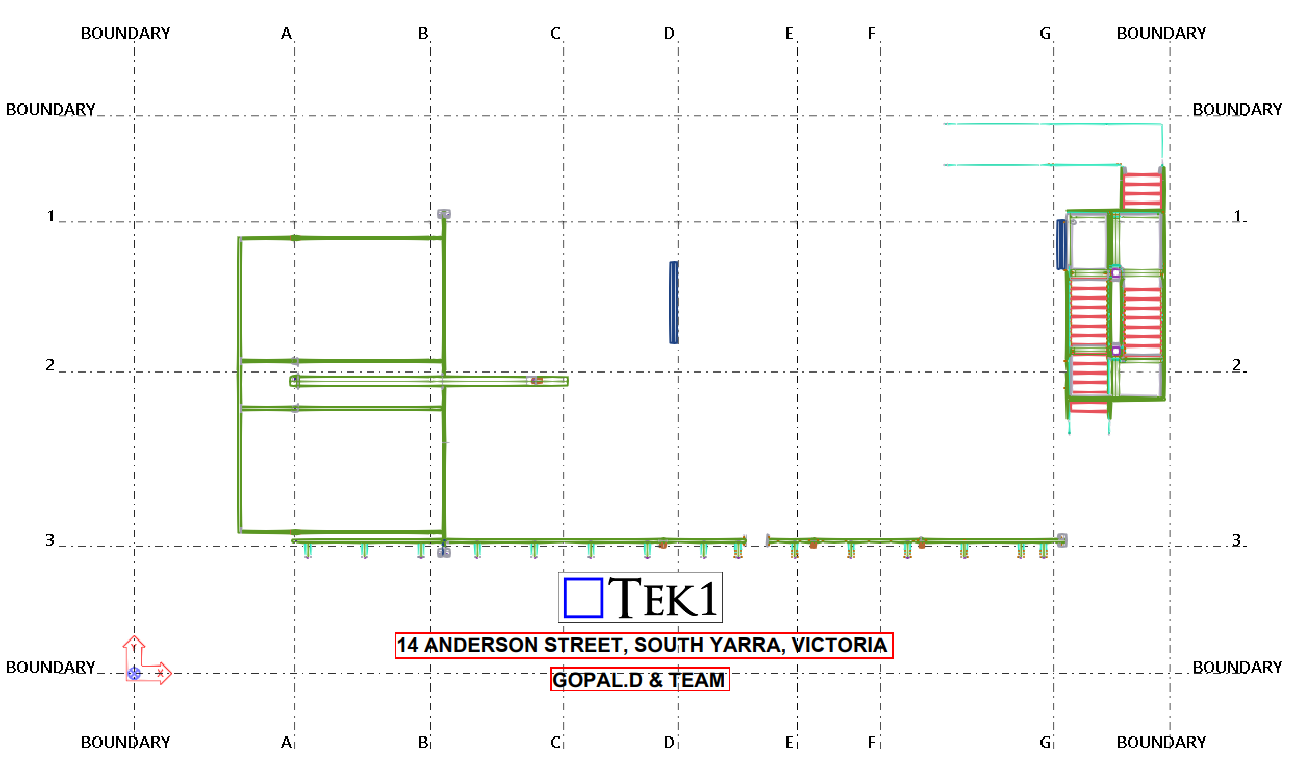
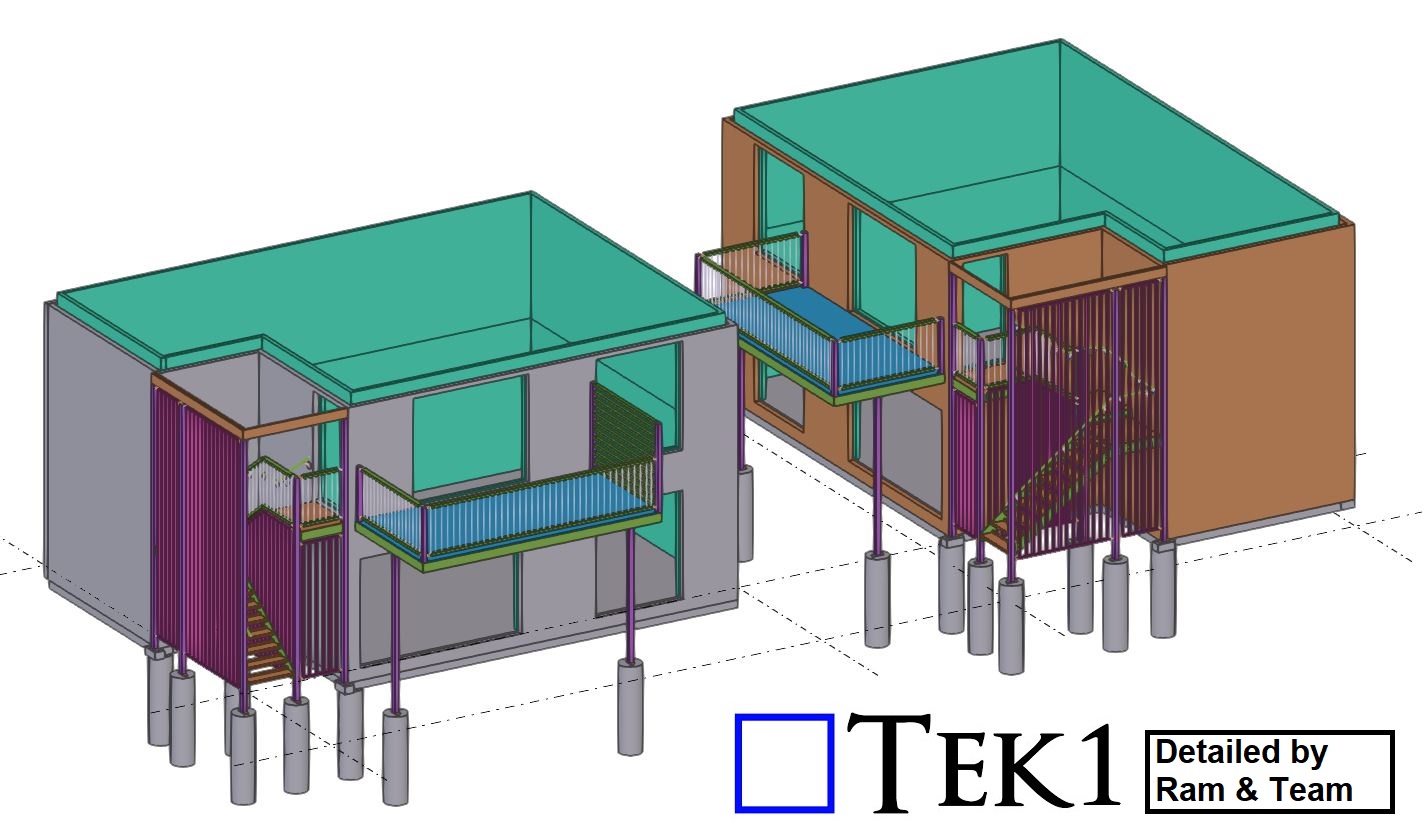
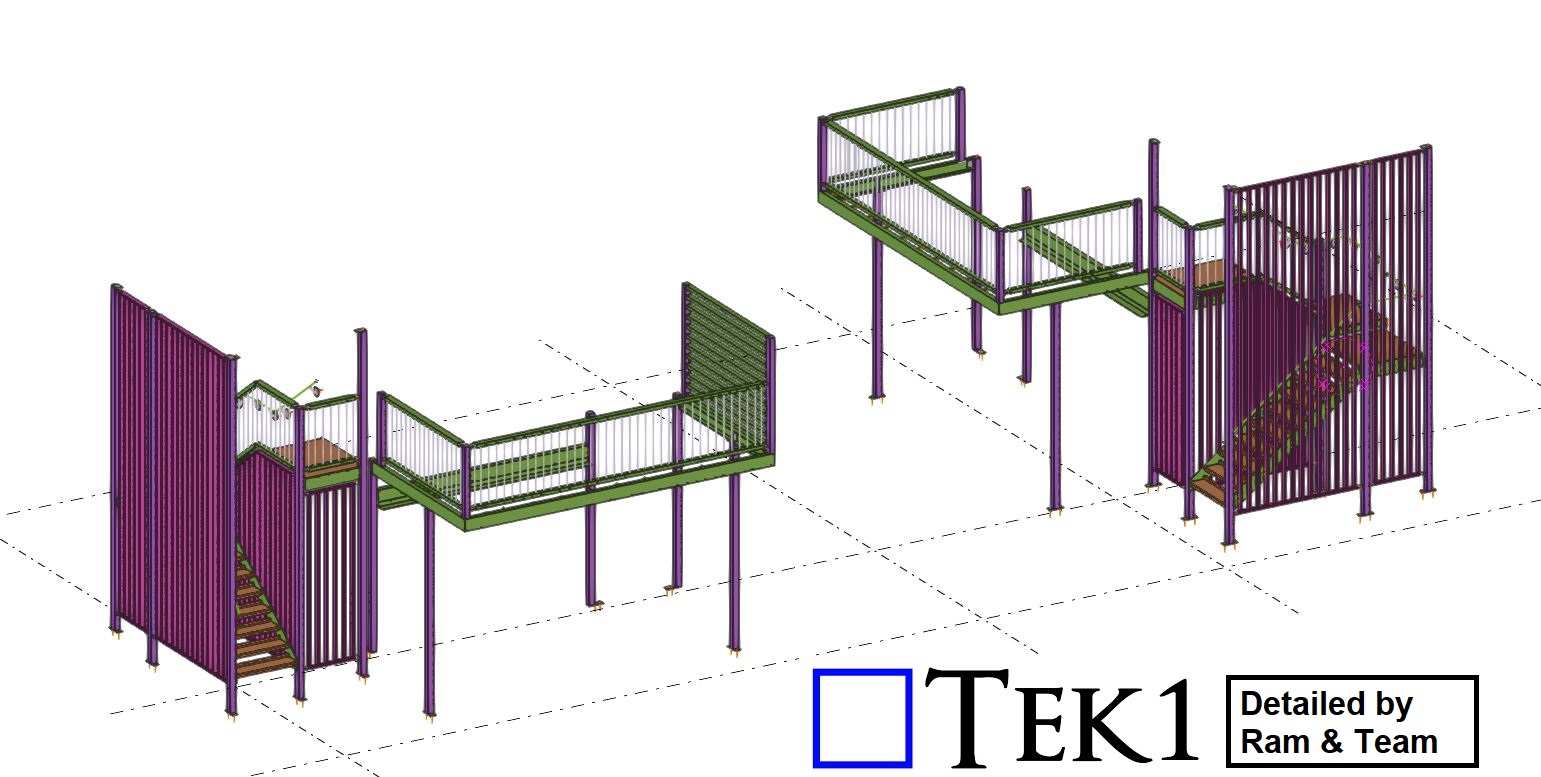
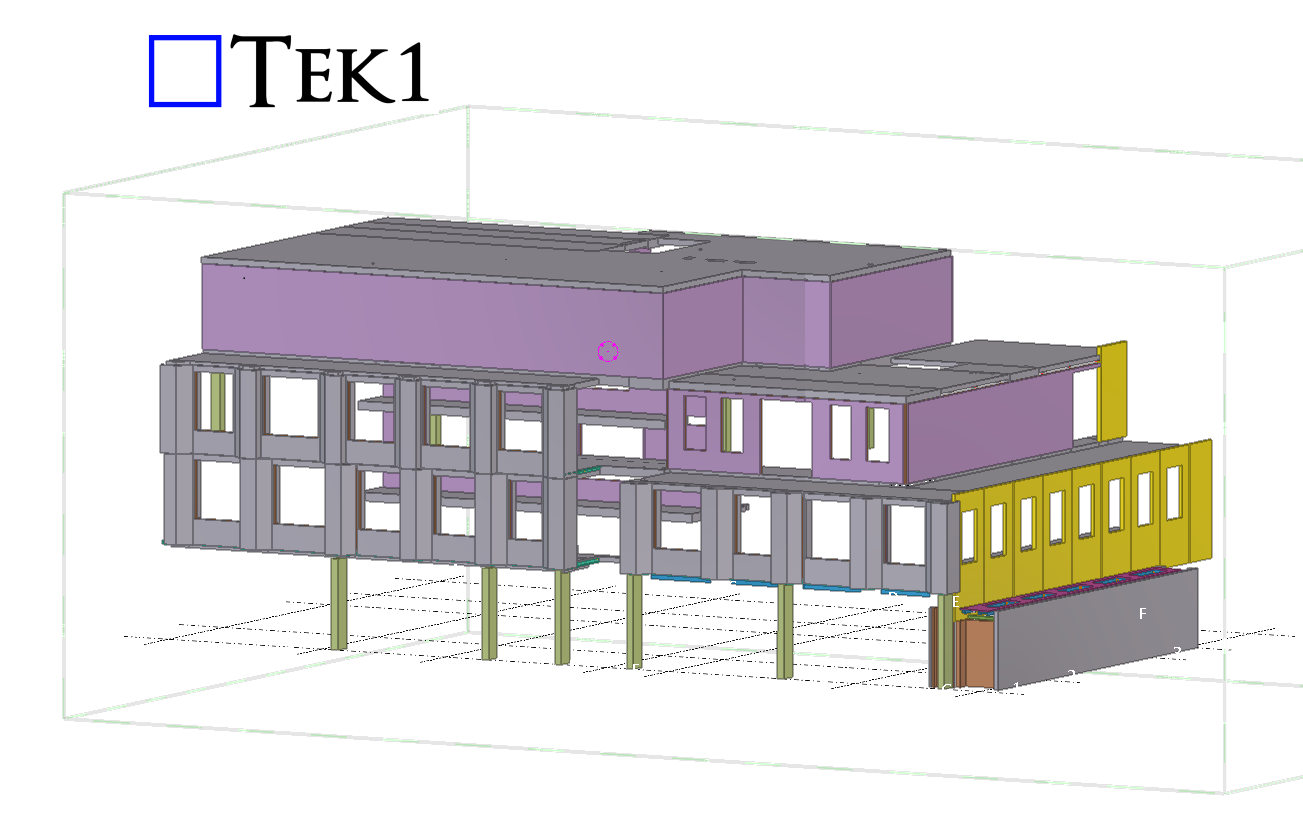
Tek1 has successfully completed a commercial project for a reputable organization in Australia.
The scope of work involves providing support for the cladding walls and awning roof. Due to frequent changes in the structural design, we have coordinated directly with the structural designer to update our model accordingly. This approach minimizes variation costs for both the client and the designer.
We held numerous meetings with the client to ensure there would be no mistakes during the installation process. As expected, the installation was carried out without any issues.
The client is highly satisfied with our work.

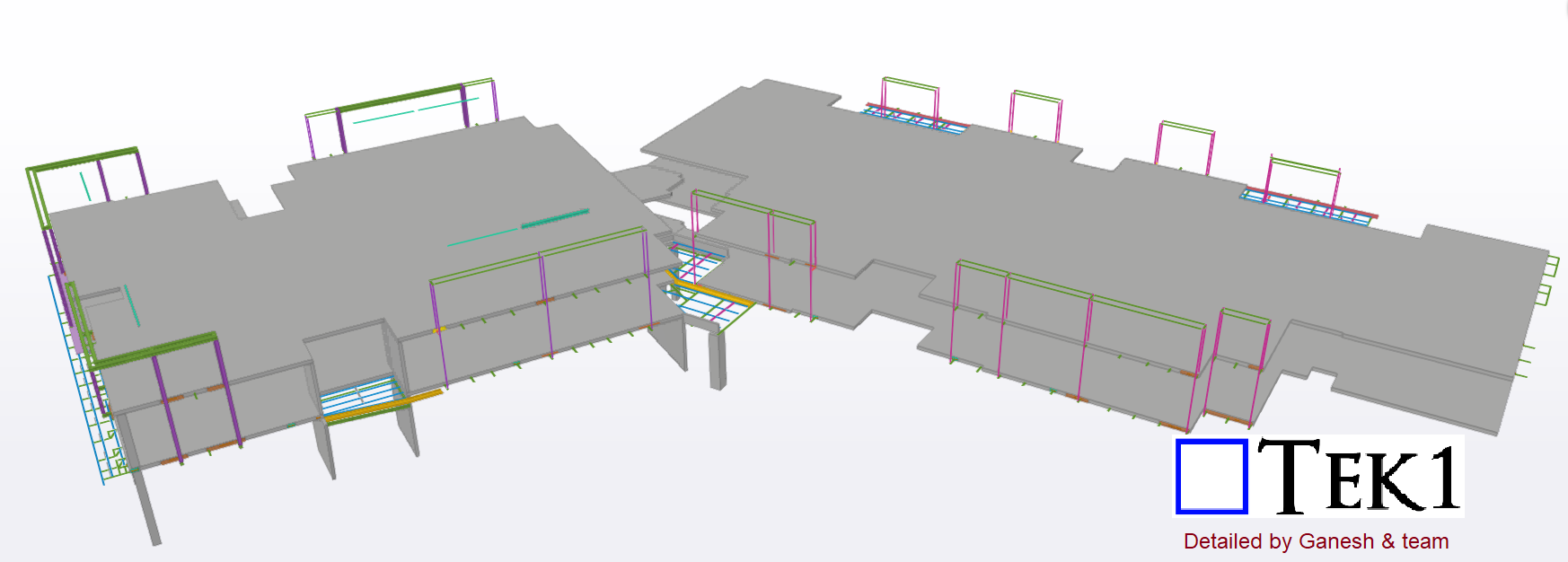
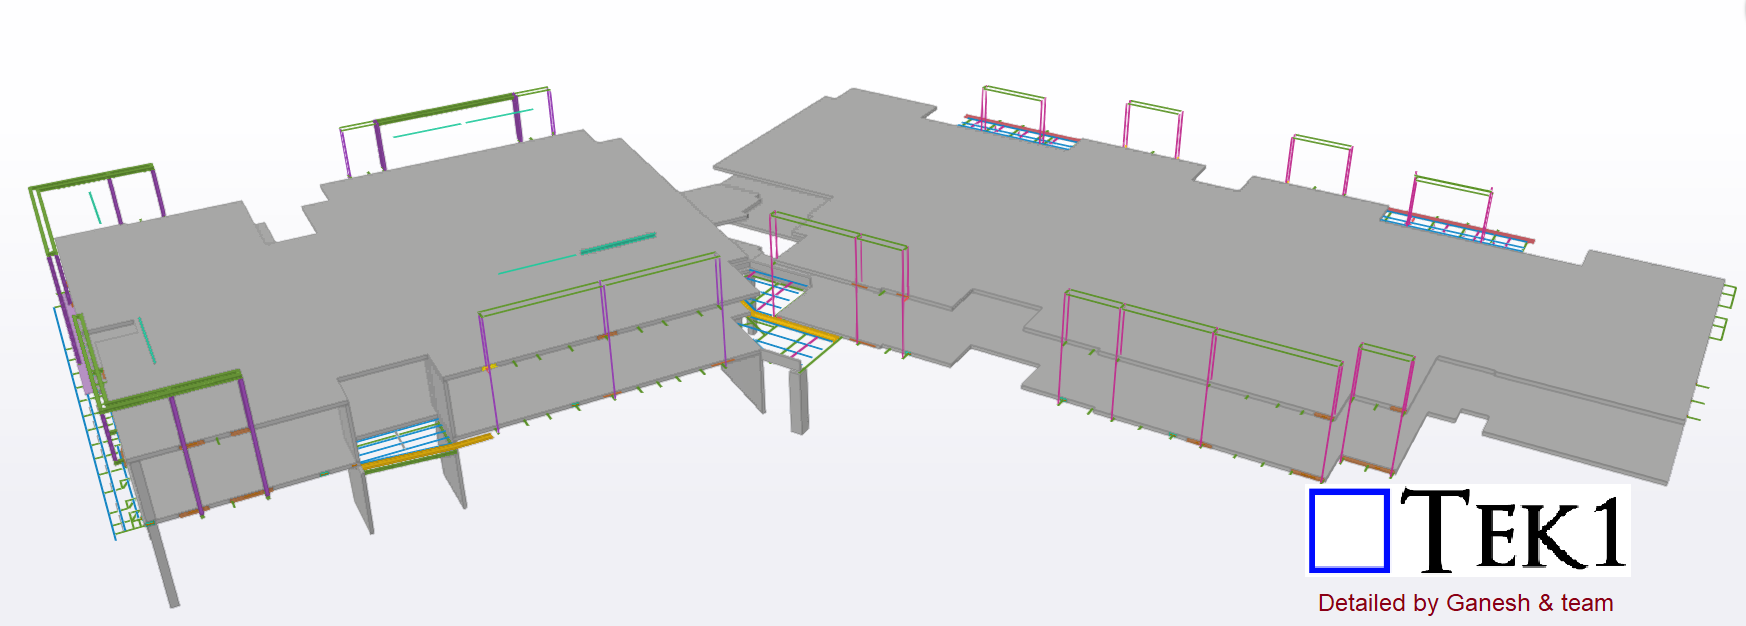
This is a Eastbourne. TEK1 Successfully done this job by one time detailing without any hitch.
Some of the Model Snaps
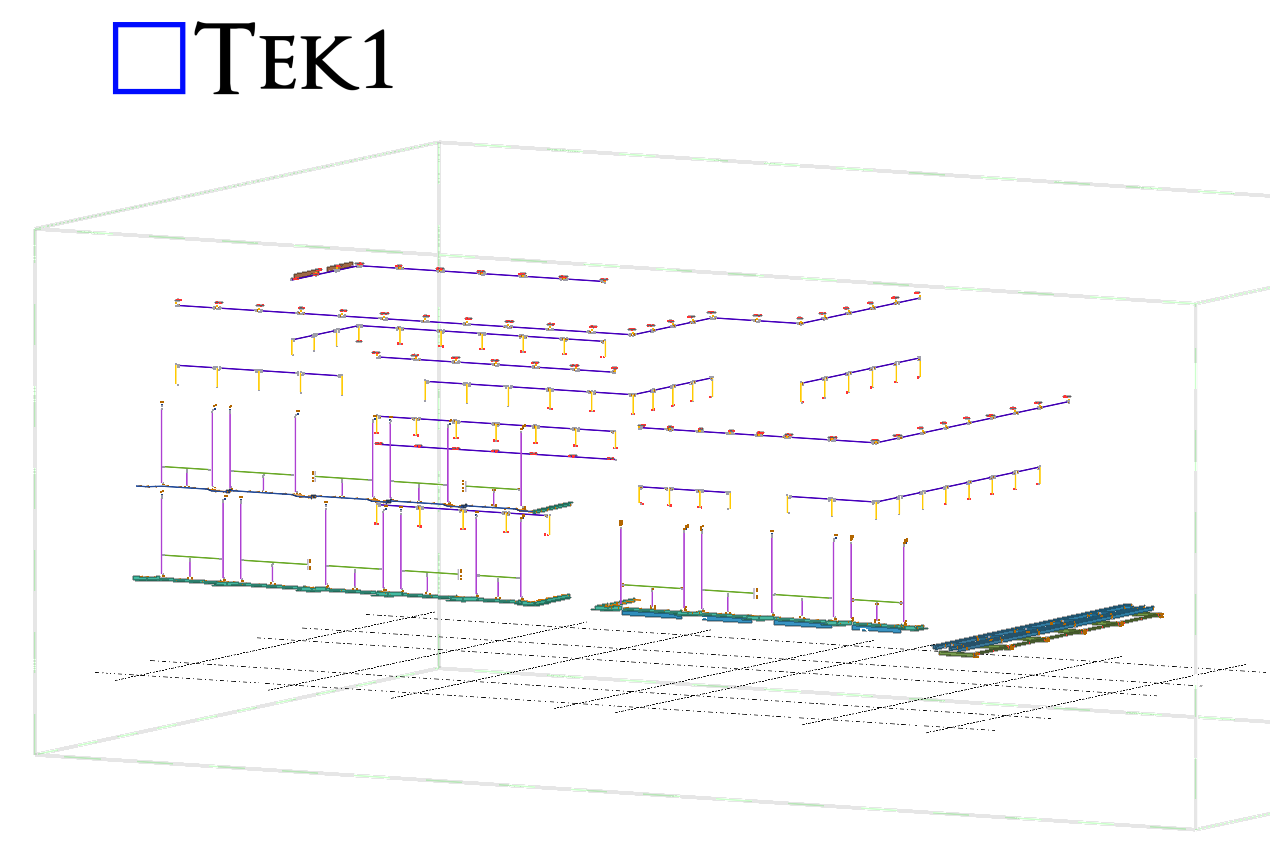
Detailed by Vignesh & Santhakumar
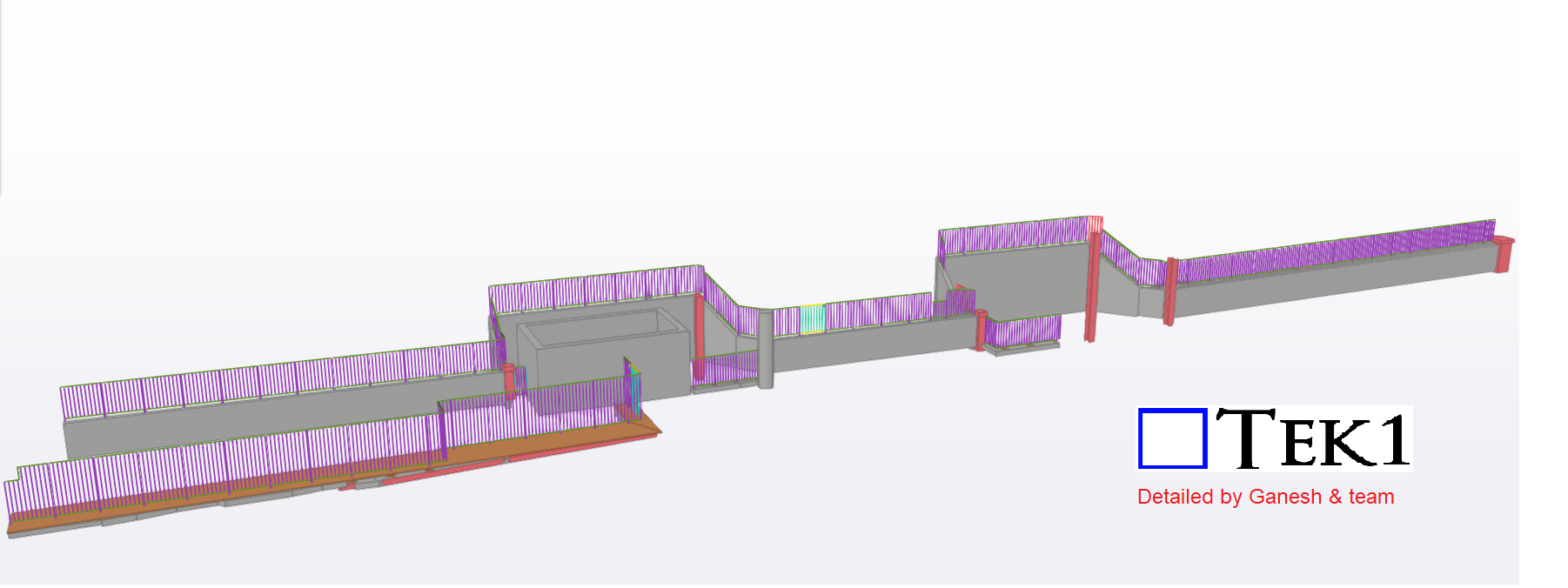
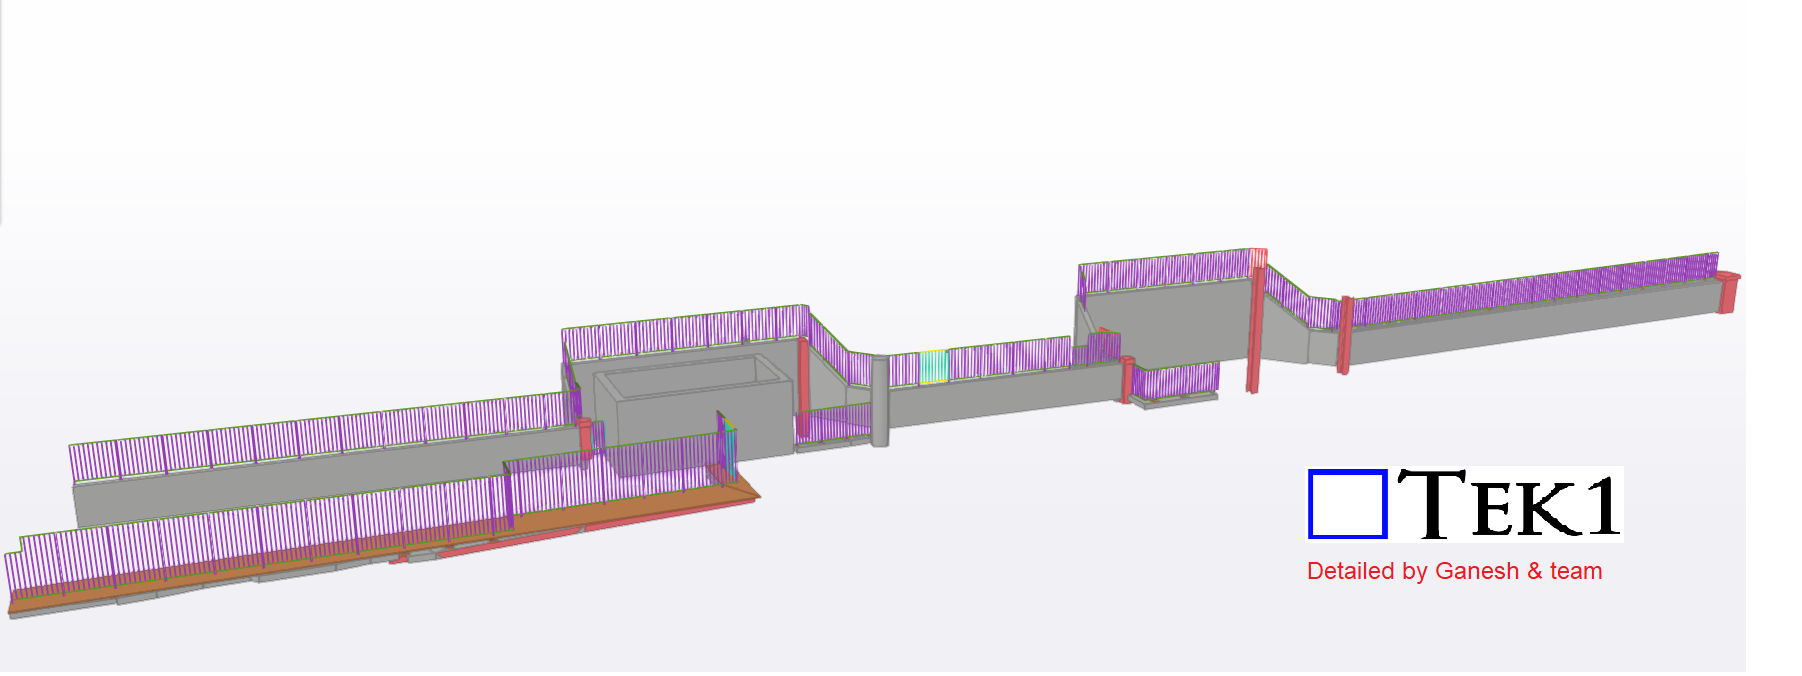
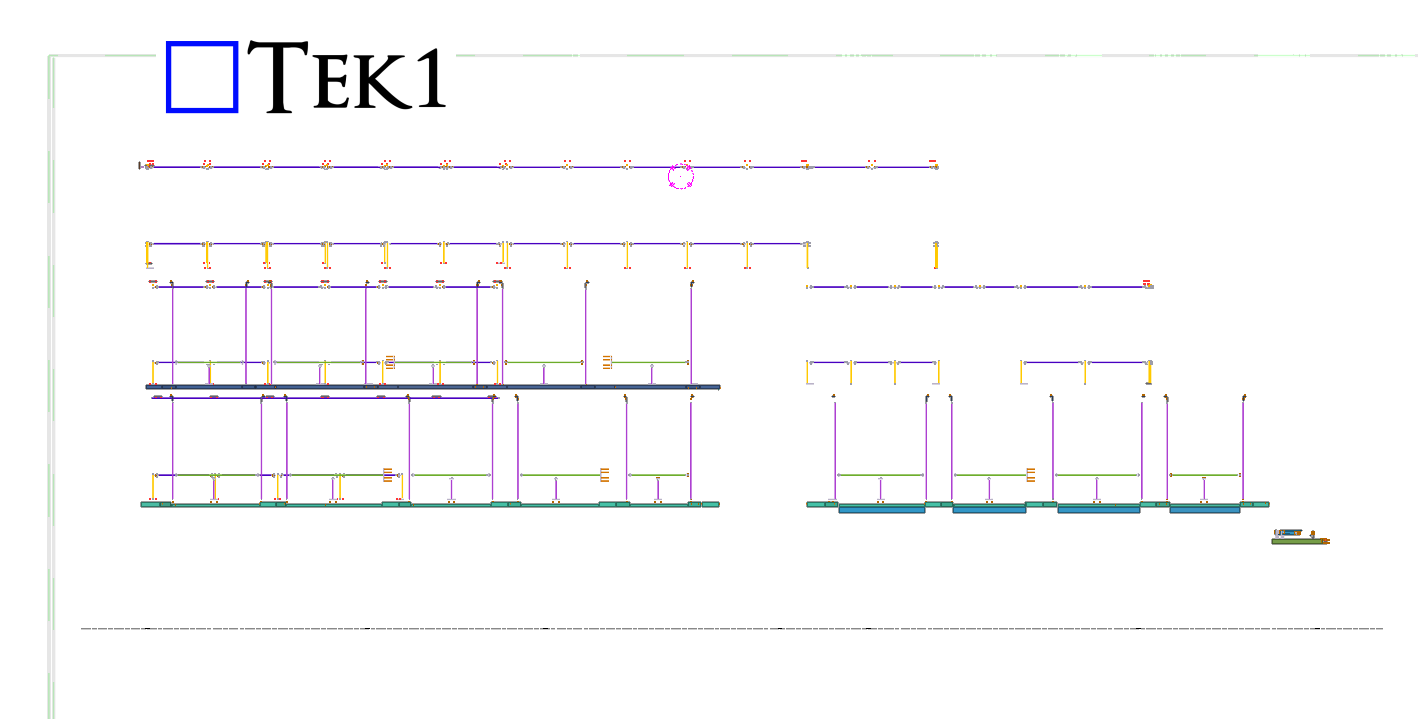
Tek1 has successfully completed a commercial project for a reputable organization in Australia.
The scope of work involved providing fencing for the station. The design drawings do not include dimensions for the fence slope and length. Therefore, we had to coordinate with site conditions to provide proper support for the fence. The fence doesn’t follow a straight line; instead, it follows the slope of the terrain, which was not indicated in the design drawings.
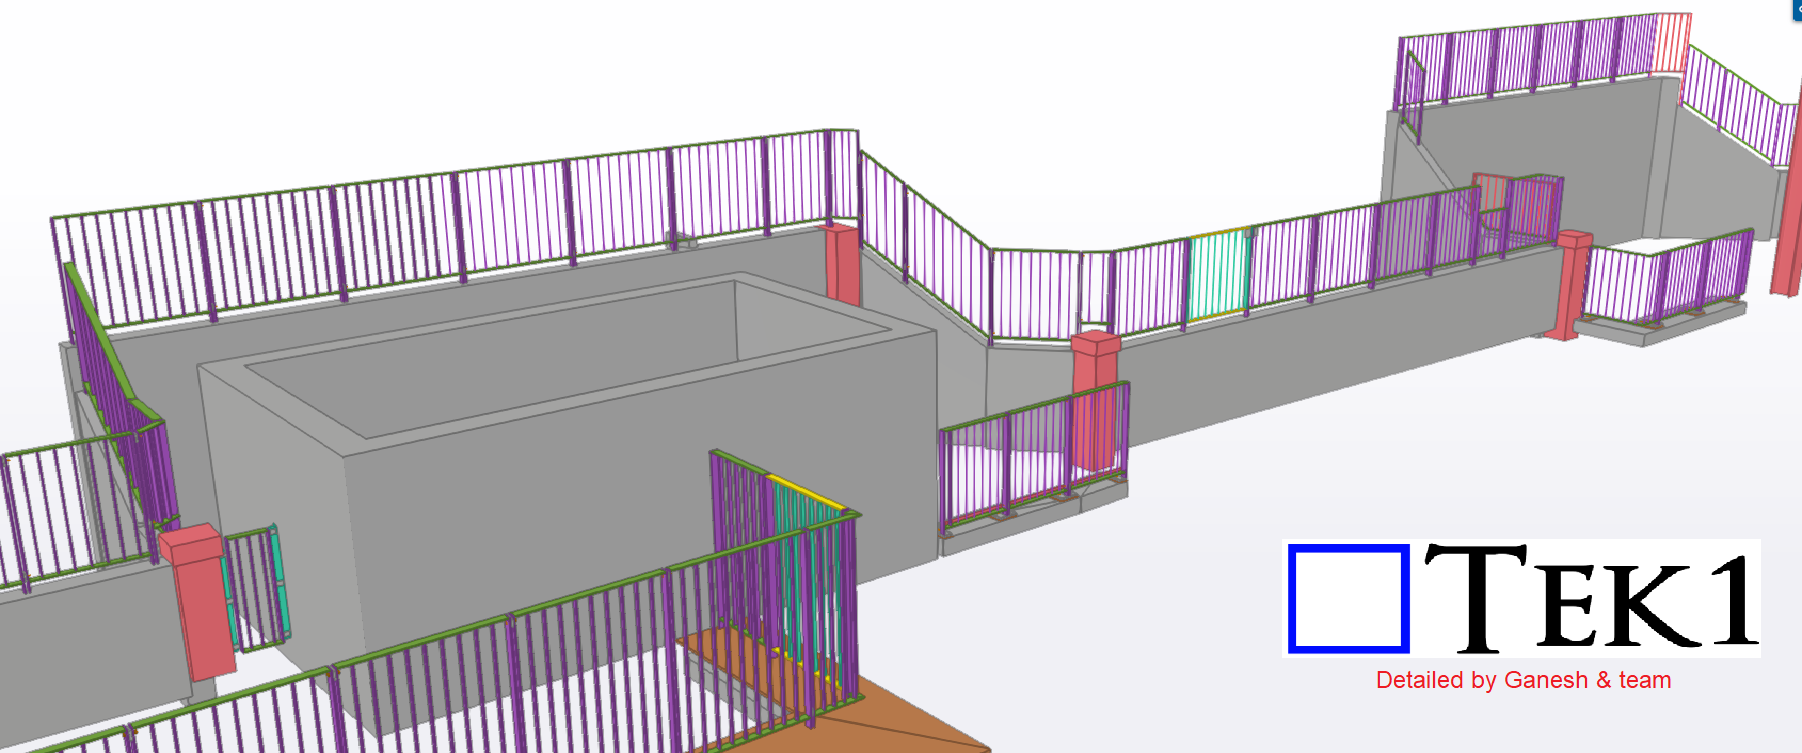
To address this, we modeled the fences based on site pictures and sketch drawings provided by the surveyor, which presented a significant challenge in creating accurate shop drawings.
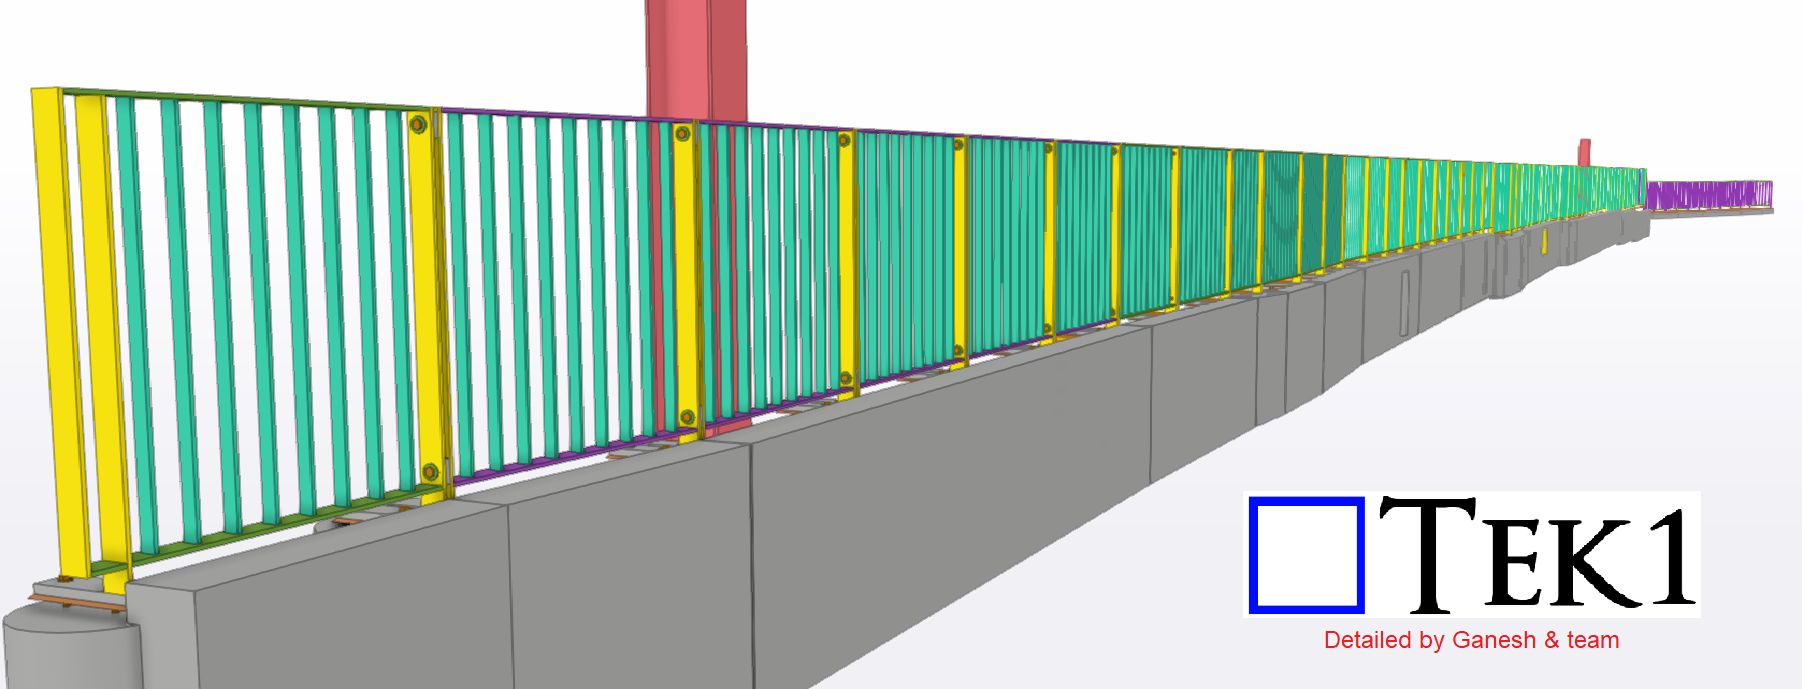

We held numerous meetings with the client to ensure there would be no mistakes during the installation process. As expected, the installation was carried out without any issues.
The client is highly satisfied with our work.
Please ensure that the firm’s name is on the Title Sheet. See details below.
Drawings should not be sent without our firm’s name on it.
NO EXCPETIONS.
I will hold to account anyone who ignores or violates this memo.
Why?
We will negotiate with contractors to ensure our name goes on the drawing.
Our Name is: Tek1 Pty Ltd.
Address: 35 Bradstreet Road, Mount Waverley, 3149.
Phone: +61 (0)3 9560 6397, Mobile: +61 0425 791 837
For instance, when we intend to include this cloud and text markup in all drawings, our current process involves adding a cloud followed by a text box. However, this repetitive action for each drawing proves to be extremely time-consuming. So, I’m going to share a trick with you (which Tekla already has) as an alternative solution.
 |
What to do:
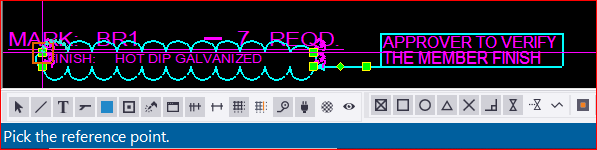
* First, you need to create a markup exactly how you want it.
* Next, select the elements that you want to be included in the markup. Be careful when selecting, as even a line that is selected will be included.
 |
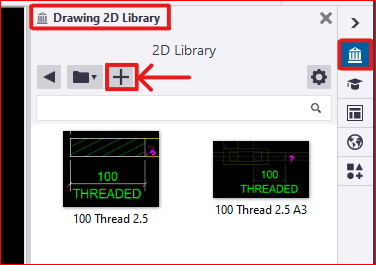
* In the Tekla drawing workspace, you’ll find the ‘2D Library’ option. Open it and to add a new detail, click the plus icon
|
* Next, you need to select a reference point near the markup. This reference point will serve as the future insertion point for your detail in every drawing
 |
* The next step is to select an area that will serve as your reference image, appearing like a thumbnail. after that the detail will be created and the the library looks like this
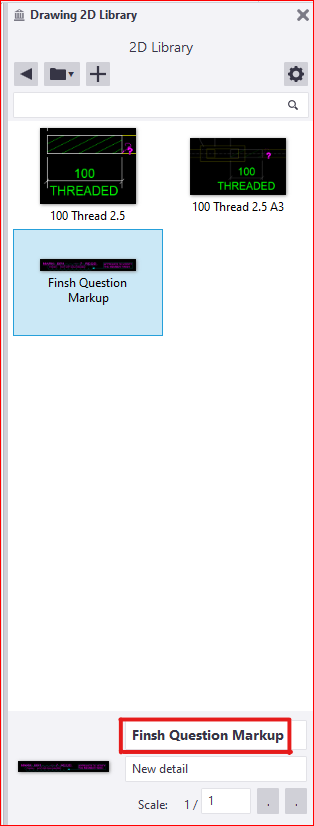 |
* There are others options available to edit these existing details as well. Feel free to explore these options; you won’t need additional tips for that |
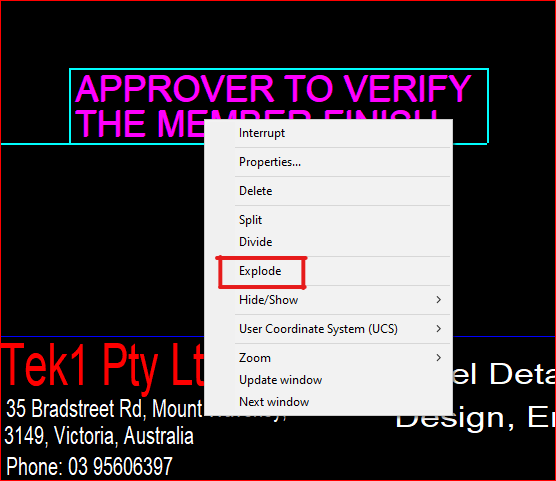
* Finally, if you wish to insert this into another drawing, you just need to select and pick the insertion point in your drawing. The chosen detail insertion point will determine its placement. ( for example, I chose a location where I didn’t want the detail to appear.. 🙂 )

* You can select and then right-click the mouse to choose the “explode” option, allowing you to select each individual element within the detail markup
 |
* We have additional blog posts that explain various tips and tricks in Tekla. Feel free to explore those resources as well
* If you have any doubts you can mail to koshy@tek1.co.au * Blog by – Anson.S |
| ****************** linkedin/anson.suhesh ******************** |

Communication is crucial between clients and detailers, but there’s an issue with conveying the current project status to clients using text. Trimble offers an excellent solution by enabling the sharing of the IFC model with clients. This allows clients to visualize the actual model alongside reference models, erection drawings, assembly drawings, and single-part drawings
–> You will receive a link from us indicating the status, or you can obtain the link from the status page of each project in quote app
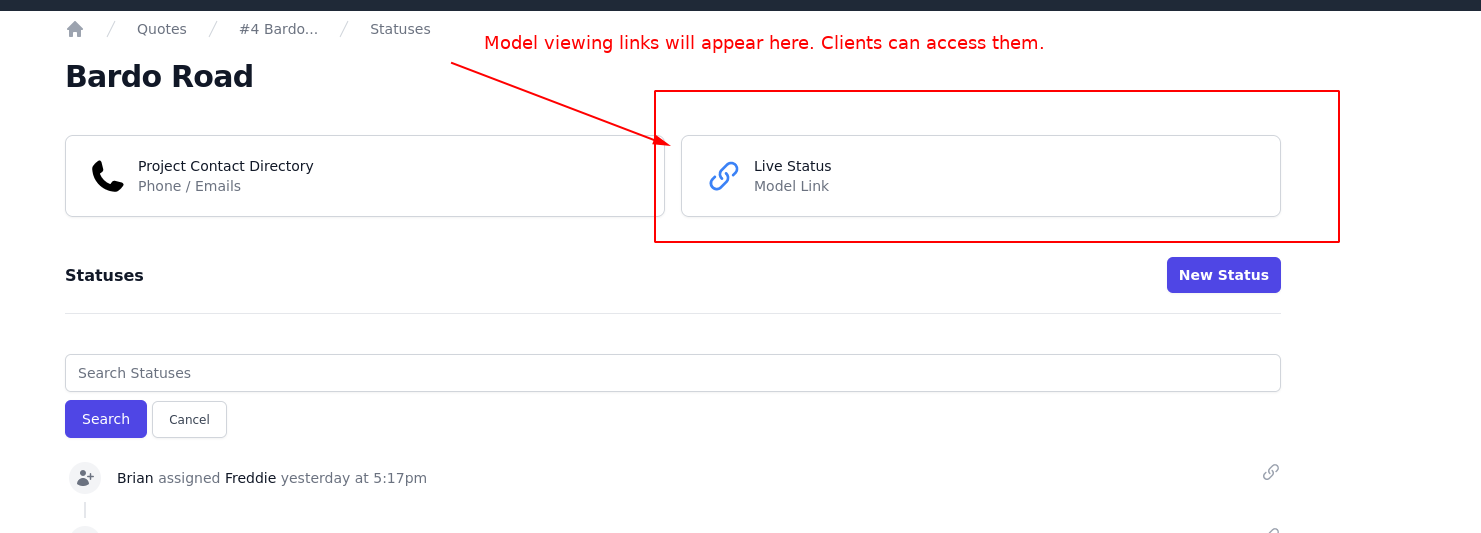
–> Retrieve the link and open it in a window. The model will gradually appear along with the attached .dwg files or 3D models, resulting in a page that resembles the following
–> You can toggle the eye symbol to view the model. Some useful options available to workaround the model
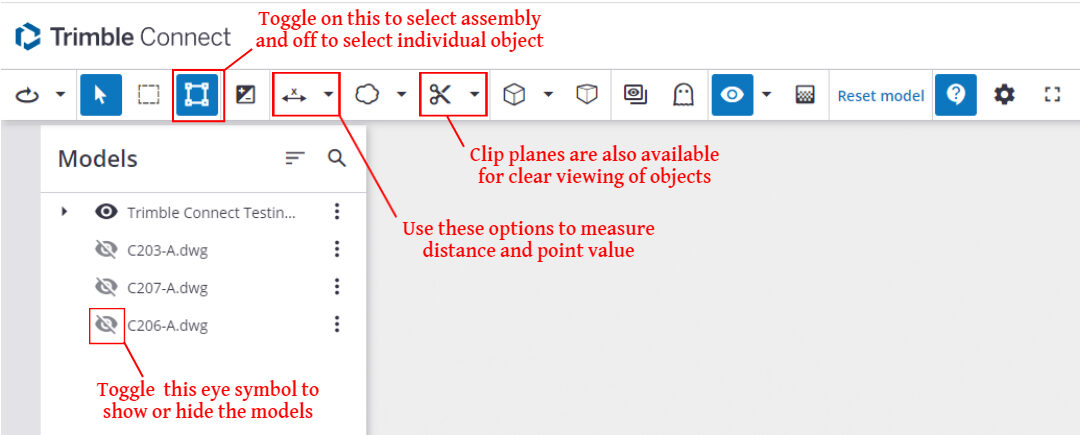
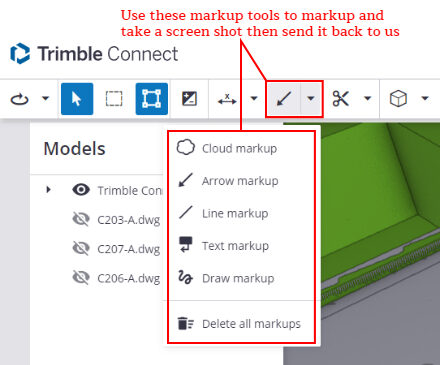
–> If you want to mark anything and report to us then it can be done easily using the markup tools available the work page
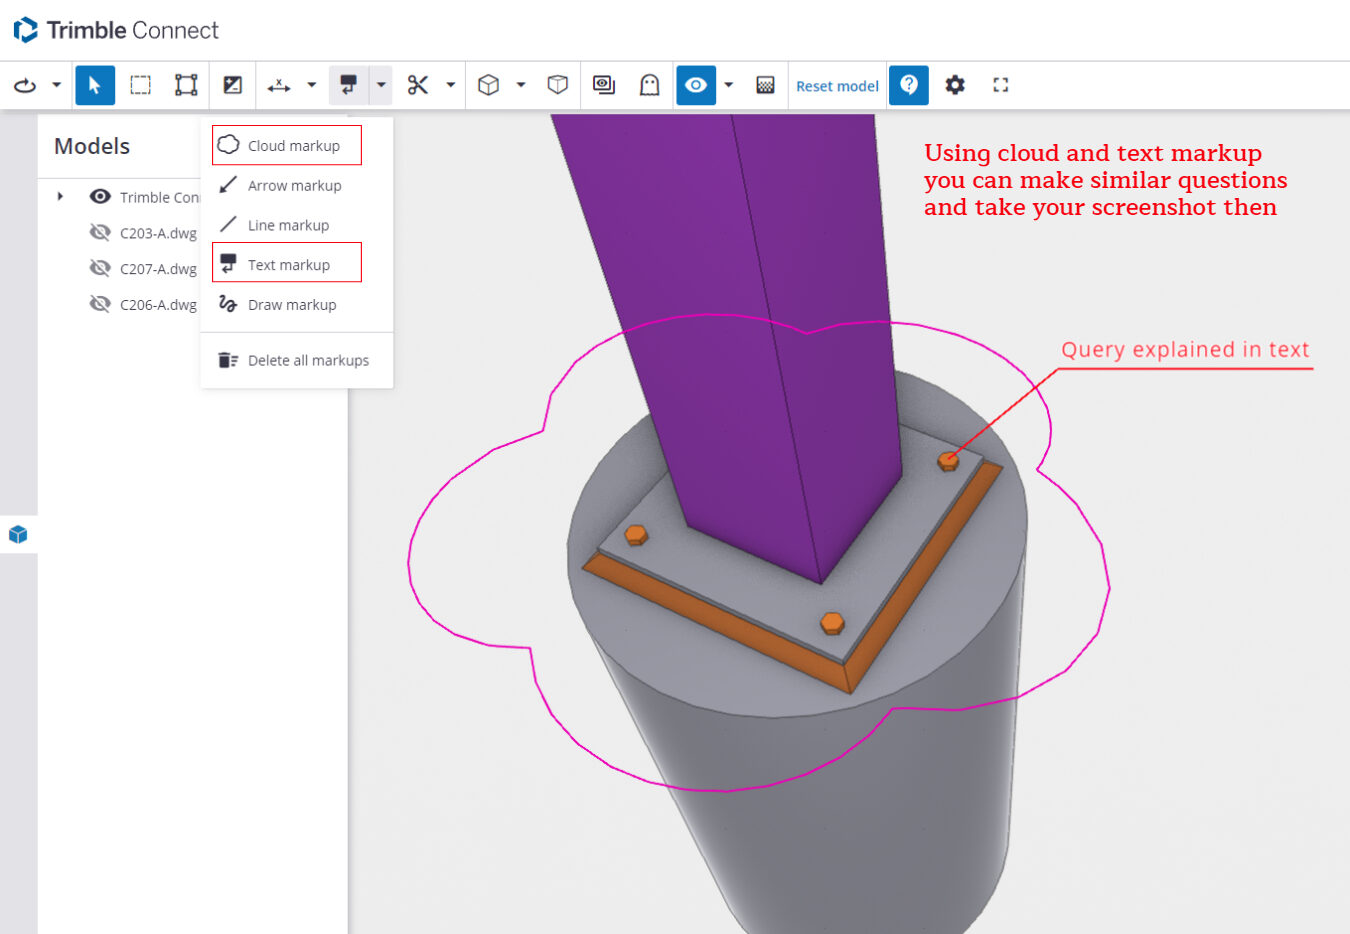
–> Using these clients can easily get to know the current status of a project the 3D space and can give any queries
If you have any doubts please mail to koshy@tek1.com.au
Blog by,
Anson.S