When designing a staircase, one of the most overlooked aspects is the correct distribution of risers, especially when integrating a mid-landing with a falling finish.
Understanding the Mid-Landing Design:
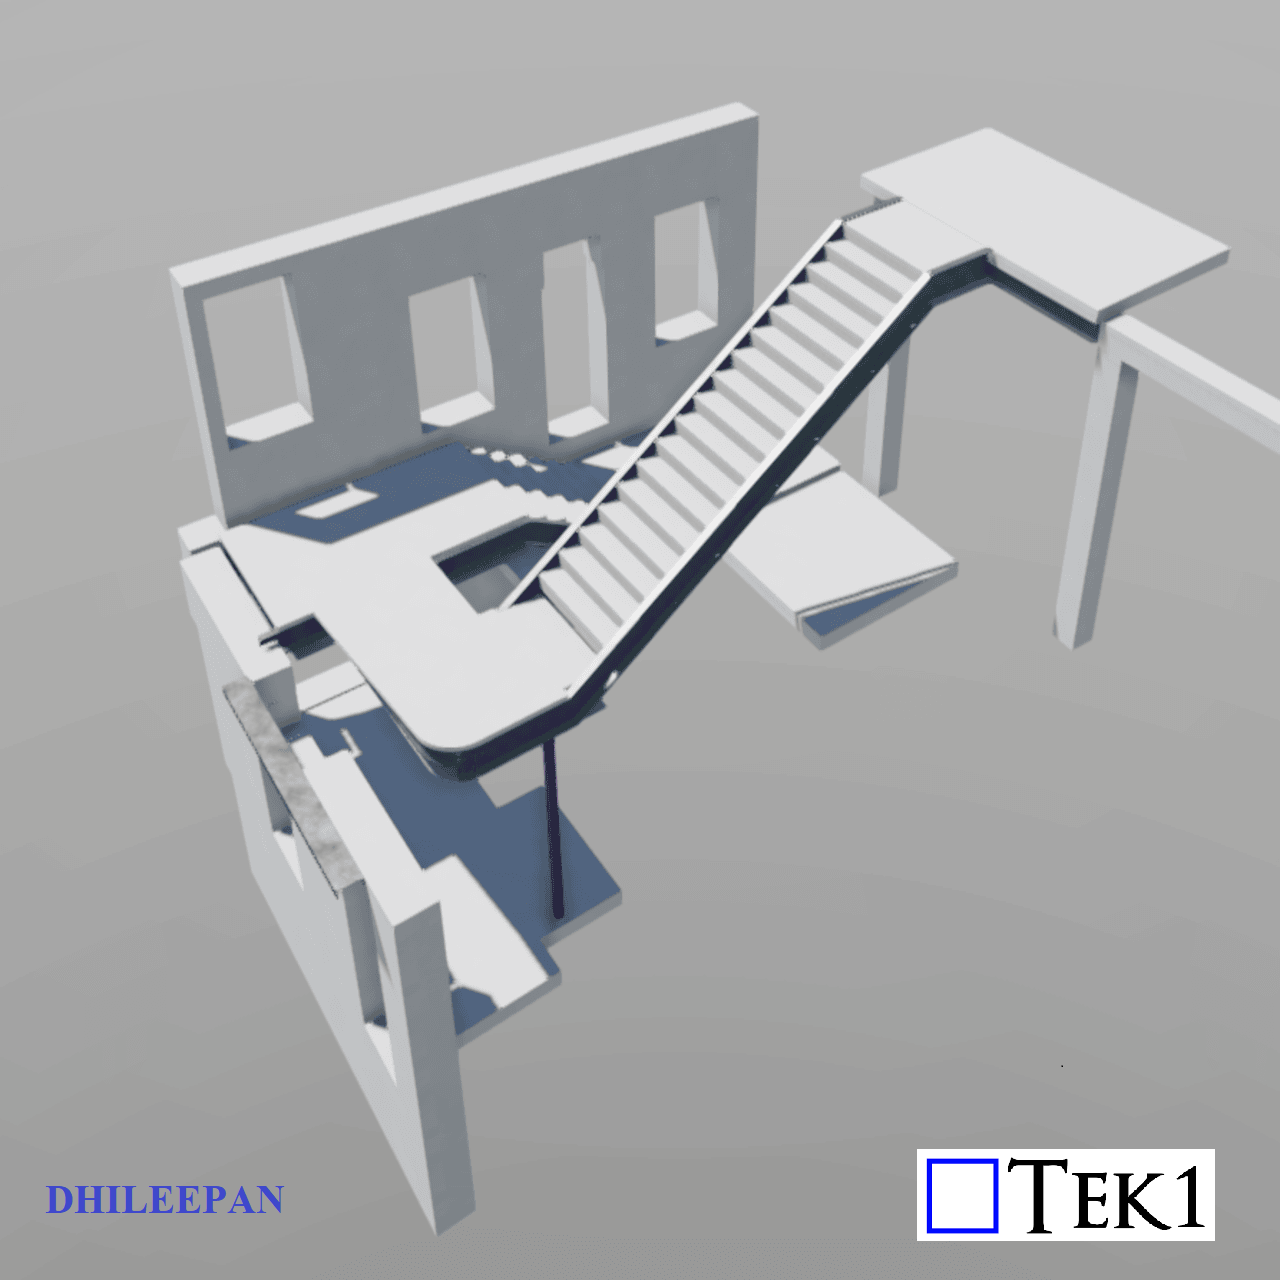
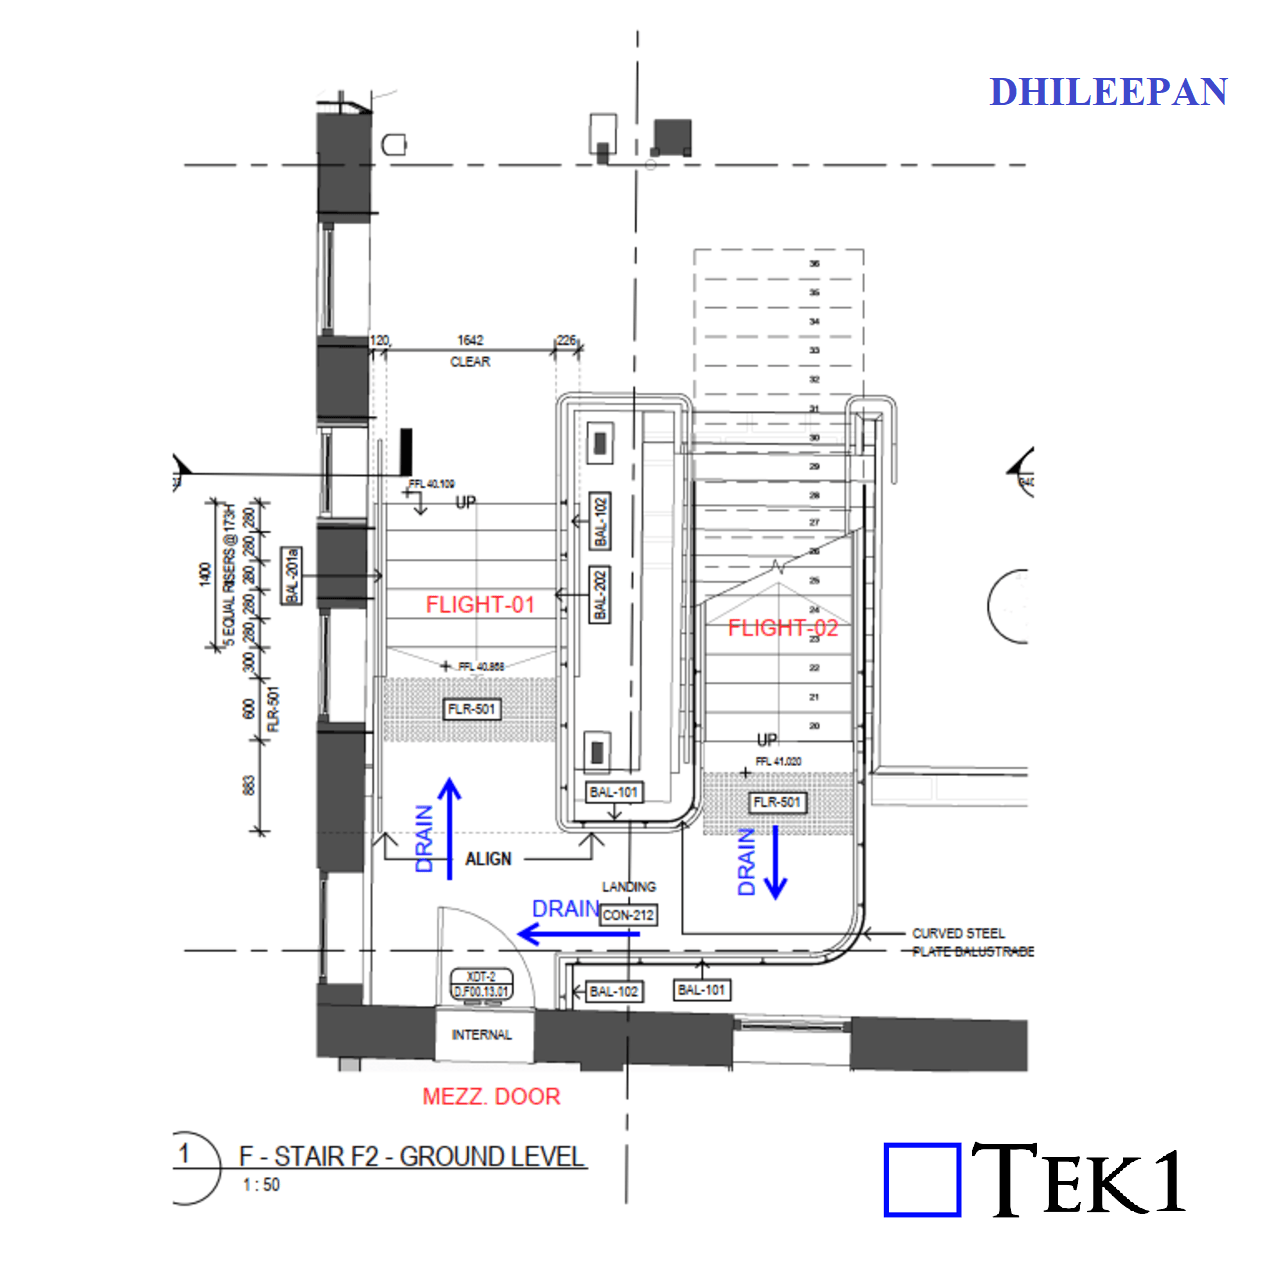
In this case, the staircase consists of two flights turning 180° with a mid-landing. The purpose of this stair is not only to provide access between Ground Floor (GF) and Level-01 but also to facilitate movement to the mezzanine level from the mid-landing. The design for the mid-landing incorporates a 10mm plate with a 50mm paver on top. However, an important requirement was added: allowing for a fall in the paver to prevent water stagnation. We received an instruction to keep the landing RL 20mm lower than the door near the mezzanine level to incorporate falls in the paver.
Common Mistake in Flight-02 Design:
For a steel detailer, just paver RL which is 20 mm below the door level & 50mm paver thickness is enough to place the steel below. The sloping surface in the paver will be taken by some other parties. But the key thing to notice here is, the slope continues to the bottom of flight-02 as well. At the end of Flight-01, the paver thickness remains 50mm. Near the mezzanine door, the thickness increases to 70mm (50mm + 20mm fall). A frequent error occurs when designing Flight-02. Many assume the risers should be evenly divided between Level-01 FFL (Finished Floor Level) and the RL of the mid-landing, neglecting the impact of the paver thickness variation.
To achieve the correct stair profile:
The mid-landing RL should be set based on the increased paver thickness near the flight-02. Flight-02 risers should be distributed between Level-01 FFL and the actual top surface of the paver (which is 70mm at the bottom of Flight-02, not 50mm). Else, the first riser in the flight-02 will be comparatively smaller than the rest of the risers.
Key Takeaways for Stair Detailing:
Account for varying thickness: Do not assume uniform paver thickness; adjust accordingly at different points.
Correct riser distribution: Ensure the risers of the second flight are calculated based on the actual mid-landing RL, factoring in paver thickness variations.
Clarify detailing instructions: Steel detailers do not need to model the paver exactly but must ensure the mid-landing RL is accurately set.
By paying close attention to these details, staircases can be designed more efficiently, reducing costly rework and ensuring a smooth construction process. Proper coordination between architectural and structural teams is essential to avoid misalignment and achieve a seamless build.
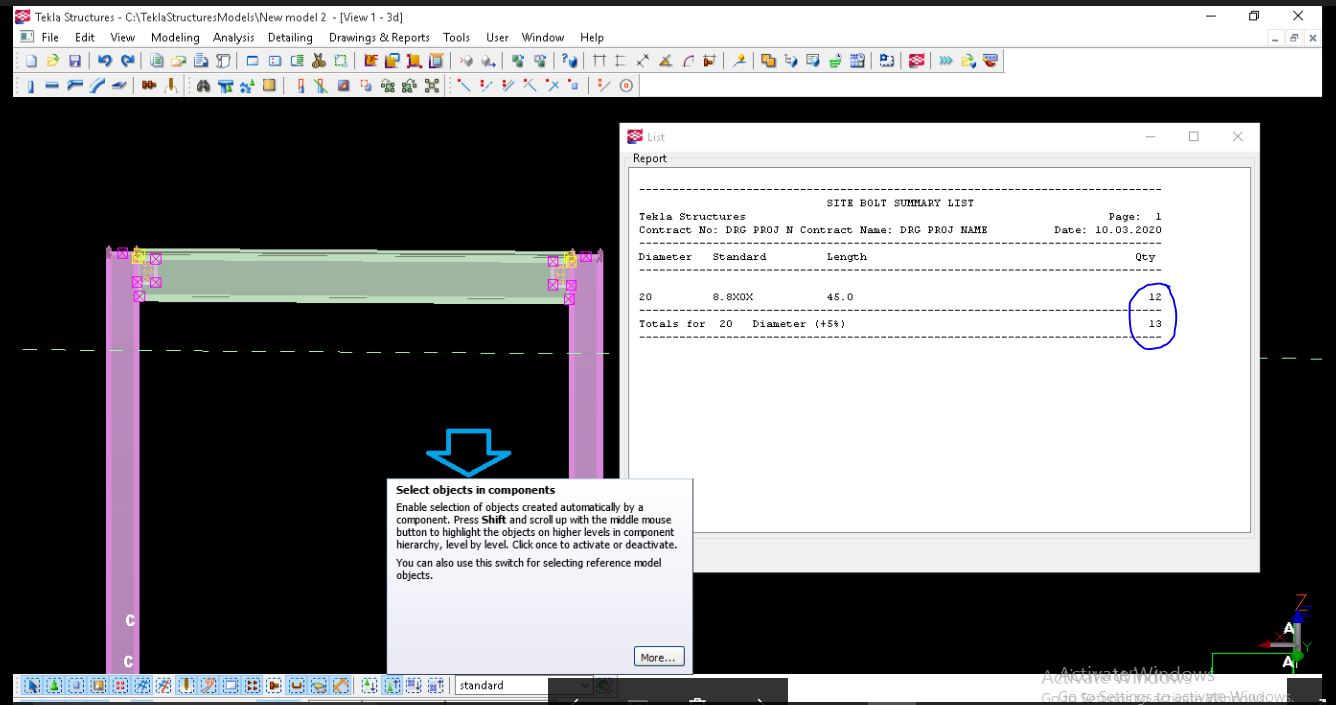
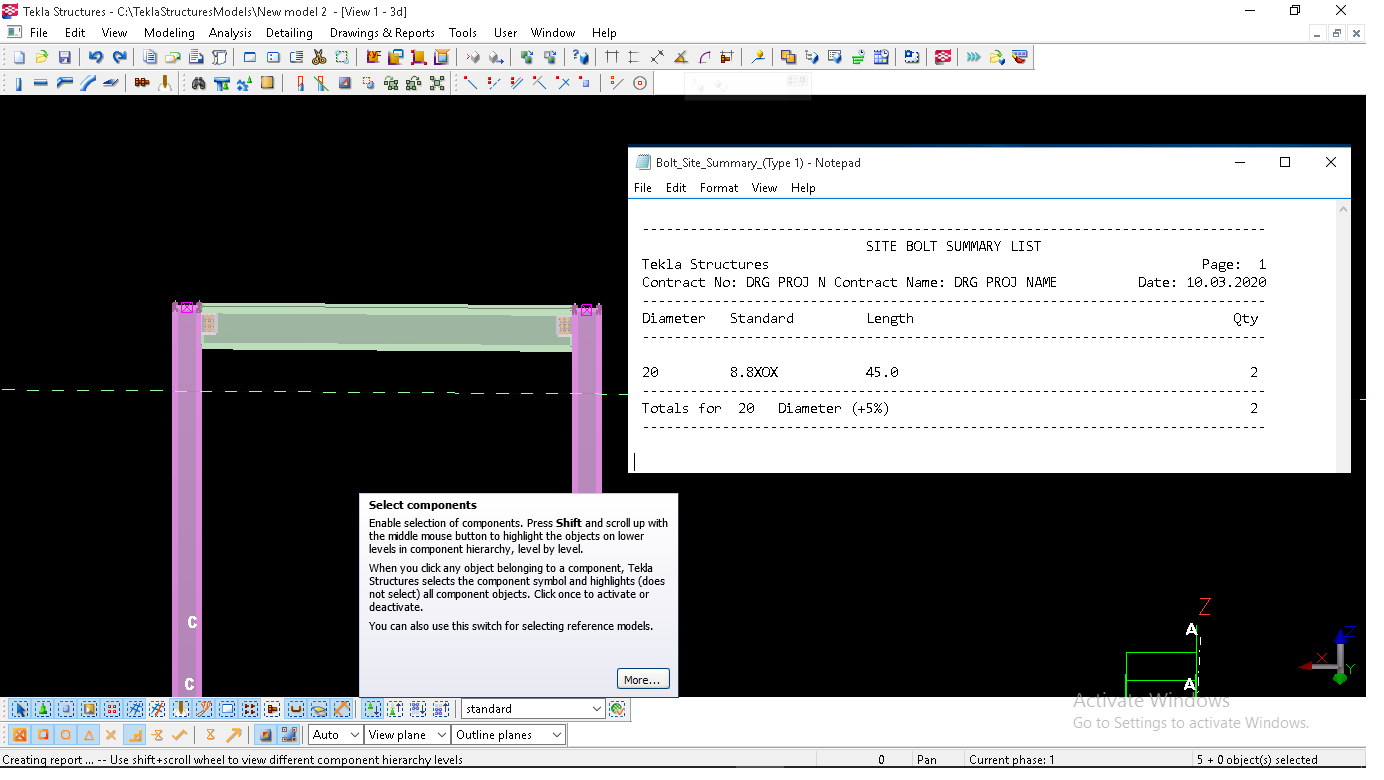
While creating reports in Tekla Always ensure that selection men must be in objects selection. See below snaps
OBJECTS SELECTION
COMPONENT SELECTION
Above snaps clearly states reports must be taken while the members selected in objects selection option is turned on. Otherwise the report quantity will be less than the actual quantity.