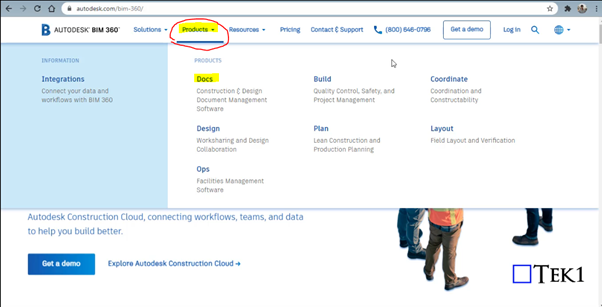
Why Bim 360 Docs?
Bim 360 is Construction project management software created by Autodesk. The main intent of using Bim 360 Docs will resolve the following thing
- The project status with its workflow with project time frame can be easily tracked by every consultant and organization assigned.
- It helps to access the different file formats directly online instead of installing the particular software required
- The error can be sorted and make the decision handling by solving the RFI raised to the concerned consultant which can be reviewed and easily sorted by accessing the file / Model directly
- Anytime and anywhere access can be easily attained for the projects and their files
- The mark-ups review provided by the consultant for the submitted documents can be reviewed and fixed easily
- The file can be Access easily frim anytime and anywhere just by login to the Bim 360 in Browser or in mobile
- It will make it simple in the documentation handling especially on the revised drawings and tracking the previous submittals history also.
Steps for Creating Project in Bim 360 Docs (Before these steps, log in to the Autodesk account you created in the Bim 360 and select the docs. Click “try now” after that you will see the images shown below
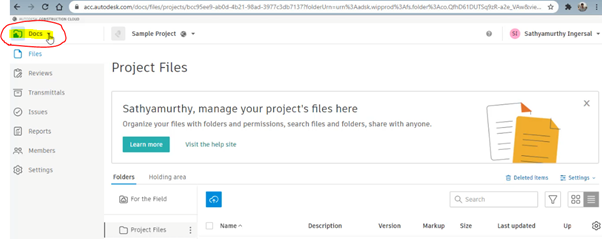
Step 1: Select the “Docs” Dropdown box on the top left corner of the Bim 360 Docs
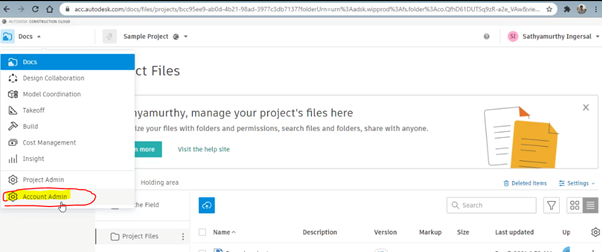
Step 2: Click on the Account Admin to create a new project
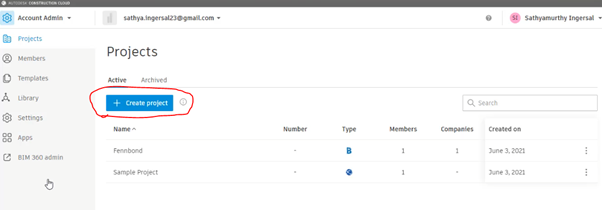
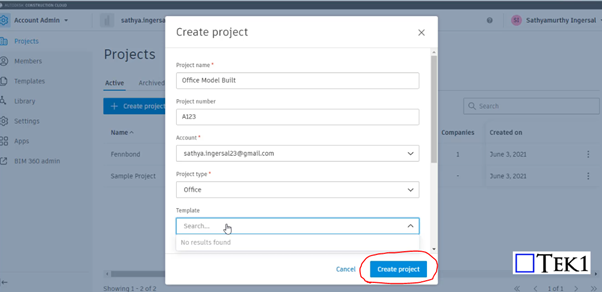
Step 3: Click on to “ Create Project”
Step 4: Fill the Project Details and Particulars with your Autodesk Email ID and click Create Project
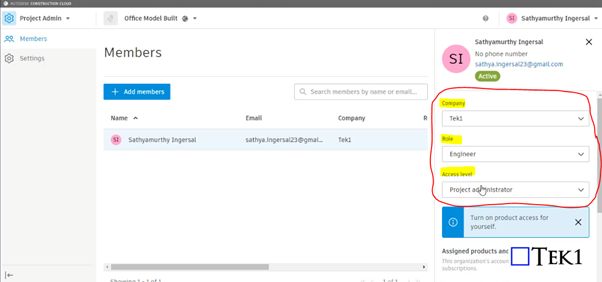
Step 5: Provide your information such as role, access level, and organization on the right-hand side
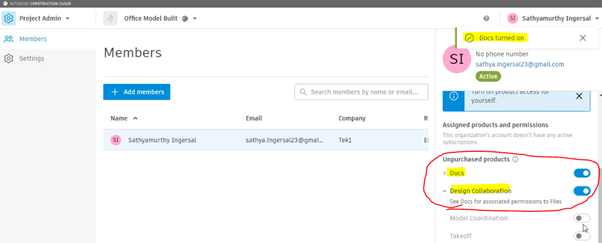
Step 6: Please Turn on the products to be used by moving the scroll down. So that Turned on feature can be accessed as shown in Step 10
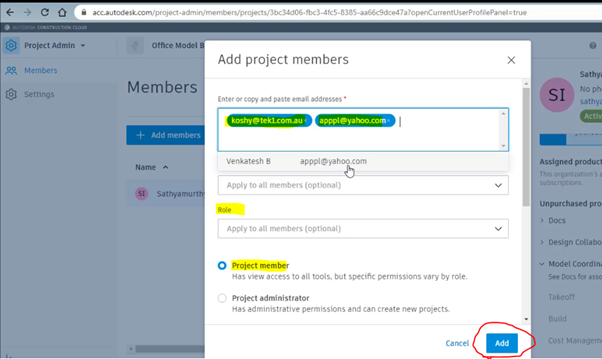
Step 7: Click on to Add member to assign the members who are going to involve and access the files in this project
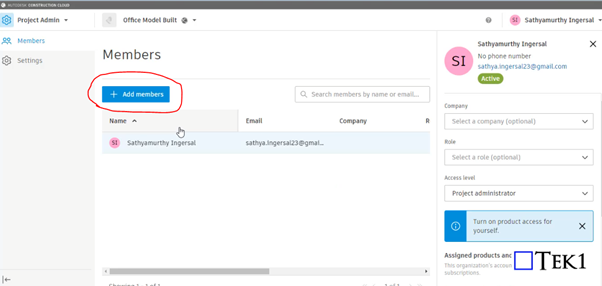
Step 8: Assign the members by adding their Autodesk email with organization name and their role and select as project member and click Add
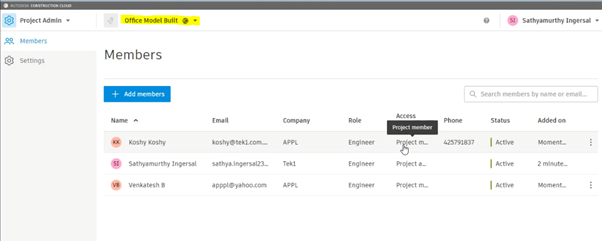
Step 9: After adding the member you can see their active status and details under the project we assigned
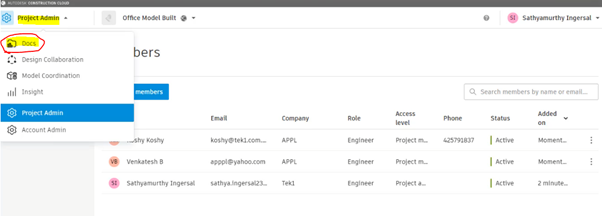
Step 10: As we turned on the following highlighted things in step 6. So that now we can access the following by Selecting the Dropdown and click on the docs to upload the file
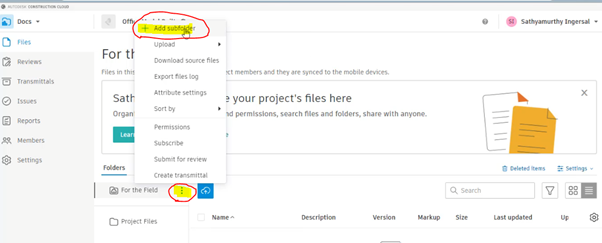
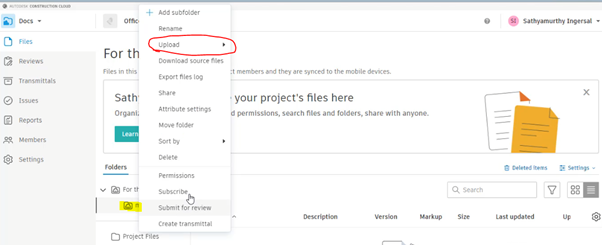
Step 11: To create Subfoler and folder click on to the highlighted below and select Add subfolder
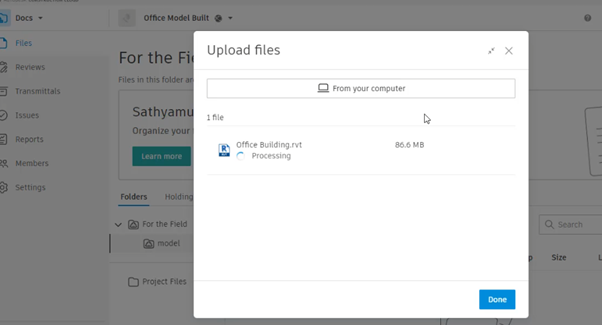
Step 12: After creating and naming the folder right-click to it and click on the upload and file. then drag the file and start upload
Step 13: The file with its details and version, Mark-ups status will be displayed once the above steps are done
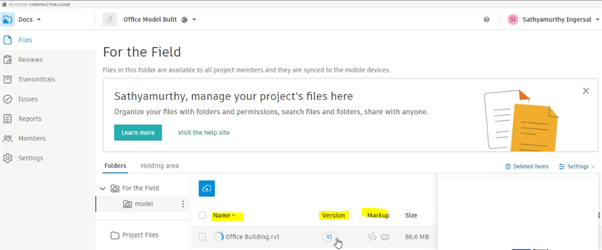
By clicking on to version you can review the history of the file from start to upload till revised. The file model can be review online itself by clicking on Filename

Leave a Reply