What is the purpose of this lesson?
The purpose of this lesson is for you to:
- understand what a stud wall is, and
- understand the importance of putting holes in the beams in order to allow for the erection of stud walls.
What is a stud wall?
A stud wall is made up of:
- A frame (in our situation this frame will be a steel frame) and
- timber members which go in between the steel frame and
- a covering of 13 mm plaster board to cover the frame. The plaster board covering is not shown in the diagram below.
In steel stud walls, light steel pressed members or standard steel studs (mostly standard steel studs) are used instead of timber.
Please view the diagram below.
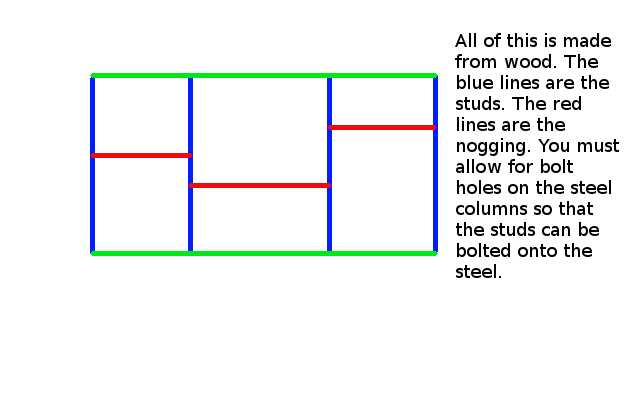
What is nogging?
Do you see the horizontal 90 x 45 timber pieces – the short red horizontal timber members? These short timber members are called nogging.
The nogging members of a stud wall are usually smaller in size than the main vertical members.
Nogging members run horizontal and give some strength to the wall.
Inside of the wall is empty space. Insulation material can be put in there.
Cross pieces are called NOGGING.
The Key Point of this lesson:
- It is important that you provide dia 14 holes on the steel beams and columns so that the timber pieces can be bolted to the steel pieces. Imagine you have some steel beams/columns and also some timber. How will the timber columns be attached to the steel columns so that the structure doesn’t move? Holes need to be drilled so that the timber pieces can be bolted to the steel beams. You need to provide holes in the steel so that the timber members can be bolted to the steel.
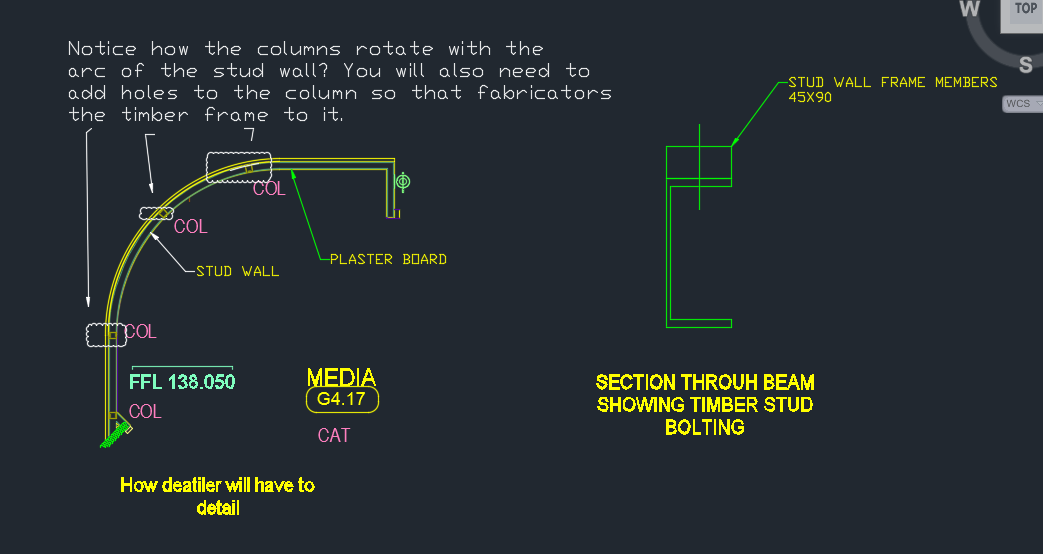
- You need to rotate and orientate the beams so that its face runs with the stud wall face.
A stud wall cannot stand in the wall without some connection.
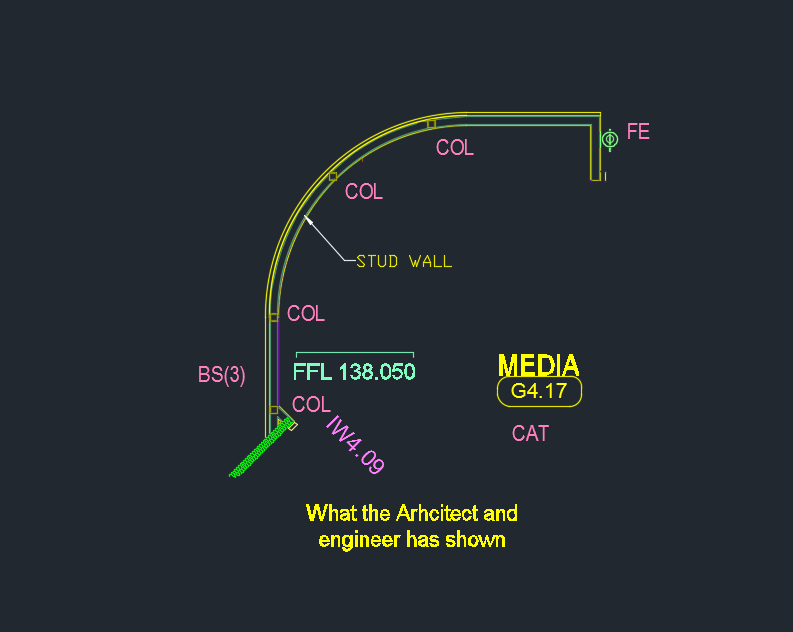
Please see the below diagram to show you how things are drawn in the engineering and architectural drawings:
Now see below how you will need to detail the above design:
See here as well:
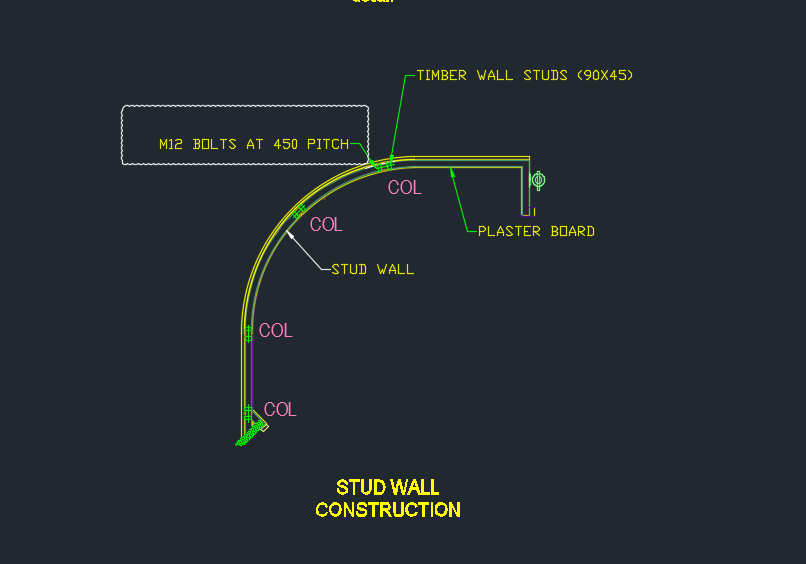
And a section view:
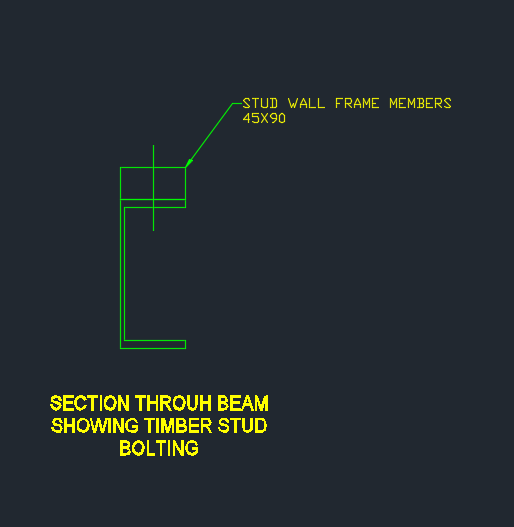
Shows a section view of the steel column and the stud.
I hope this helps.
Leave a Reply