Author: admin

  • How to programmatically insert Reference Models into Tekla (Tekla Open API)

    Wouldn’t it be handy if we could programmatically insert reference models into Tekla? Well you can now do so quite easily.

    Here is the code which does the hard work. (You will of course add the appropriate references and directives):

    And if you want to see a video demonstration, here it is:

    Inserting XRefs into Tekla as Reference Models from Tek1 on Vimeo.

  • Bubble Deck Panel Outline – Fire Collar Clash Check (Precast – Bubble Deck)

    We’ve been noticing an increasing problem in that certain items are clashing with BubbleDeck Panel outlines. In order to eliminate these types of errors we’ve instituted a new check in our procedures. Everyone is now required to specifically check for this type of situation. This adds to our check list which is already quite long. I go into further explanations below in a video.

    Fire Collar Clash Check with Panel Outline. This is becoming a problem so it is now a check against it.


    Bubble Deck – Clash Check With Panel Outline from Tek1 on Vimeo.


  • Finding Blocks “Colliding” with Shear Lig Points (AutoCAD .net, Precast – Bubble Deck)

    Showing Blocks Close To Shear Lig Points

    It’s a common problem apparently. There are far too many block references placed a little too close to those pesky shear lig points. It takes discipline, but when you have 5-10 people all working on the same drawing, with different practices, it’s something that’s really easy to miss, but really expensive to discover.

    So I developed a tool to take care of it.

    Here is the video demo:

    Checks for Clashes against Shear Lig Points from Tek1 on Vimeo.

    Thanks for stopping by!

  • How Tek1 solves the problem of Ordering Items in Precast Panel Detailing Projects (Precast)

    Demonstrates the output of Tek1 Order forms – in precast projects.
    Counting Items is difficult

    Ordering parts in precast panel projects is tricky. You need a BOM (Bill of Materials). You need to know what you need and how much. When there are thousands upon thousands of parts – that can be a very tricky endeavour.

     Why should you bother counting inventory?

    It all comes down to money. And how much of it you tie up in your inventory. And how quickly you’re gonna use it. Financial liquidity is like blood and oxygen. Without it, no organisation can survive. And you can maximise your liquidity (and profits too) if you manage your inventory well. You should be able to answer these questions:

    • How much inventory did you pay for?
    • How much inventory is in your shop?
    • How much did you use up in your projects?
    How Tek1 solves inventory problems: Demo Video

    We give you accurate numbers about what you’ve ordered. And what you need to order. This is how we come up with a Bill of Materials:


  • Connection Side Mark on Dimension Lines (Tekla Tips)

    How to add a connection side mark on Tekla drawings in structural steel drawings.

    Switching on the connection side mark on the part properties in Tekla drawings sometimes can crowd the drawing.

    You can select the Plate side marks “Type” to “Automatic” to set the connection side marks on the dimension line itself.

    One additional advantage is that it will also tell whether the dimension is actually put on the connection side. Cleats should normally be dimensioned to the connection side in steel shop drawings.


    Screenshot explaining connection side on dimension line.
    Screenshot explaining connection side on dimension line.
  • The Dangers of Mirroring In Tekla (Tekla Tips)

    As a general rule:

    Avoiding Mirroring objects in Tekla  — if the handles will be inverted that is.

    Why’s that?

    • Everything is reversed.
    • All the handles are flipped. Down is up and up is down. Front is back and vice versa. It is thoroughly confusing and a bit of a nightmare. More over, Tekla doesn’t recognise an object which has been mirrored like this as the same as one which has not been mirrored. And essentially it’s gonna cause problems when you begin drafting the drawings. The model might look good, but unless drawings are not required, as a general rule, I would say avoid mirroring objects in Tekla. You can get away with it – but take due care.


  • What is a lifter? What is a tail bar? Why are they required in precast panels? (Precast – Lifter Series: Part I)

    Precast panels are heavy.

    Panel Mass
    Showing the title block of a shop drawing – shows the panel Mass.

    Cranes are used to lift the panels into place into their appropriate place. Because the mass involved is significant, it is very important that all the components of the lifting system are properly engineered and designed. If this is not the case then the panel could fall – and that can be lethal.

    In those post we will be focusing on lifters.

    This is how we denote a lifter:

    Lifter symbol
    This is how we denote a lifter in shop drawings. The 7T lifter block.

    This is how a lifter anchor looks like in real life.

    Real Life Lifter
    Showing a lifter and all its composite elements: Reo, Tail bar, void, and mesh.

    Let us explain everything in detail – the purpose and what it does.

    1. The Void

    Precast panels are made in moulds. Items are placed in the mould and wet concrete is poured into it. The concrete is like water. You can’t have anything projecting out of the mould – everything must be contained within the mould itself. In other words, you need to provide a hook or latch onto the panel if you want to lift it. And the hook cannot project out of the panel because then it would be very hard to cast such a panel.

    Impractical panel design
    Shows a hypothetical panel with a protruding lifter. It would be difficult to fabricate this panel with the lifter within a mould, not to mention it being inconvenient.

    Imagine if someone fabricated the above panel – you will notice that the lifter is sticking out of the panel. This would be very hard to fabricate. Because it would require a hole to be exposed within the wet concrete for the lifter to protrude out from. Consequently, lifters are placed within the panel outline. And in order to facilitate the ability of a lifting system to latch onto the panel, a small depression and hook is provided within the panel. In reality, the panel will look something more like this:

    A better representation of how a panel actually looks like
    This sketch more accurately represents how a panel is actually fabricated. You will notice a slight depression/void where the lifter is. A hook is located within that depression which is used to haul the panel up.

    You will notice that the actual concrete panel follows the white outline above, and that there is a depression in the panel. In addition – and this is not shown in the above diagram, there is a loop like feature on the end of the lifter which allows one to use it to haul the entire panel up into the sky etc. e.g. notice the hole at the top of the lifter shown below. It is this hole that is used to affix the lifter/panel to suspension systems.

    Lifter Up close
    This shows you how a lifter actually looks like. There is a little bit involved in these things.
    1. The Tail bar and reo – it’s importance in the safety/stability of the lifting system

    The second thing to note in the above diagram is the tail bar and reo. Why is this important? It’s important if you want to be able to safely lift the panel. If you forget to add the tail bar and reo, and simply add a lifter without those items – then when you attempt to lift the panel, the concrete will simply break off where the lifter is and the panel will fall to the ground – potentially killing people under the panel as it is being hauled up.

    The tail bar and reo provide very important friction which ensures that the panel is safely secured to the lifter when it is in the concrete. Without it, the weight of the panel will simply cause it to separate from the lifter as it is being hauled up.

    Generally Tek1’s practice is to draw the lifter only. It is assumed to be standard factory knowledge that the tail bar should be added when the panel is cast. We make assumptions that the guys on the factory know what they are doing.

    1. Mesh

    The mesh is what gives the concrete some additional strength. It’s important.

    In tomorrow’s post we will more closely investigate the lifter and certain matters pertaining to lifting.

  • How to Avoid Trouble in Building and Construction Projects (Part V)

    We continue our series on how to avoid trouble in building and construction projects.

    What is required in order to have a successful construction project?

    Building and construction is necessarily a collaborative endeavour – there are many elements that need to come together in order for it to work successfully.

    First and foremost you need a skilled and capable team:

    1. Good architects
    2. Good engineers
    3. Good project managers and builders.
    4. Good guys doing the shop drawing.
    5. Good cash flow and funding.

    Where can you go wrong?

    But I’ve found that in this industry there are several pitfalls:

    1. The competence of building and construction professionals.
    2. The liquidity and ability of folks to pay. It seems to be a common practice in this industry that folks will receive goods and/or services and simply not pay for it – either out of unwillingness or an inability (or both).

    My invective is necessarily harsh on architects on this point: bad architects are the bane of the industry, and are part of the reason why building and construction is notoriously expensive. I’ve seen many and there are but few worth their salt.

    Now you know of the places where you can fall – you can take measures to maximize your likelihood of success.

  • How to Avoid Trouble in Building and Construction Projects (PART IV)

     How to choose an architect?

    We will now focus on architectural competence in those post – particularly on the tools they use. My invective is necessarily harsh on architects at certain times: bad architects are the bane of the industry, and are part of the reason why building and construction is notoriously expensive. Ask around and you’ll hear stories about guys getting screwed over by: builders and you guessed it….! Having said that, architects are very, very important and are an essential component of the building and construction industry.

    Look at their Tools

                    Does the tool make the workman?

    The Mathematician Example

    A good mathematician is a good mathematician whether she uses a slide rule, an abacus or a calculator. The tool doesn’t really matter so much.

     The Surgeon Example

    Imagine if you were going to consult a surgeon and she tells you that she’s using tools and techniques from the 18th/19th century. Wouldn’t that strike you as a little odd if a modern day surgeon was given over to hacking off limbs with a common carpenter’s saw?

    What if you asked the surgeon why she doesn’t use a scalpel – and if the response was that:

    1. Scalpel’s are expensive, and/or
    2. Learning how to use a scalpel takes a very long time to learn (‘ain’t nobody got time for dat’)

    ….What would your response be?

                    As a general rule, A good workman will have good tools

    That’s not to say that a surgeon who uses a saw to hack of a limb is necessarily a bad surgeon, nor can it be definitely said that a surgeon who uses a scalpel is a competent one. But we can definitely say, conclusively, that it’s easier to make a small incisions using a scalpel than if one was using a chain saw.

    The same analogy applies to architects.

    Architects are very, very important and are an essential component of the building and construction industry

     What tools do architects use?

    Generally their tools fall into two classes:

    • Generic CAD tools (which are just glorified pen/paper systems on a computer).
    • Building Information Modelling (BIM) software systems. Rather than using pen and paper, BIM based software allow you to basically use Lego to design and build things electronically, rather than using pen and paper.

    The Danger of Change – And How Tools Manage Change

    • How CAD tools manage change?

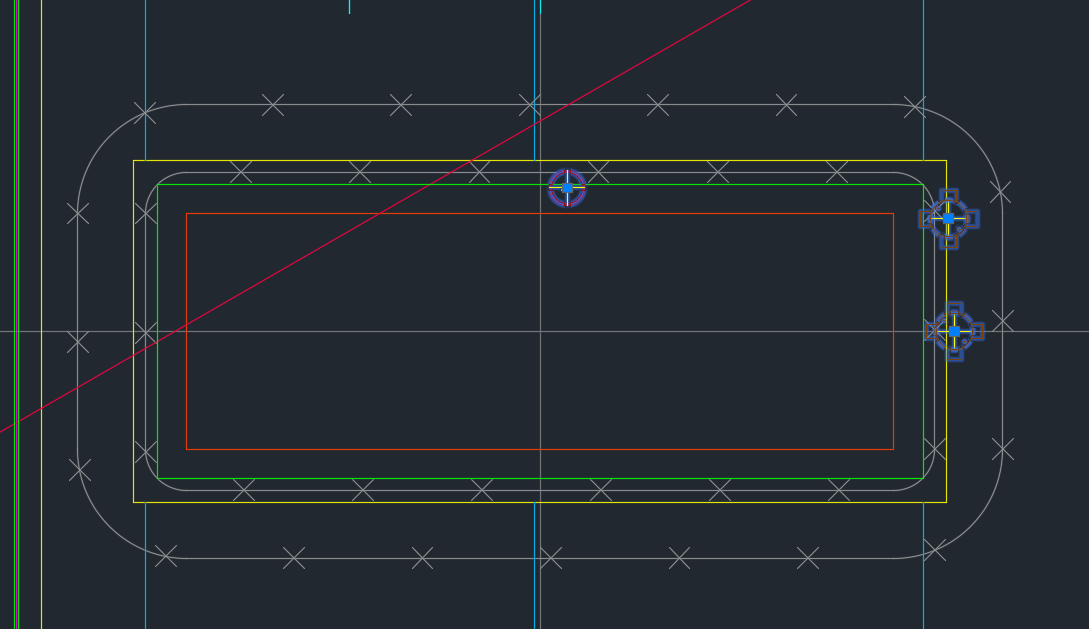
    Suppose, as an architect, you decide to shorten the design of a room. If you’re using a pen and paper – you’ll have to change the layout view of the structure, then you’ll also have to change two elevations, and then you’ll also have to change all section views. It’s gonna take you a while, and moreover, it’s really, really easy to miss things. I see mistakes. I see mistakes all the time. All the time. That’s the problem with pen/paper/general CAD systems.

    • How BIM tools manage change?

    But if you are using BIM based software then it’s much more difficult to make that type of mistake. The software basically eliminates it. BIM tools manage change particularly well.

    What is the better software solution?

    For an architect, in my opinion, its better to use a BIM based software solution unless you have cogent reasons for using a generic CAD system. If you use a system like ArchiCAD or Revit, then life will be significantly easier.

    Revit was born out of a need to avoid mistakes in the management of change, and in the management of different models and revisions used by various trades at the design stage. I cannot see a good reason why an architect should not use a tool like Revit when it is available.

    Why would an architect use generic CAD tools and not use Revit instead?

    There are reasons, but none of them good:

    1. Learning Revit takes a lot of time

    AutoCAD in its various forms has been around for a long time – since the 1980s. But Revit is the new kid on the block. If it took 20 seconds to learn Revit/ArchiCAD etc then the entire industry would switch in a heart beat. So why don’t they? It’s a simple case of: “cannot be bothered,” most fundamentally. Learning Revit etc takes a lot of time and patience. The old skoolers are familiar with their slide rules and generic CAD solutions and cannot be persuaded to change – nor will they probably be inclined to do so. If that’s the case then they’ll probably be disinclined to spend too much time in other areas of expertise pertinent to their trade.

    Each to their own, but the problem is that their disinclination to devote time and effort to master their trade will cost you money.

    1. Revit is expensive

    It is expensive – to own and to learn. But that shouldn’t bar an architect from making that investment and recouping the benefits of improved efficiency and better designs with less errors. It’s a no-brainer to me.

    So What if an Architect uses AutoCAD? What is the cost of architectural mistakes?

    It’s easier to make mistakes if you’re using AutoCAD. And the problem with mistakes – incorrect/missing information – is that it is very costly and confuses everyone down stream of the architect. Architectural mistakes are like a tsunamis – they gather momentum very quietly at the design stage, only to destructively wipe out those involved later on in the project – and they’re the ones who pay the cost – not the architect!

    Summary

    • Good architects will generally use tools like Revit or other BIM based tools.
    • The use of Revit / ArchiCAD etc does not guarantee the competence of the architect.
    • Be cautious if an architect insists on tools like AutoCAD for mid-sized projects (or larger), without cogent reasons for doing so.